


|
|
|
|
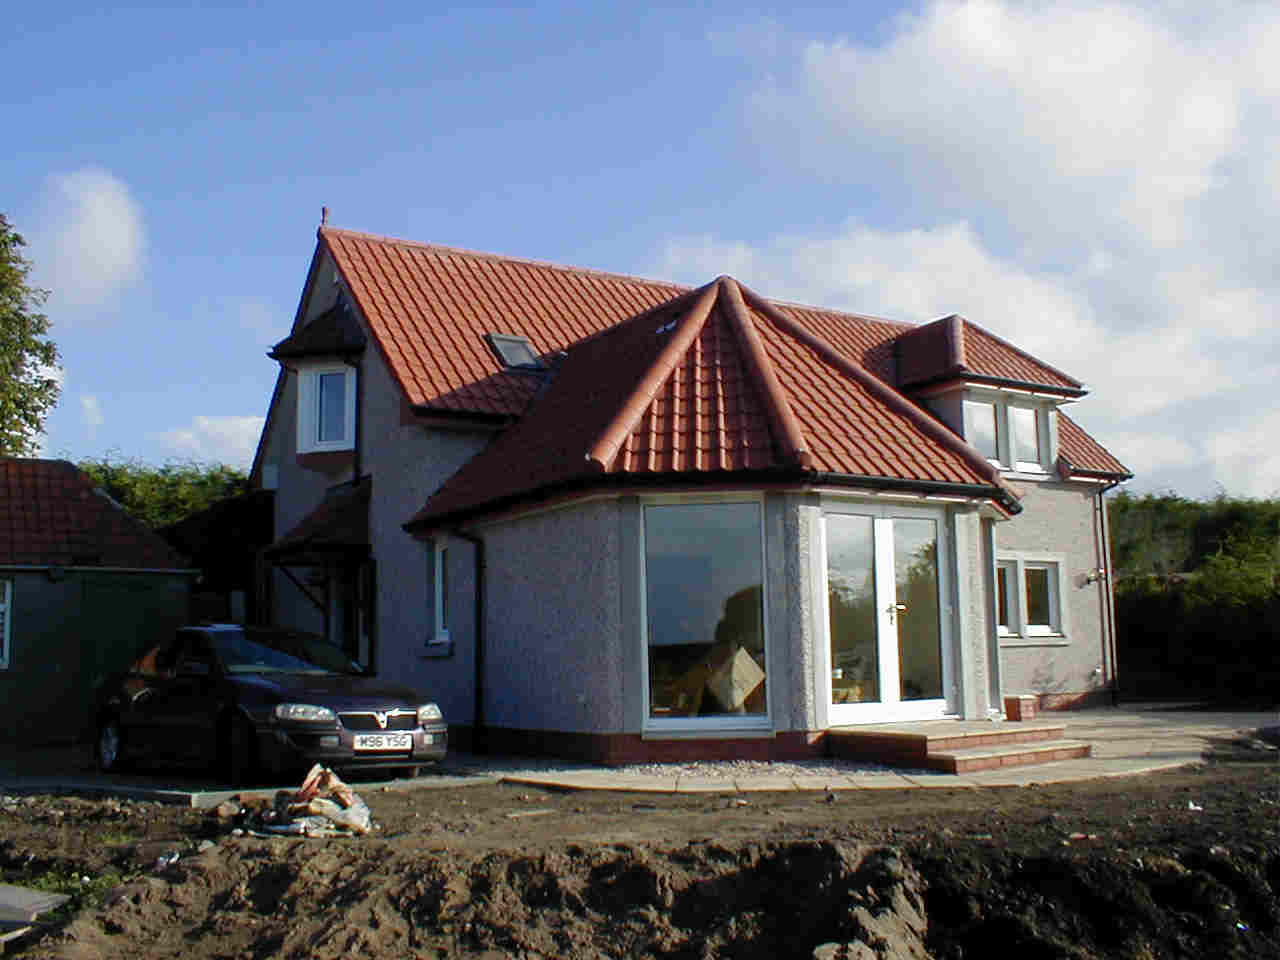
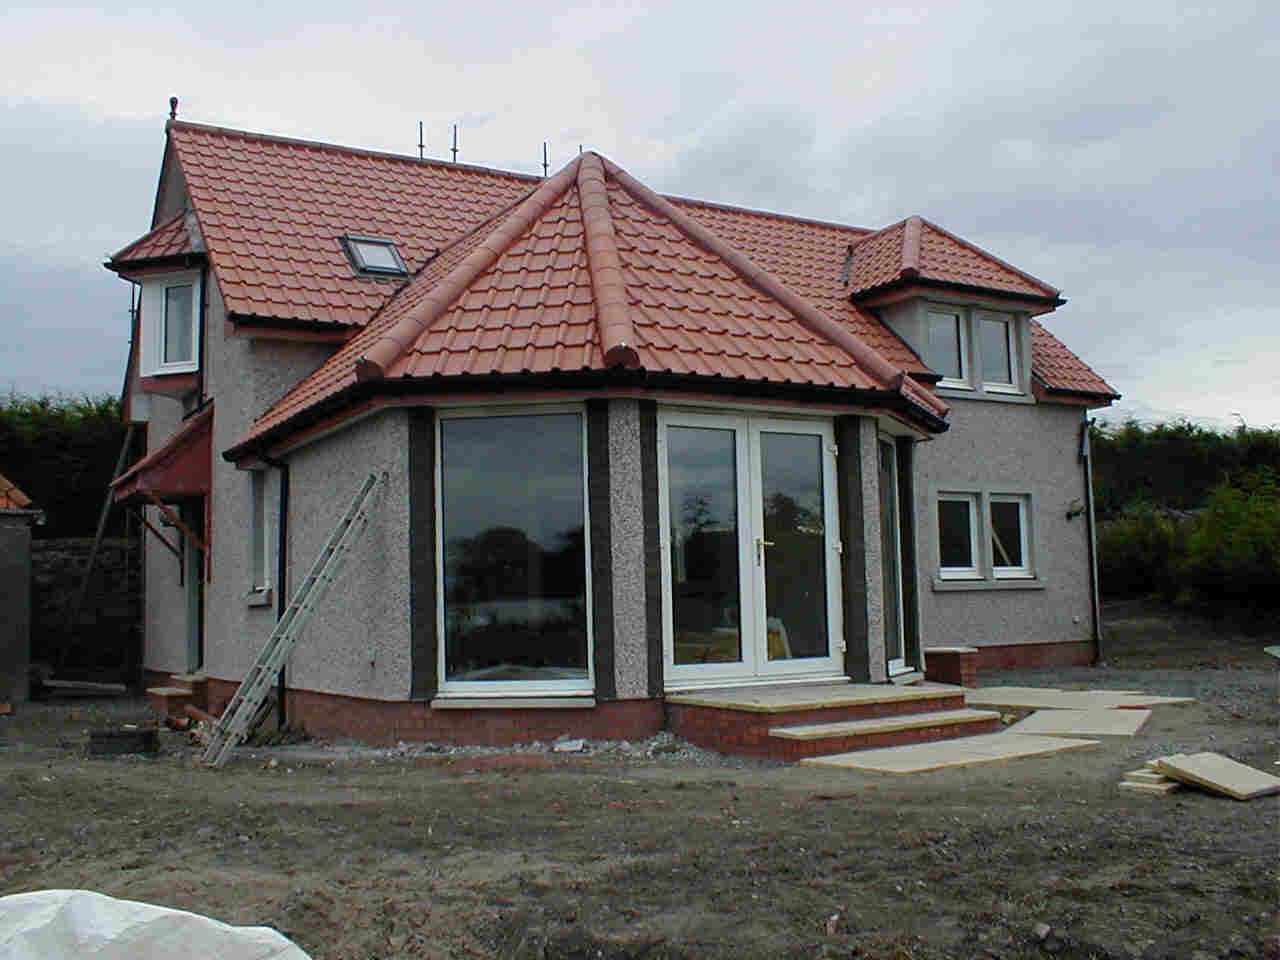
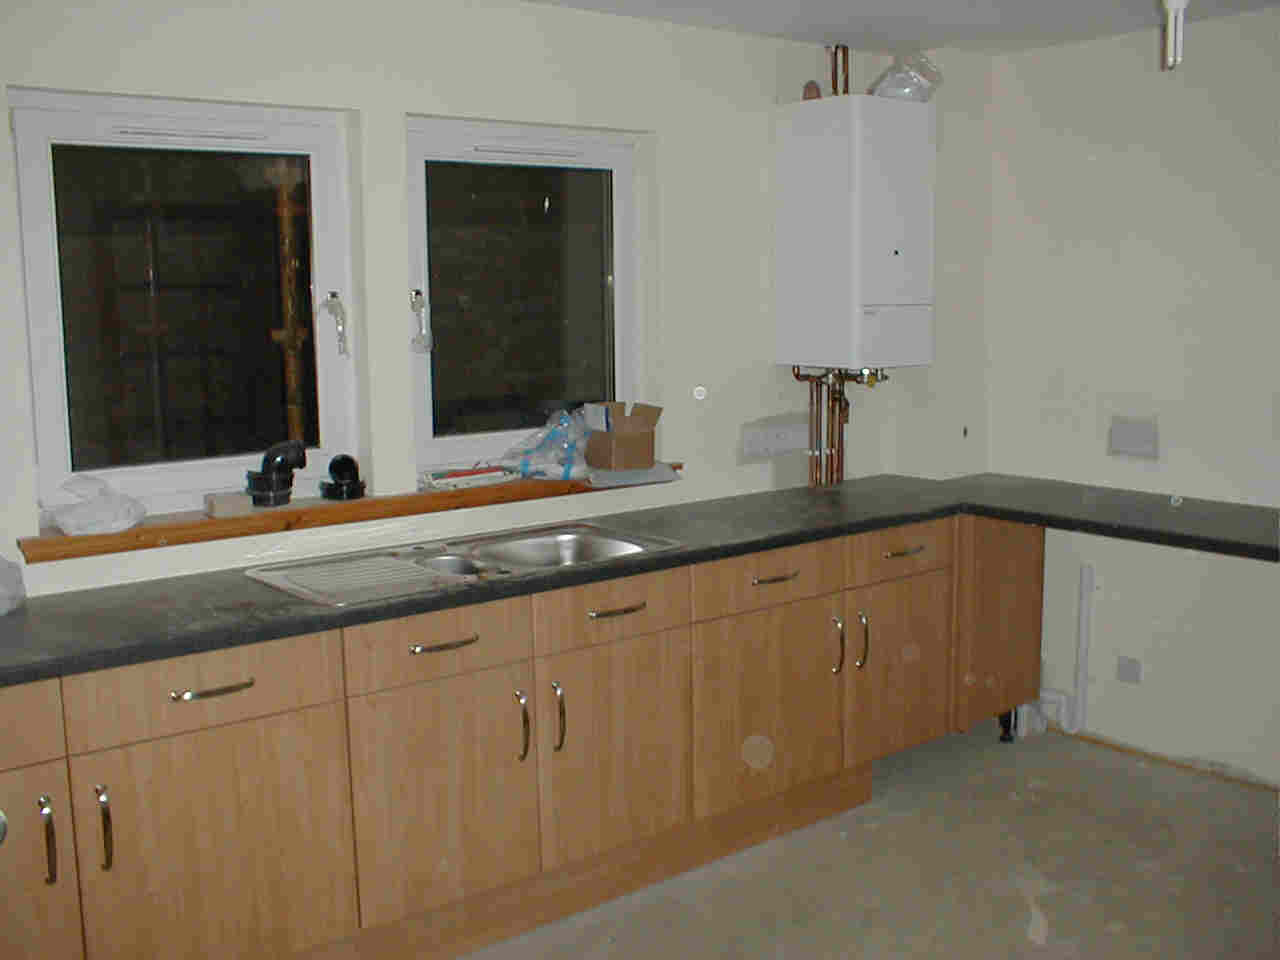
Pictures and Explanations as to what's been going on (Due to the number of pictures this may take a while to load) So close, sooooo close!! The first picture is of the house in possibly the last day of sunshine this year. The gravel driveway is down and the patio/paving is complete. You can see that the roof tiles were sorted out in the end, thanks to Steve, and that we are pretty much complete. Picture two is the kitchen. Again you can see that all is done and the oven finally works. I've lost some plugs but I can put up with that.
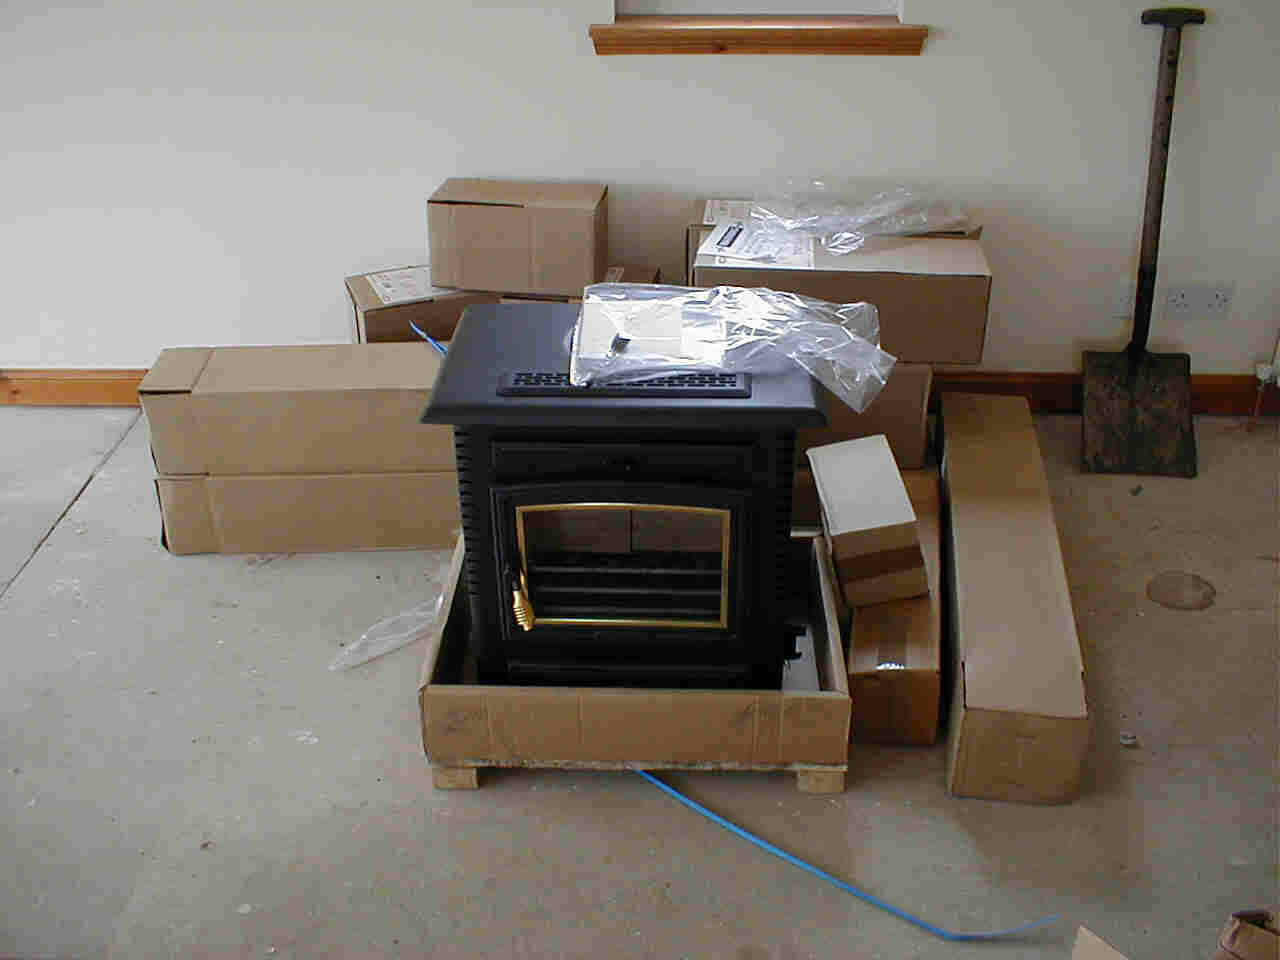
The third picture is the driveway (taken about 10 minutes after the first one!) and it shows the chuckies on the ground. They look a bit dull just now, but once the rain has washed them for a few days, they will look great. Most of the drain work is back up and complete again. Picture four is my fire. It's not the one I thought I was going to get, but I think the models changed. It's taken sooo long to get this, I don't want to complain and send it back.
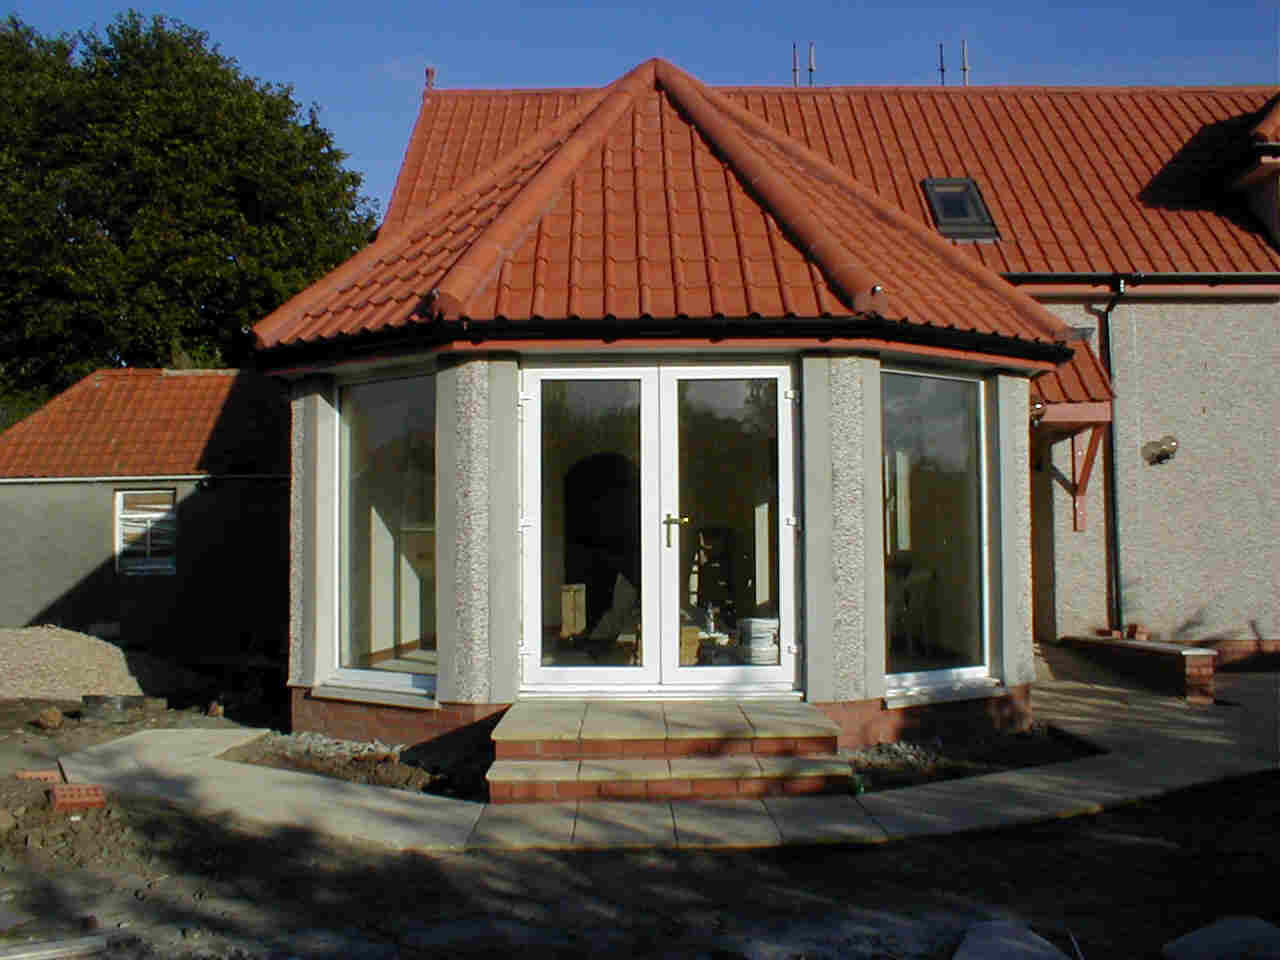
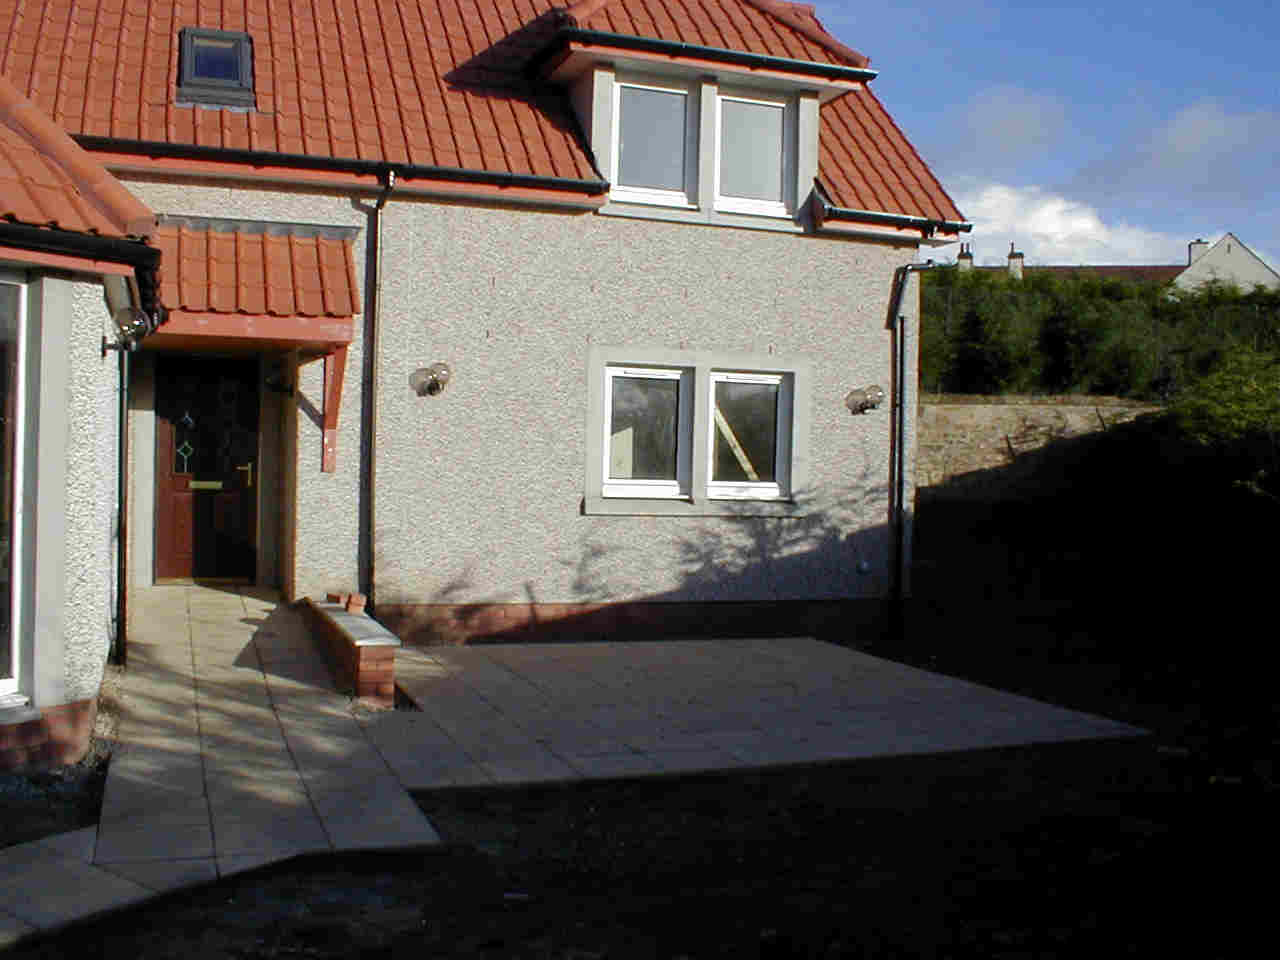
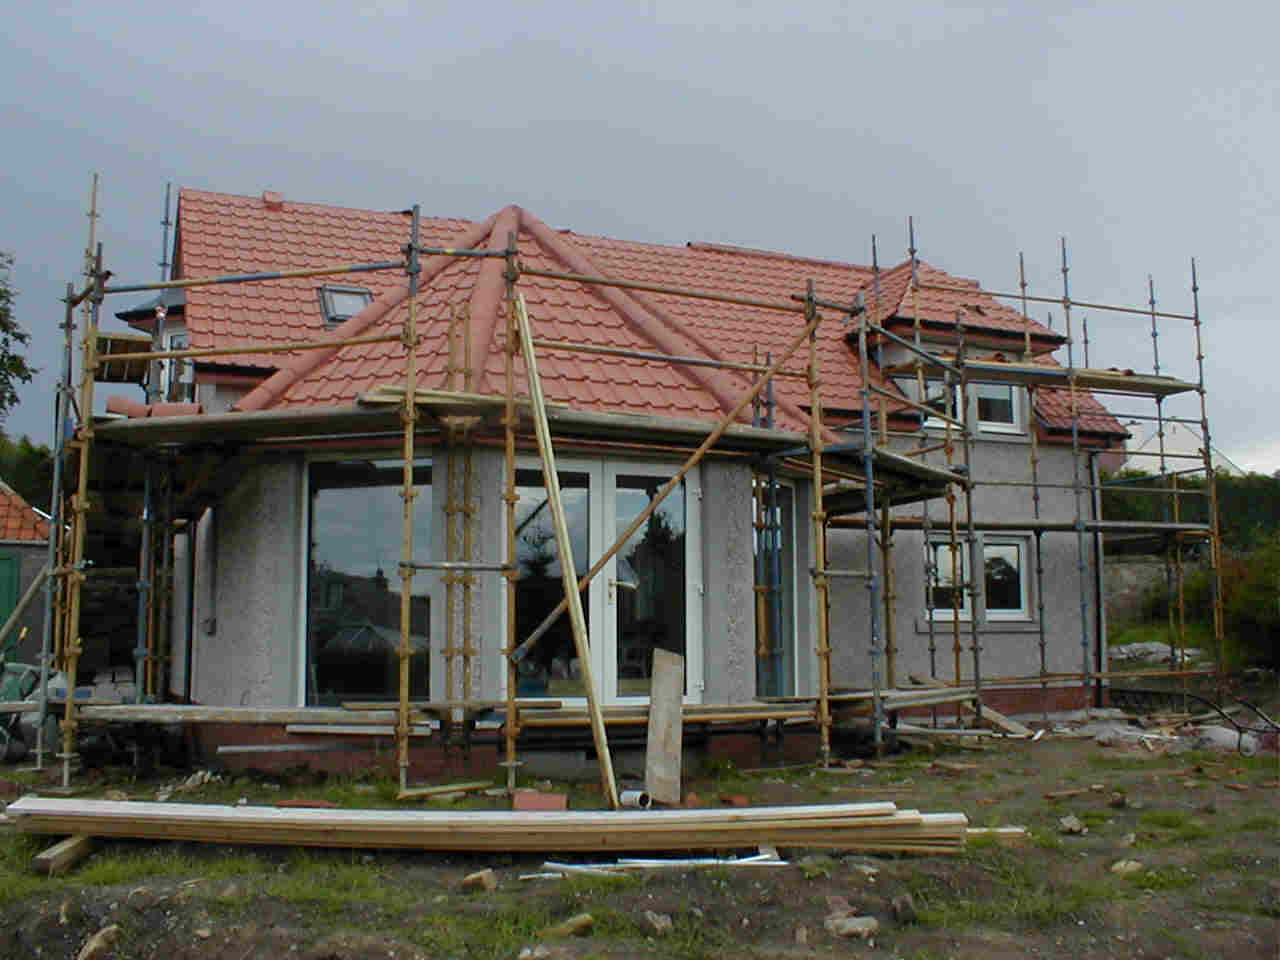
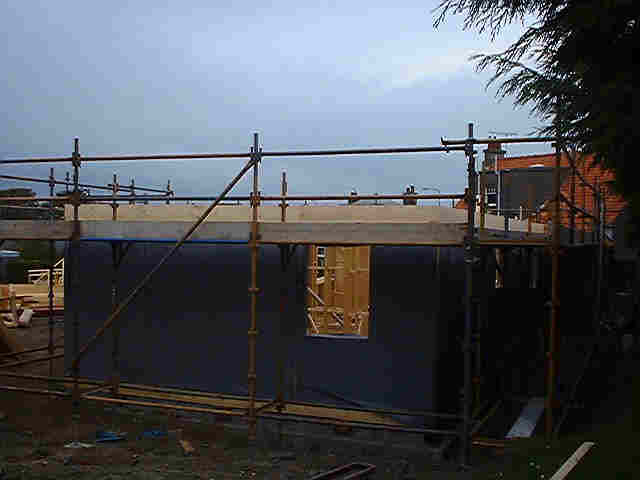
So far, so good! I know I have been tardy in updating the web site, but progress has been pretty slow. But then, when you least expect it, loads happens! So, I'm not connected as of today to the water mains. This means that I can start looking forward to the completion/habitation certificate. Picture one is the lounge with the steps and paving on the outside. If you look to the left of the picture, there's a pile of gravel that will be spread round the house, its some kind of quartz pebble stuff. All I know is that its £50 a ton, and there's four tons of it sitting in a pile! Picture two shows in dodgy light the almost completed patio and ramp up to the front door. A small dividing wall has been put in to make it look a bit better, and allow for the change of level. You can see that all the water drainage from the roof is sorted out, apart from the bit thats hanging off the end of the house.
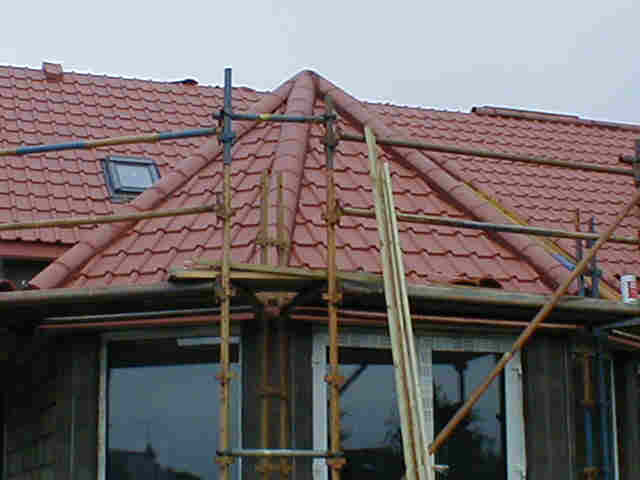
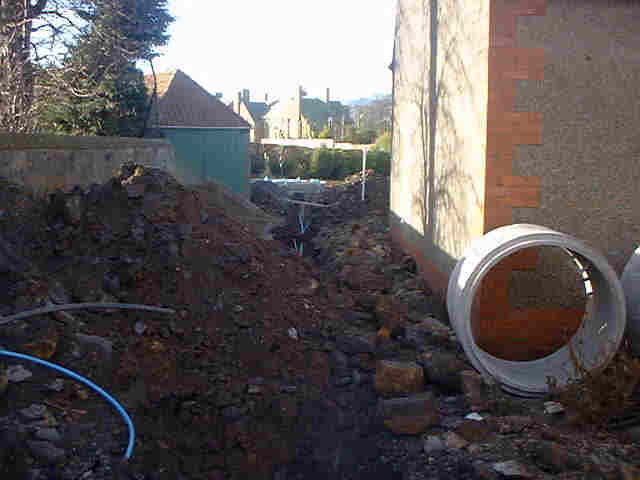
A small retaining wall had to be built at the rear of the house to stop the earth from falling into the path. Steve has also scrapped the ground and will be seeding it with some sort of grass, green I suppose. The scaffolding is up there to sort out some of the tiles, and to put up a bird wire to stop the buggers crapping all over my nice shiney roof. Picture four, you can see the ground has been leveled off and you can see a bit of the patio. All the ground you can see, if its not got slabs on it, will be covered in those stones. Really, I just want to move in right now. This has been a long time coming.
The end is nigh! Five pictures tonight! Pic one is the kitchen again, the work top is almost complete, the sink is in but the taps are still to go on. Picture two, you can see that the oven is in, and underneath the wee light there is a gas hob hidden by the polythene.
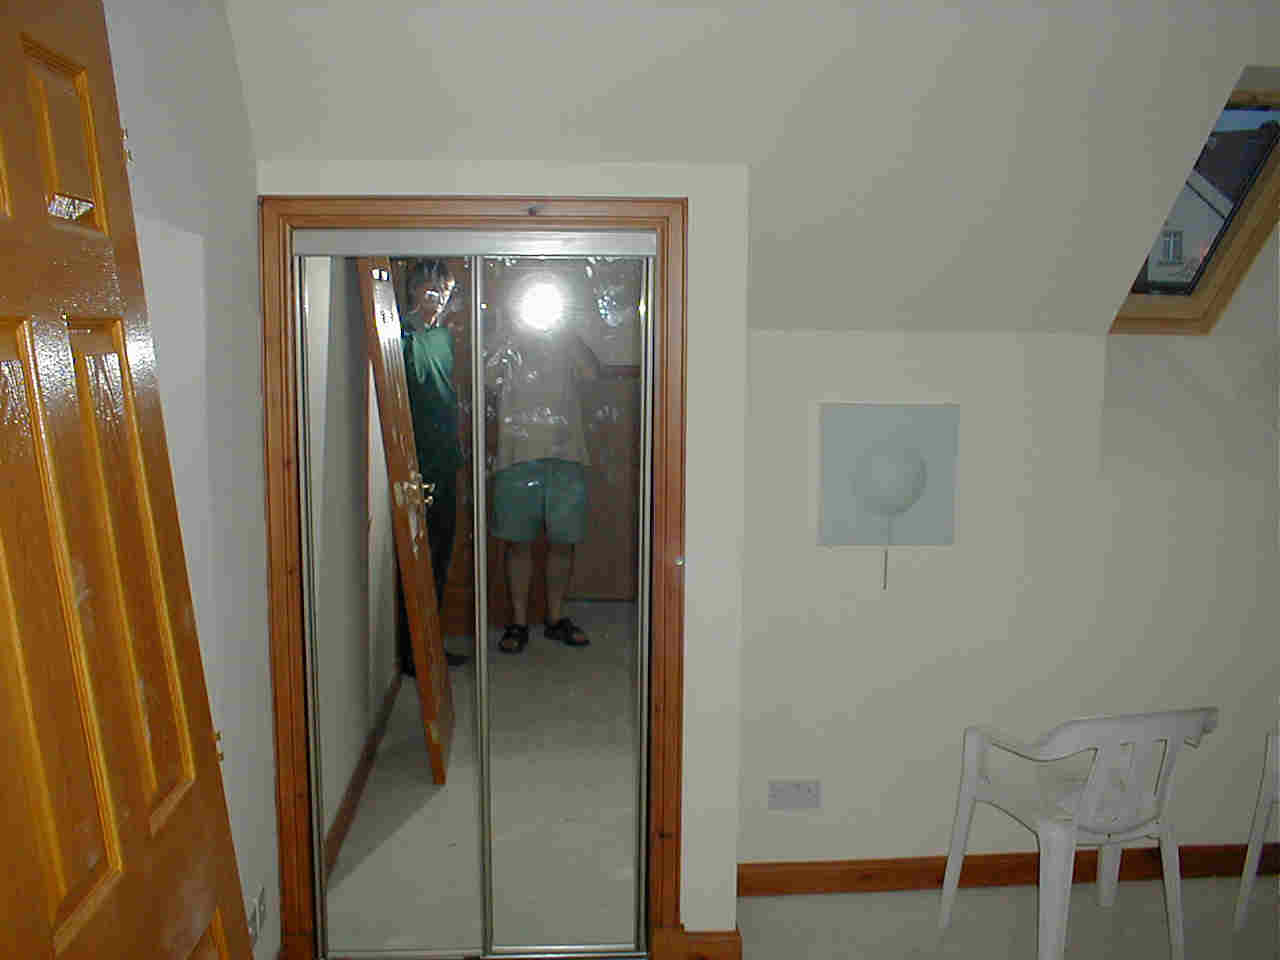
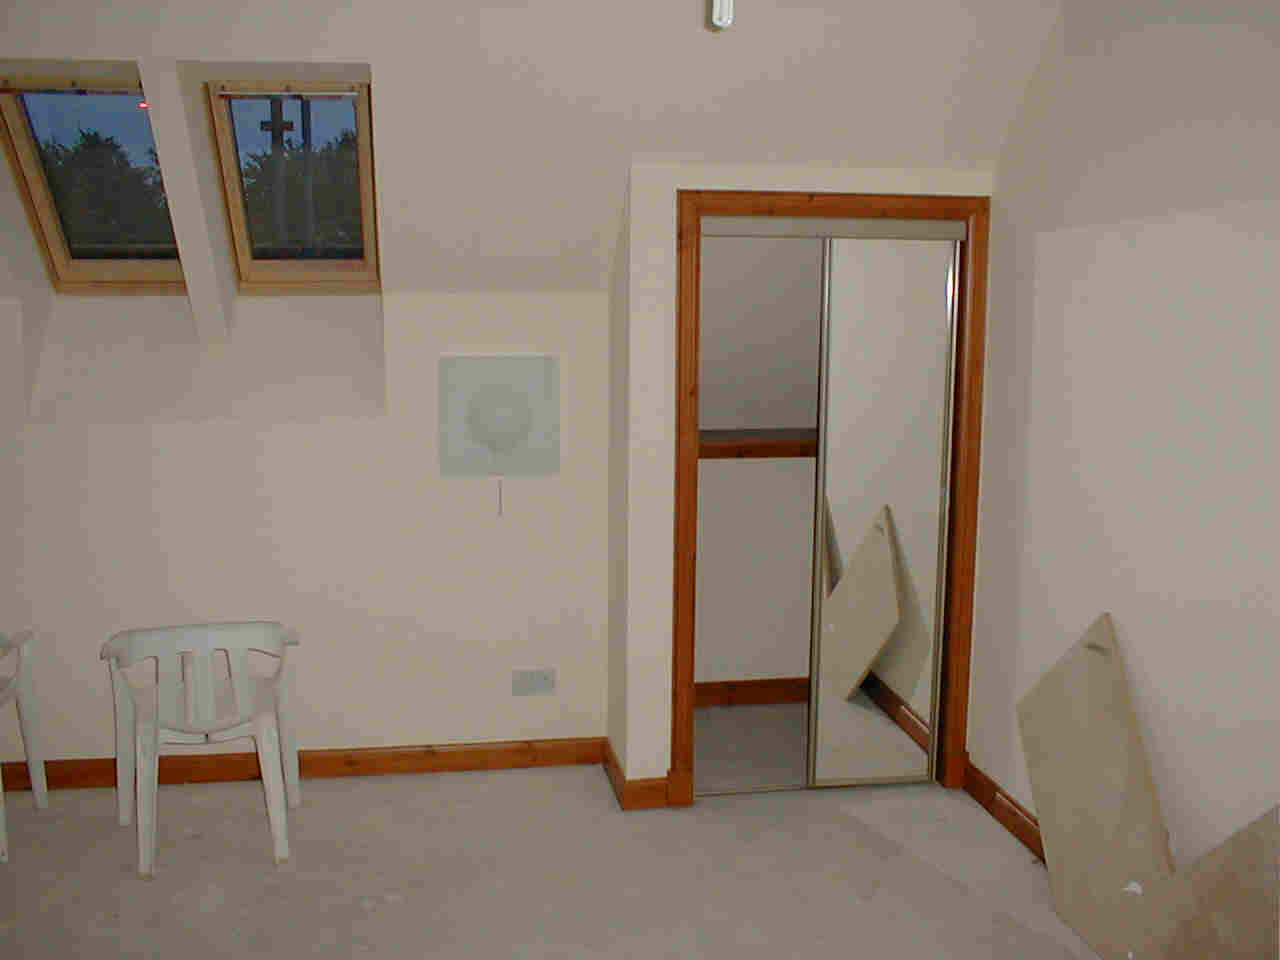
Picture three is the upstairs bedroom, You can see me in the mirror. The shadowy bloke beside me is my brother up for a neb. The door at the edge of the wall is infact from the bathroom, its had to come off for the tiling. Picture four is the other side of the bedroom. Picture five is.... ..the bathroom floor being tiled! Atlast!!
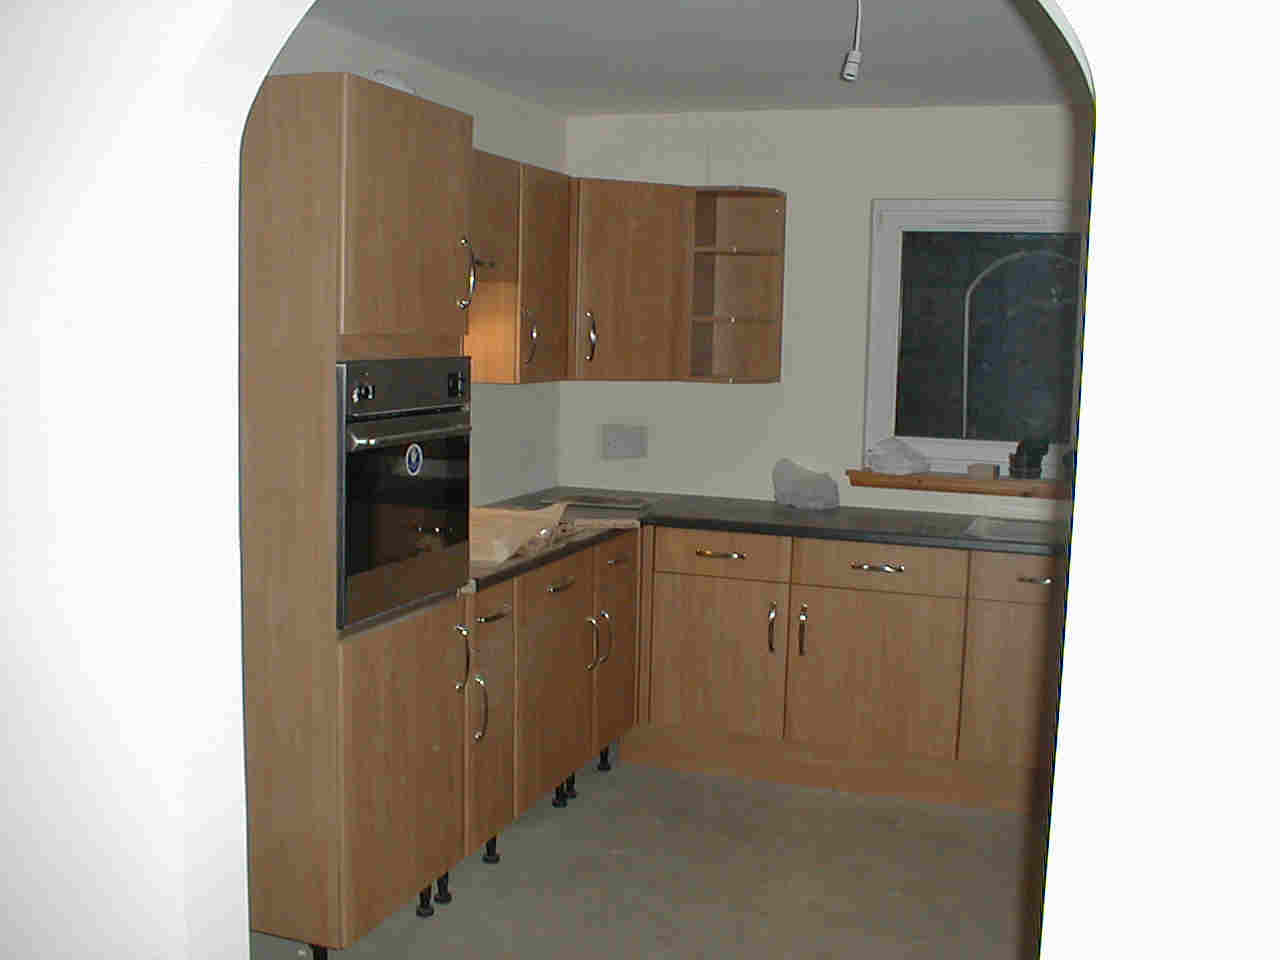
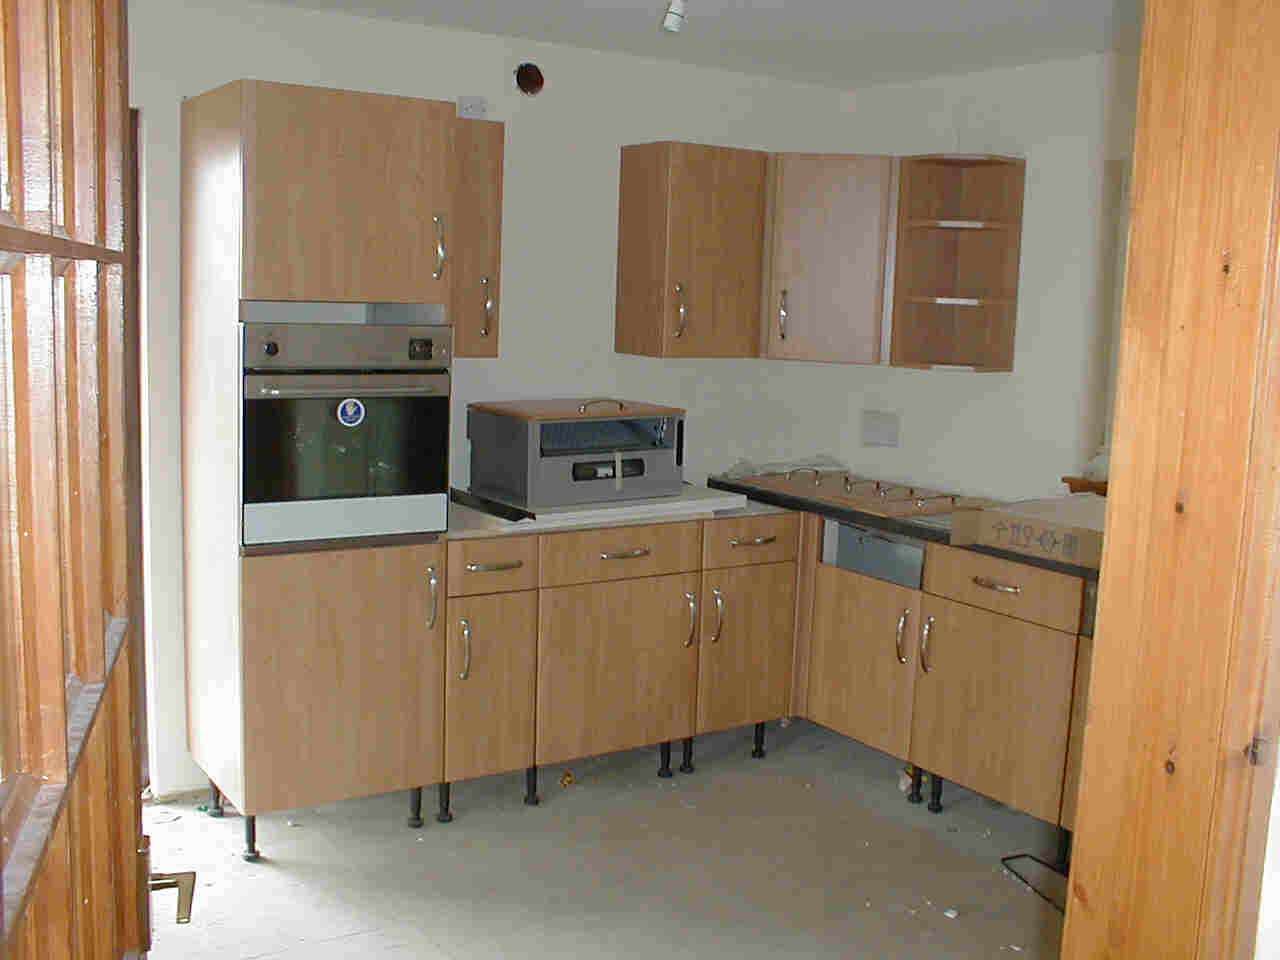
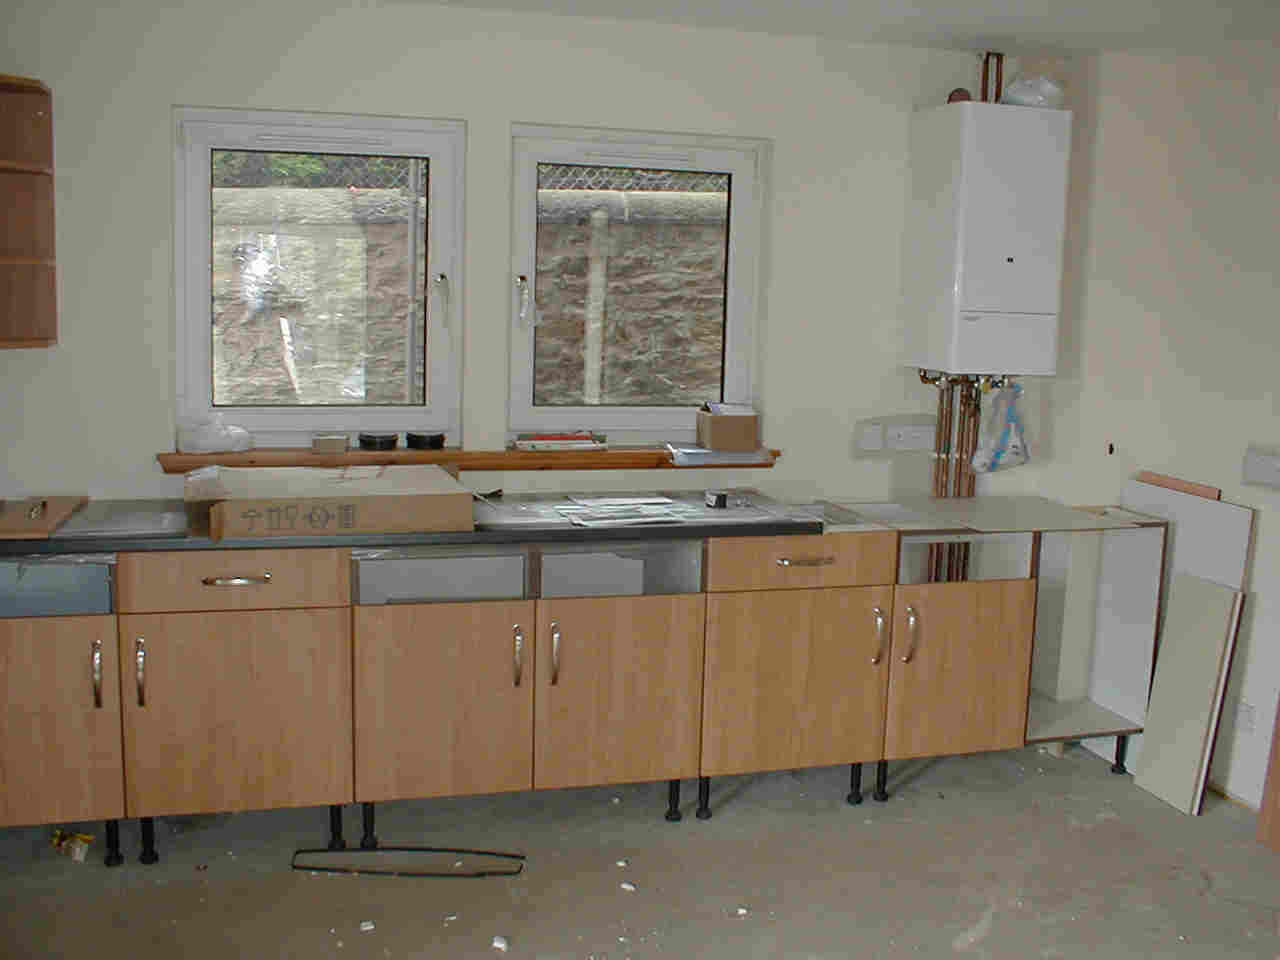
Picture one is the kitchen from the hallway. Its well on the way to completion, the cooker is in and the thing sitting next to it is the extractor fan. Where its sitting will be the gas hob. Picture two is the other half of the kitchen, the sink will go right between the windows on the work surface.
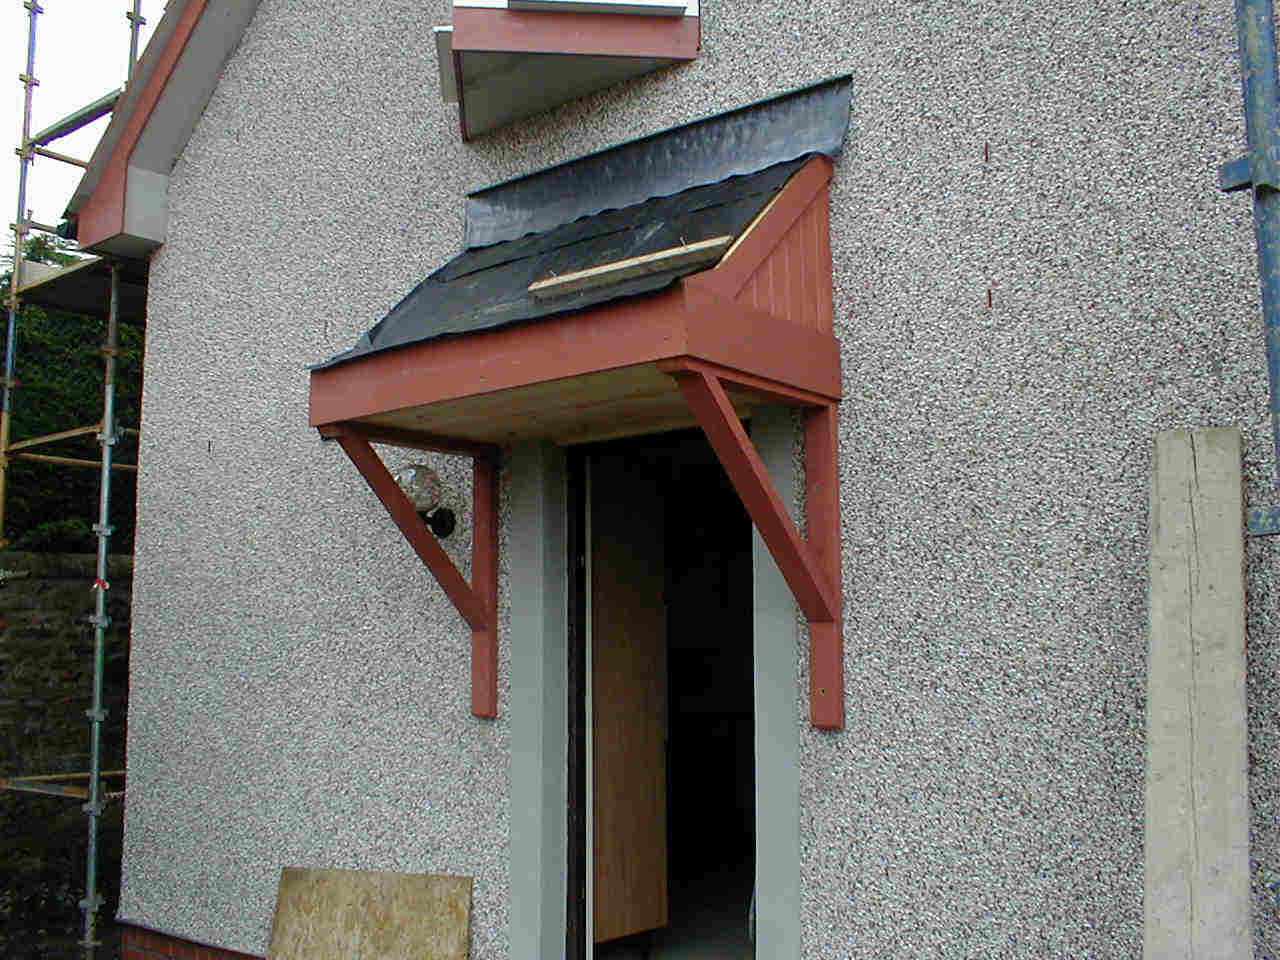
Picture three is the back door, which has the porch and the outside light complete. "Baby" tiles which match the roof will be delivered sometime this week. Picture four is the Front door, the porch there is also ready to be tiled, and the outside lights are complete.
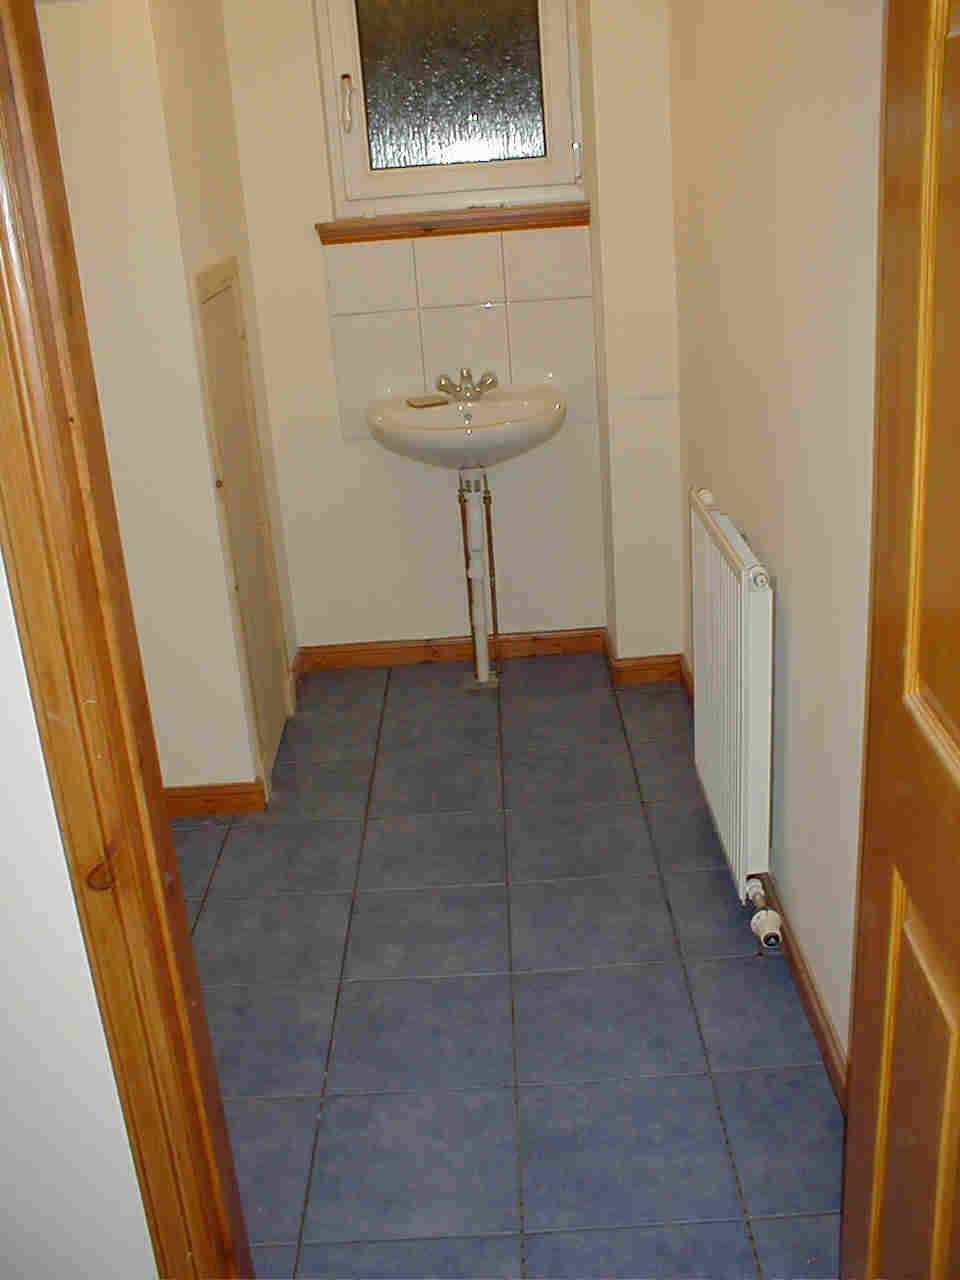
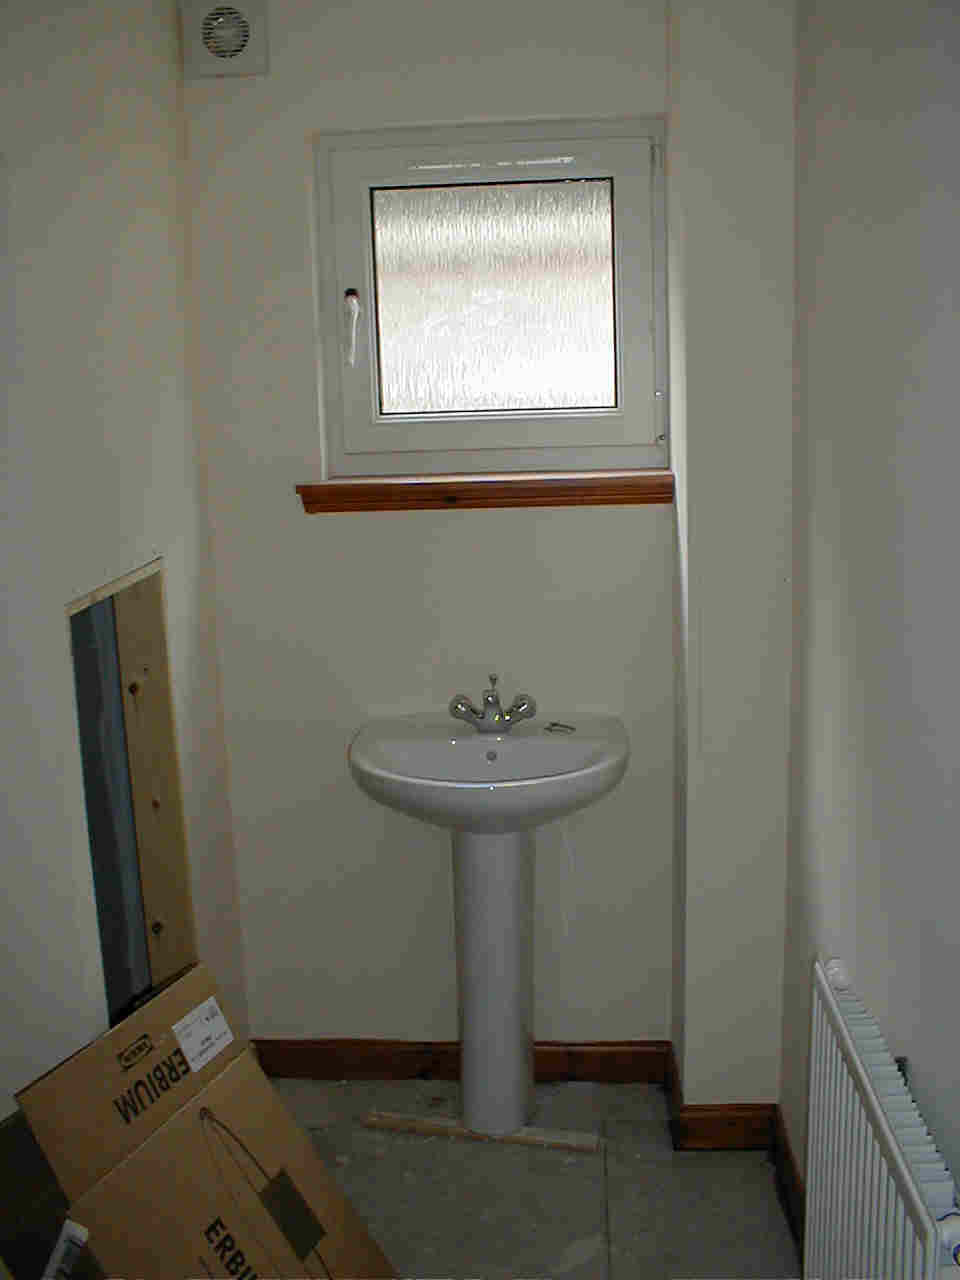
Bog-Tastic! You can see from Picture one that things are moving again. The sink is in place in the downstairs bog. That hole in the wall at the side of the sink is for cupboard space, and what a cupboard it is!! It's huge! You can see the radiators have also been put in. The next picture is the upstairs bog, with the bath. I was sure that the bath was bigger in the shop, but these things are often difficult to put into perspective.
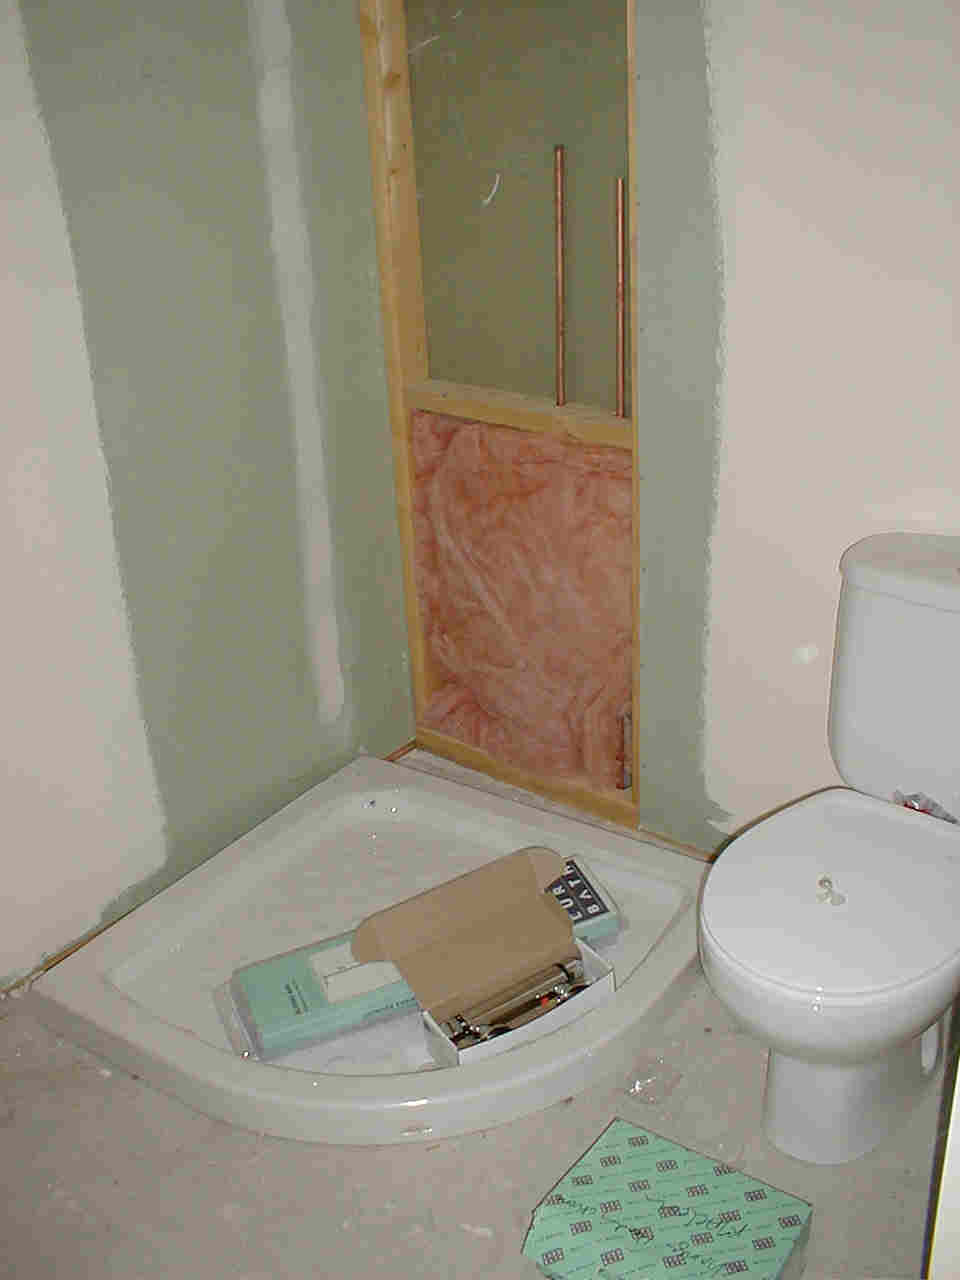
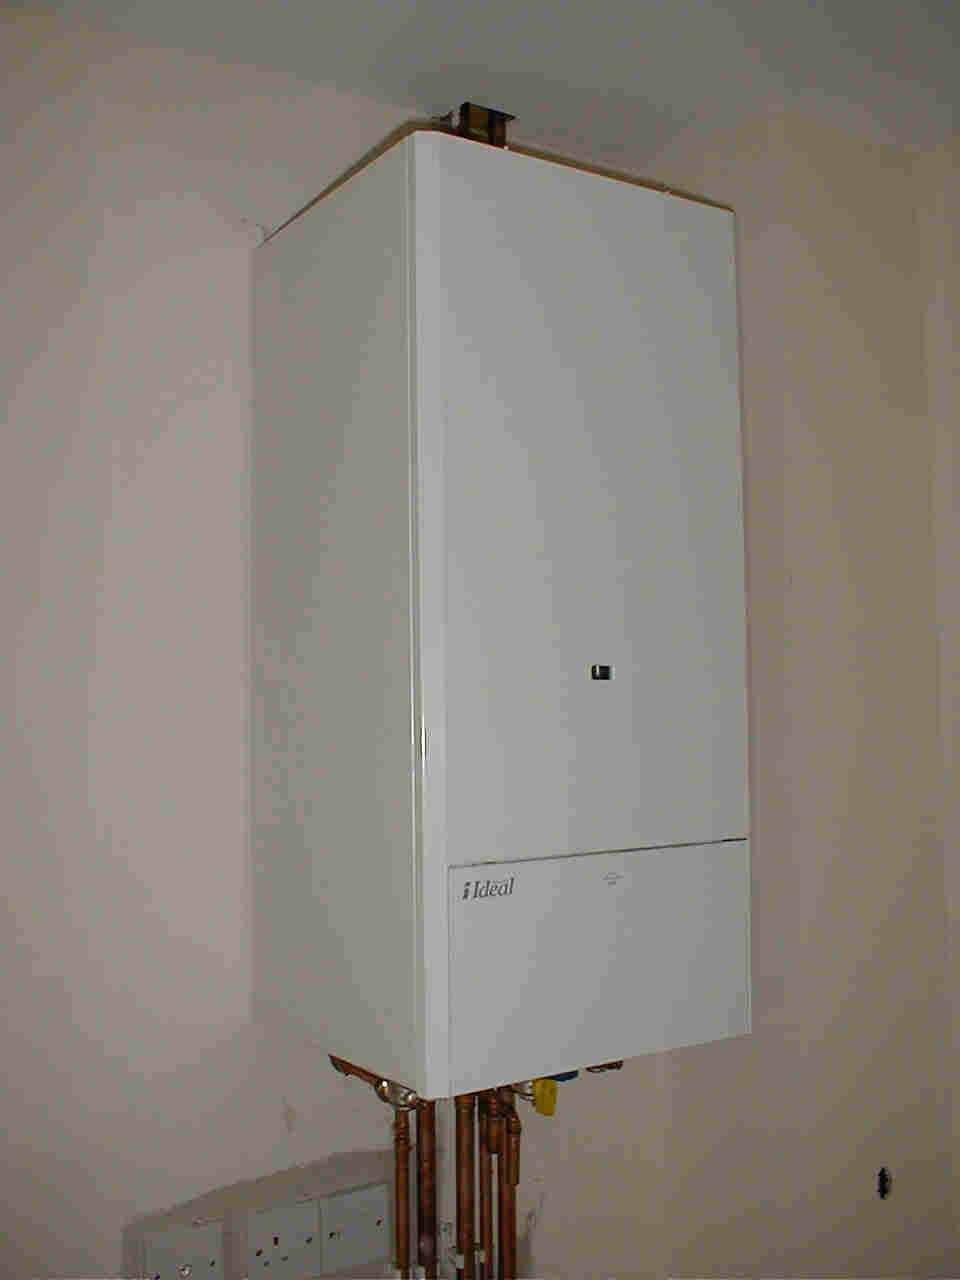
Picture three is the downstairs bog and shower basin. You can see they've taken away a panel of the wall and you can just see two pipes coming out of it.These are going to be the feed for the shower. The bog downstairs is bolted down in place. The box in the shower tray contains my adjuster valve for the shower. Picture four is the combi boiler. That just went in the other day - its a bit on the big side!
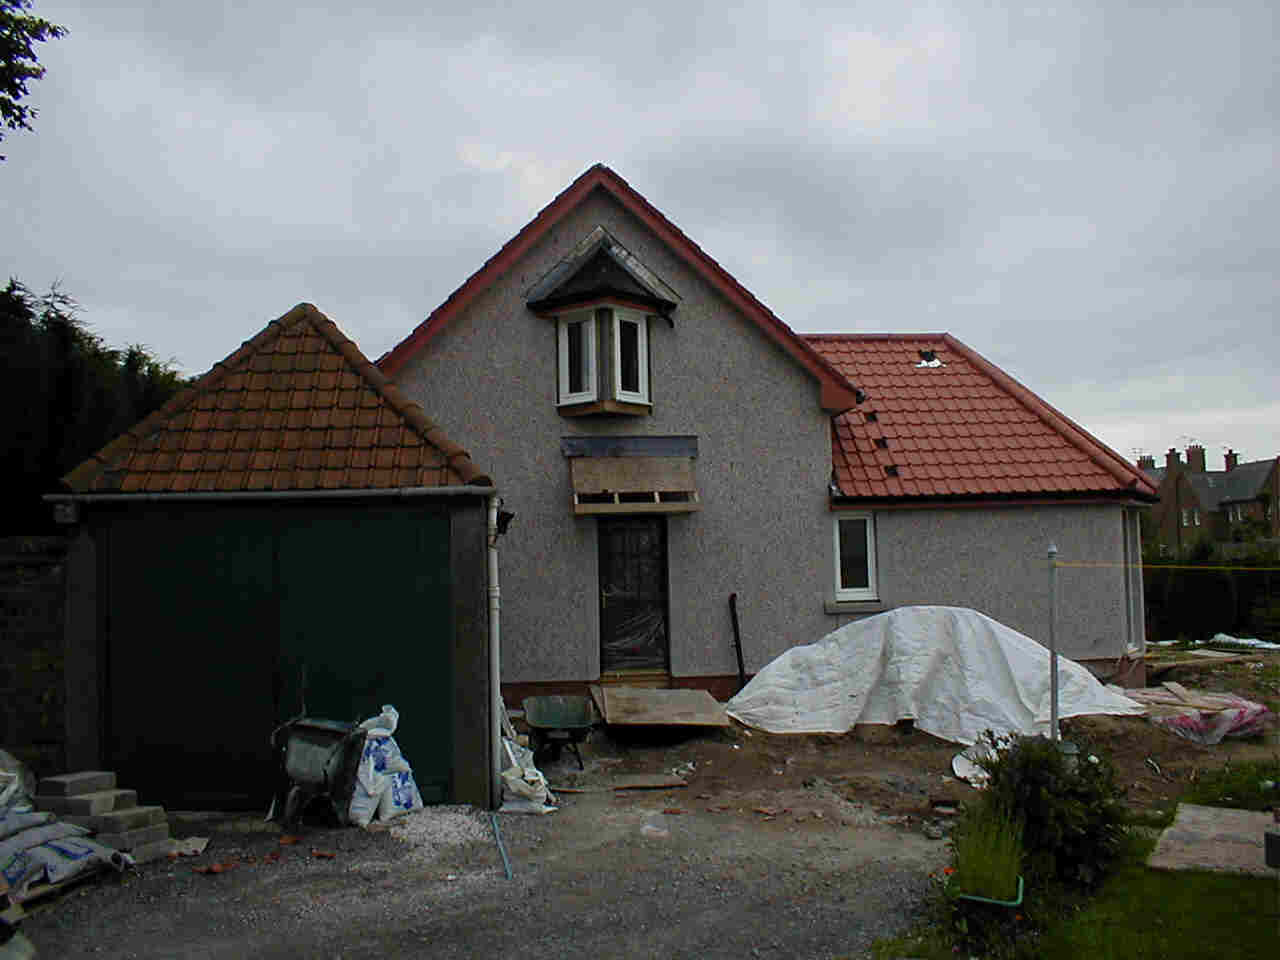
Scaffolding be gone! As you can see from picture one the scaffolding has been taken away. Gone. Which is a pity (no doubt you'll have read the diary and know that the roof isn't finished yet) Picture two shows the site looking pretty much as it always has, above the lounge you can just see a bit of silver, that's where the chimney is going to sit.
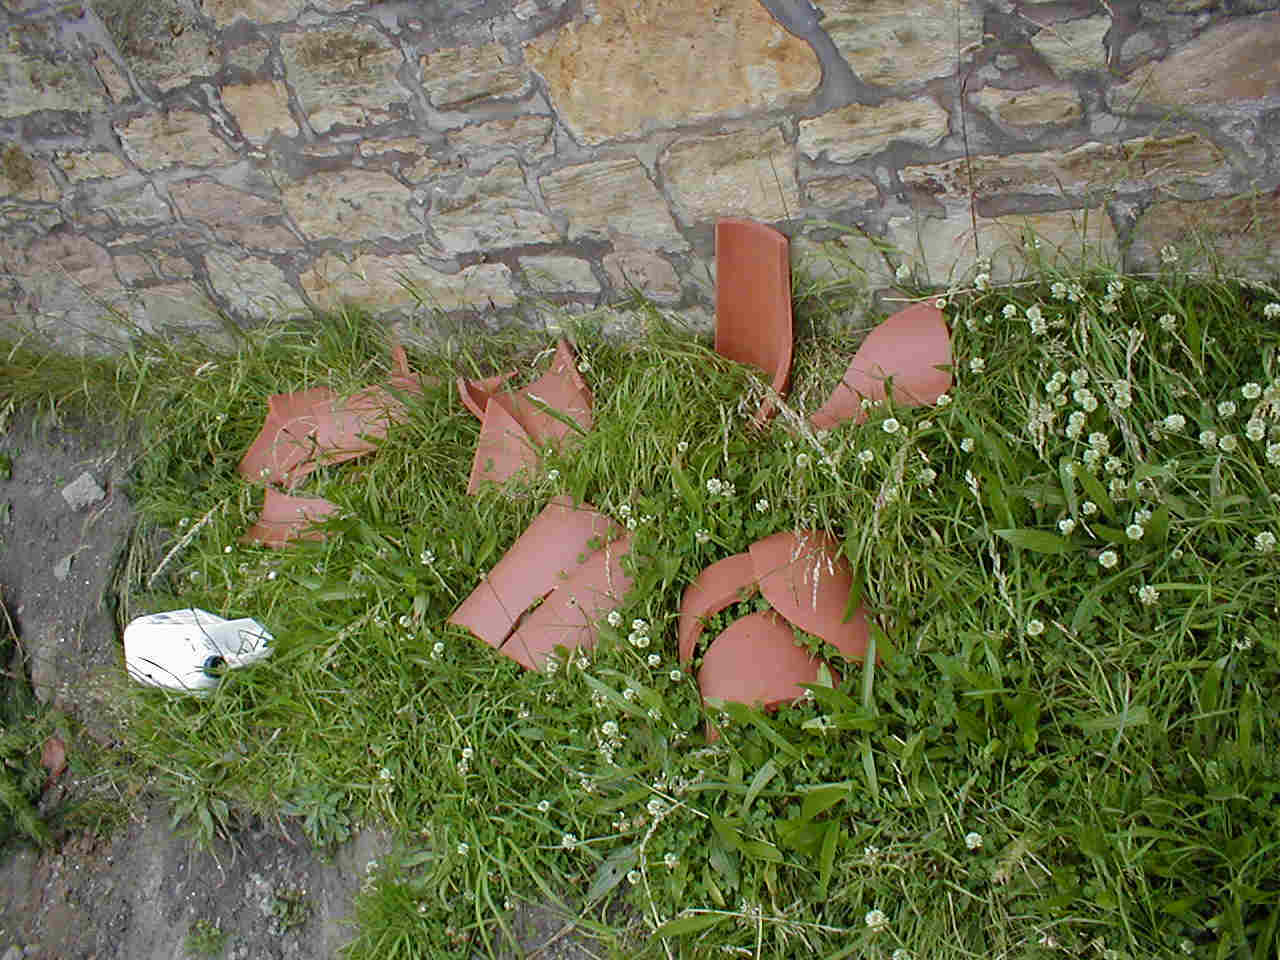
Picture three shows the result of the whirlwind scaffold removal. Quite a few of my tiles were tossed from a great height and didn't manage to survive the impact. Picture four is a side on view of my house. You can see the aurial has had a wee bit more work carried out but not completed. The back door has a little porch over the door, its half way complete. The black thing on the wall is my drain pipe, which was up briefly, then knocked down again.
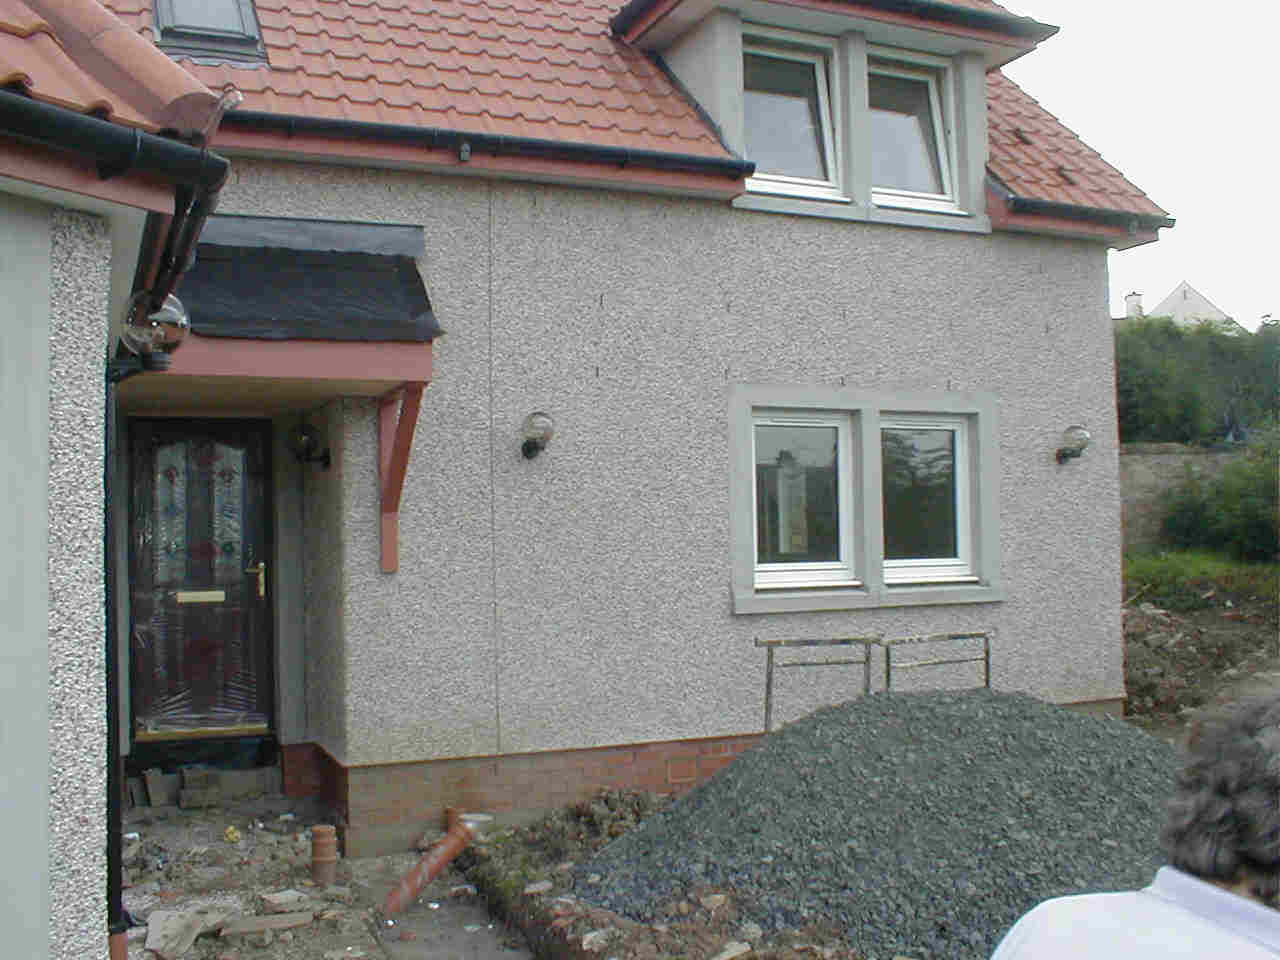
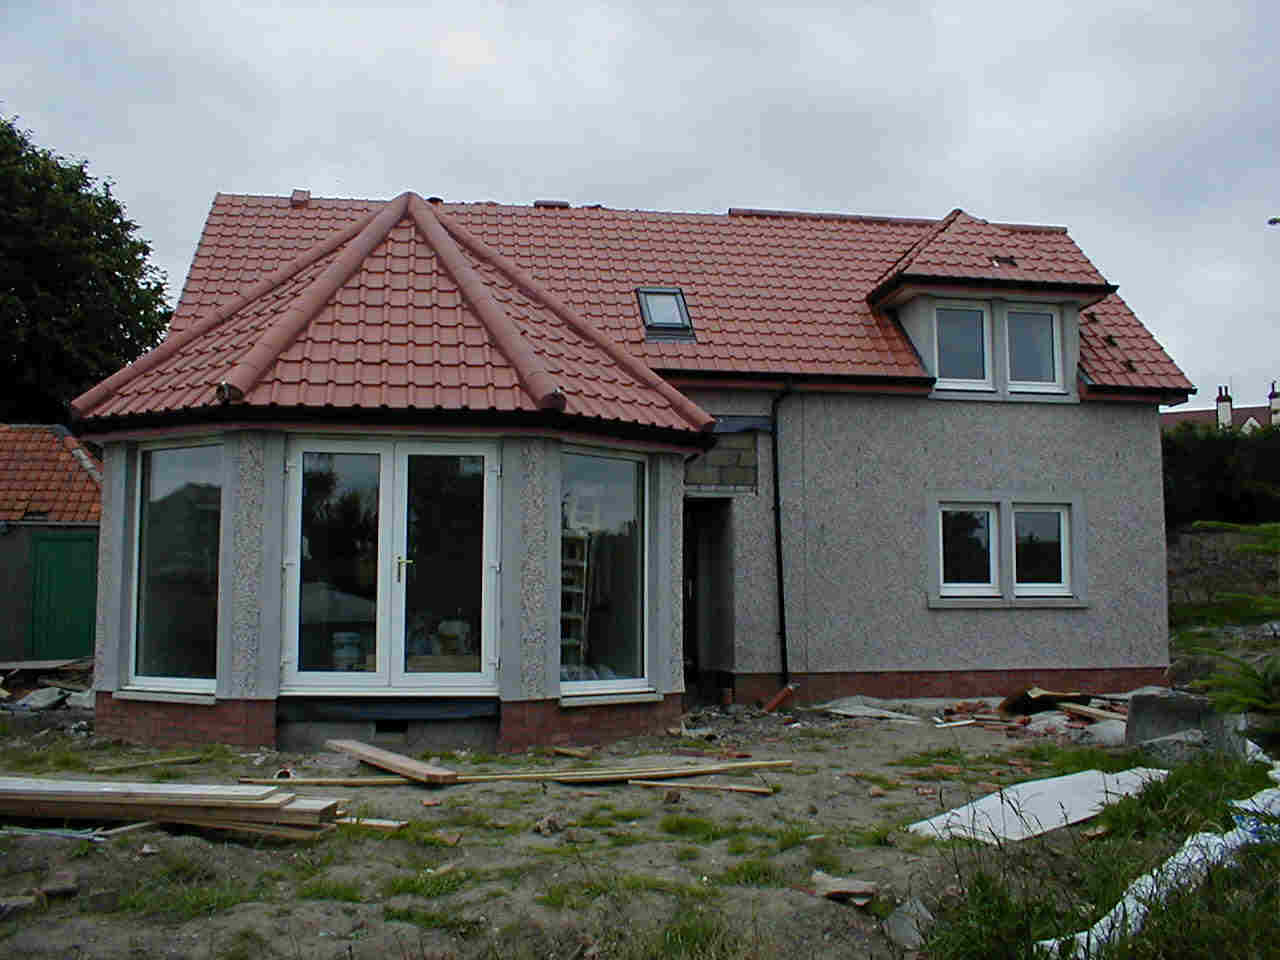
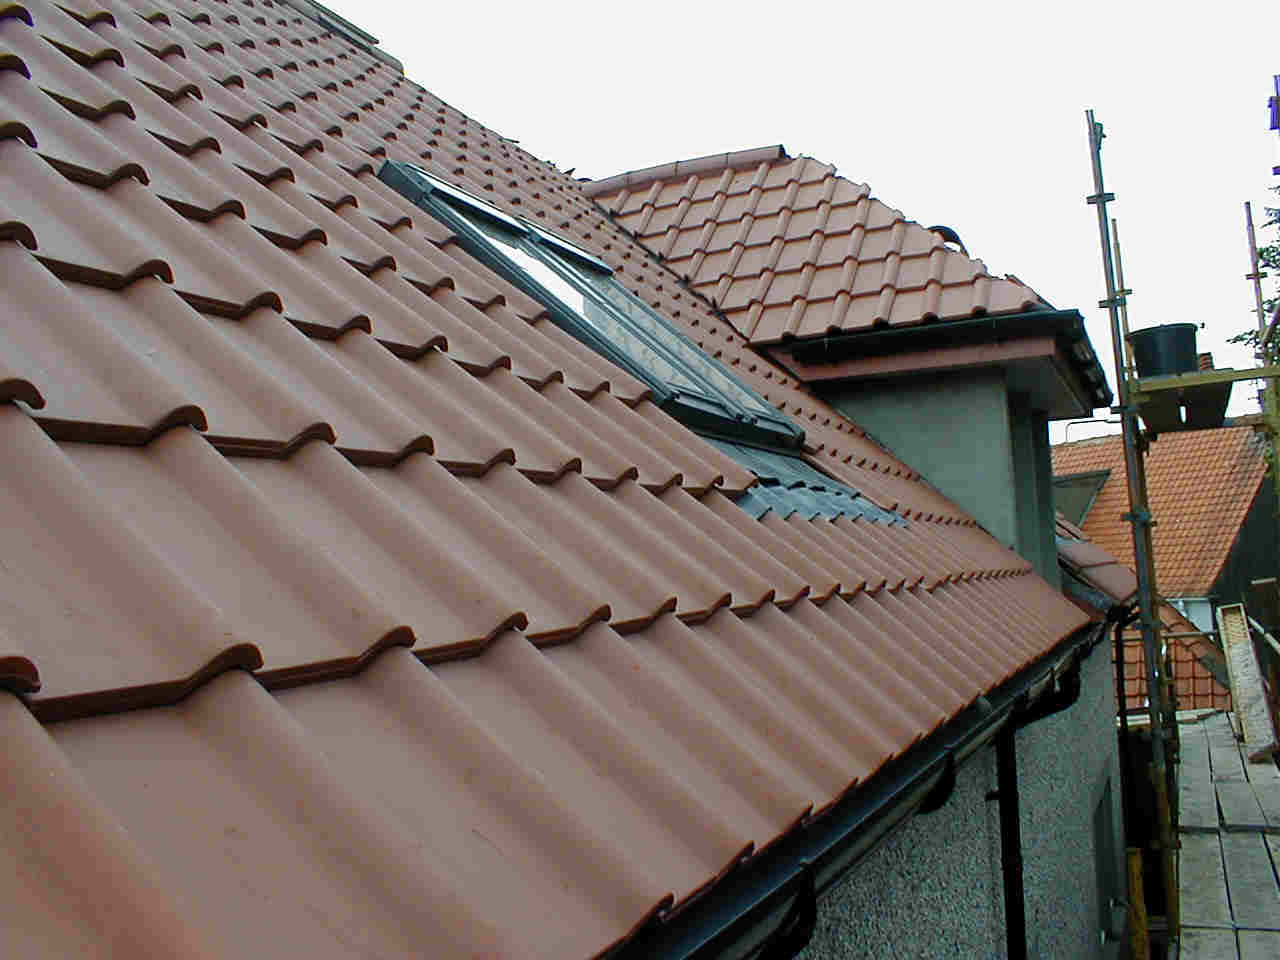
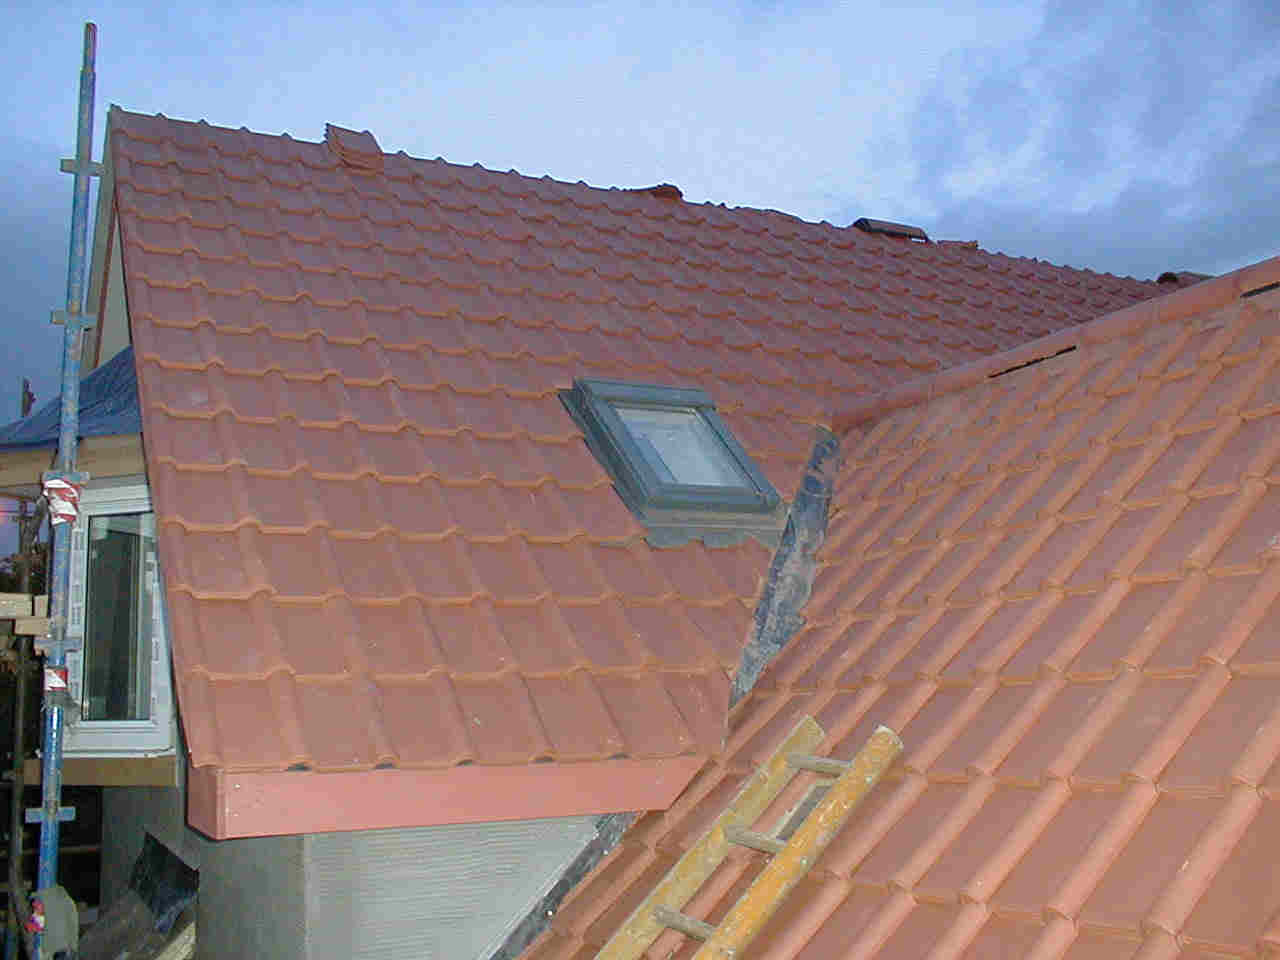
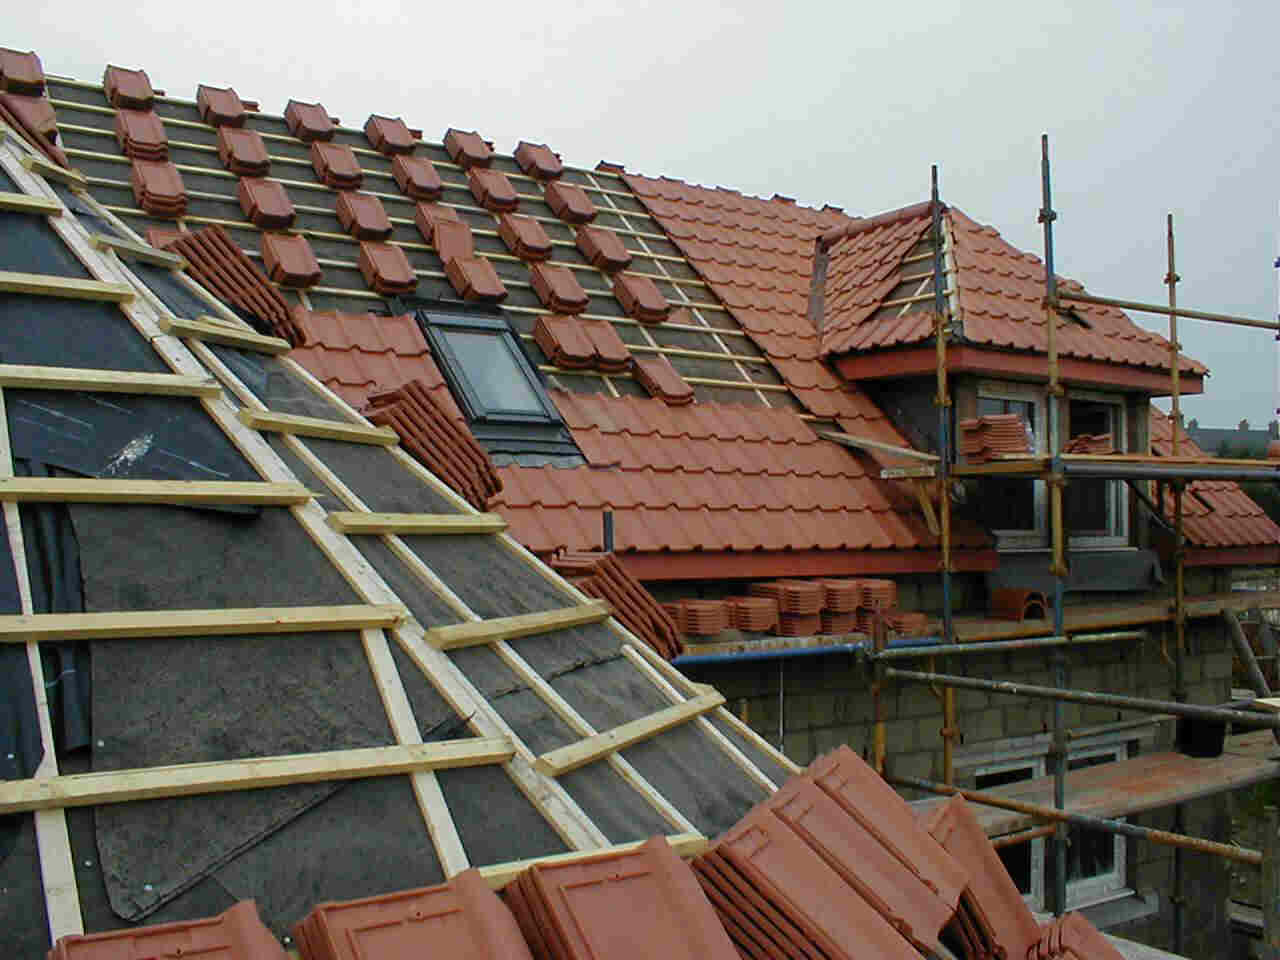
OK! I was late doing the update! Thanks to the many people who e-mailed me to mention that I had not updated the web site. I have thrashed myself for my tardiness, and I promise it wont happen again! Picture one is the outside of the house, you can see the harling is complete. It'll change colour as it dries out so we'll need to see what it looks like in a few days. Picture two is a close up of the tiles, which look grand. The edge of the dormer still needs to be completed. Also, the guttering has been put up too.
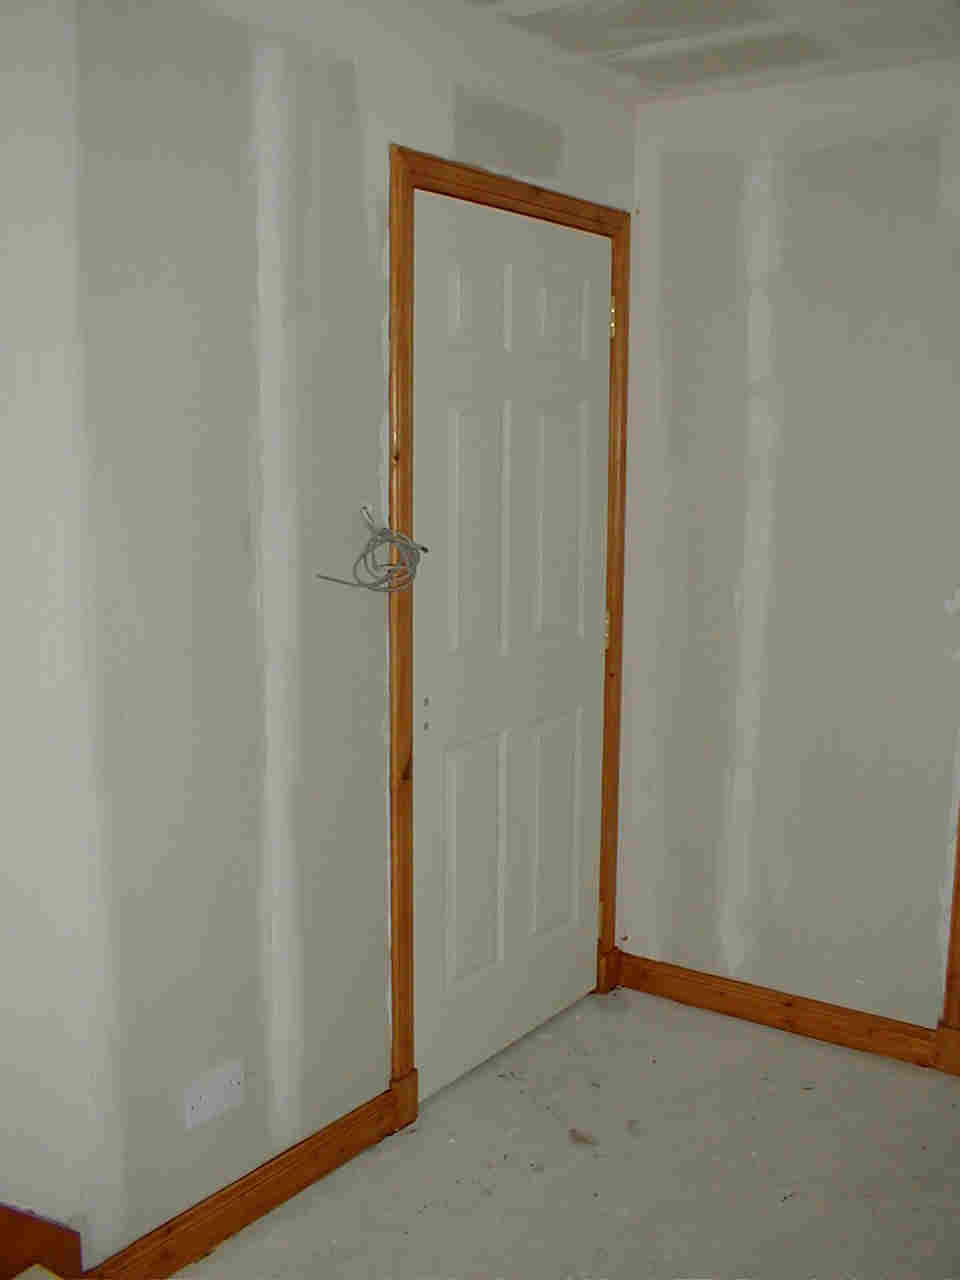
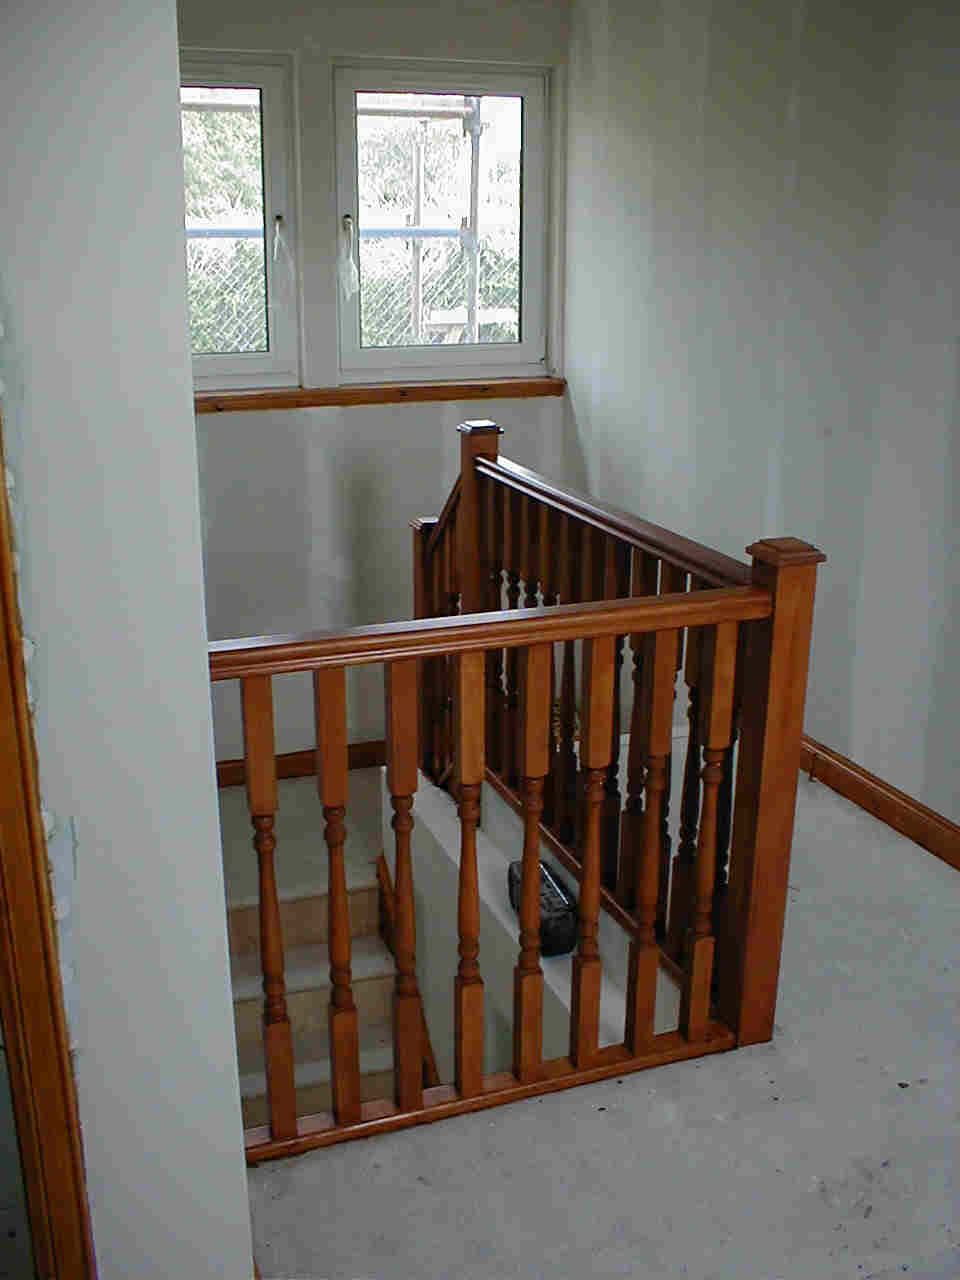
Picture three is the bathroom door downstairs, you can see that the painter has started and has varnished the skirting. Picture four is the bannister which looks groovy in dark stain. You can also see the window at the back has been fitted up with a wooden sill too. There have been done all round the house.
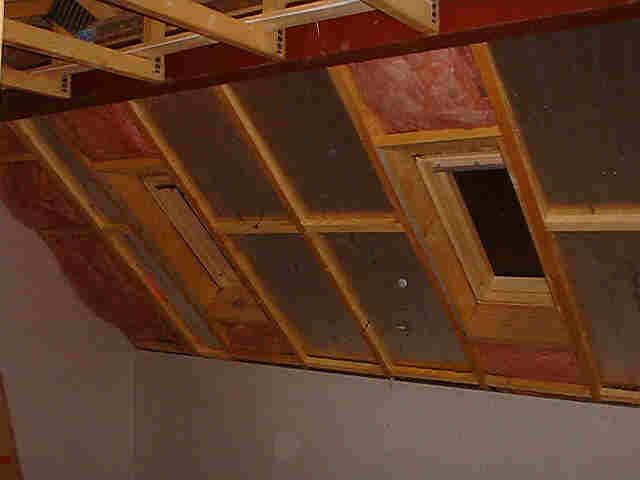
could murder a bacon sannie! OK, nothing to do with the house but I have a huge craving for pig and tomato sauce right now, big thick bits of bread and a coffee. Hmmmmm. Picture one is the lounge roof looking back towards the house, with the velux in the small bedroom upstairs on display. You can also see the triangular window jutting out. Picture two is the roof from the garden, you can see some of the ridge tiles on the top still need to be done.
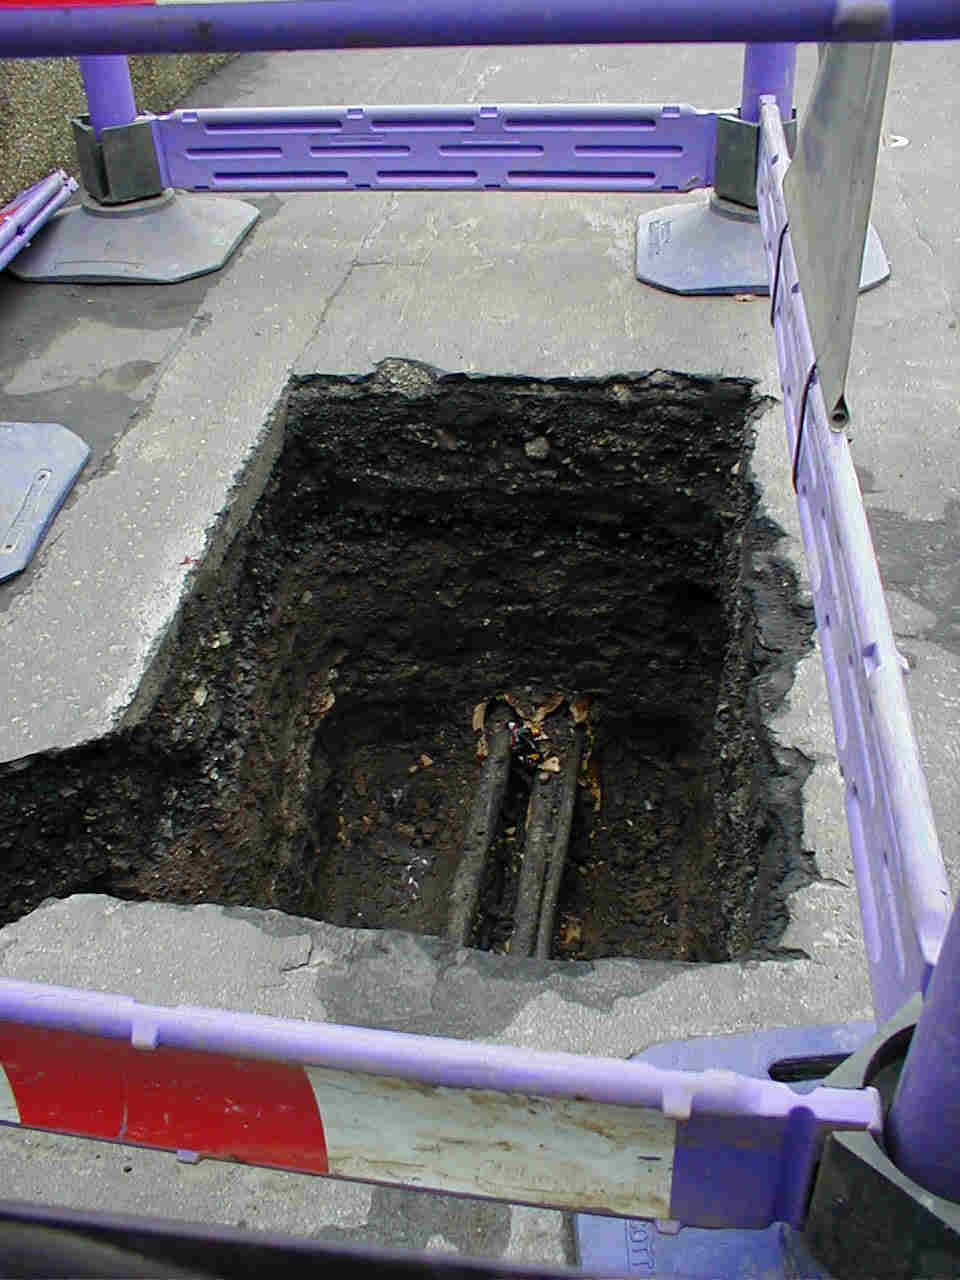
Picture three is the lovely hole that Scottish Power came and dug last Friday. I'm waiting with baited breath to see what happens next - you can see they have exposed the electrical cabling. It should just be a matter of feeding the supply down the pre laid ducting and catching it at the cupboard in the hall way. Picture four is the lounge (again!) but this time with a door. Things don't get much more exciting than this I can tell ya! Next week
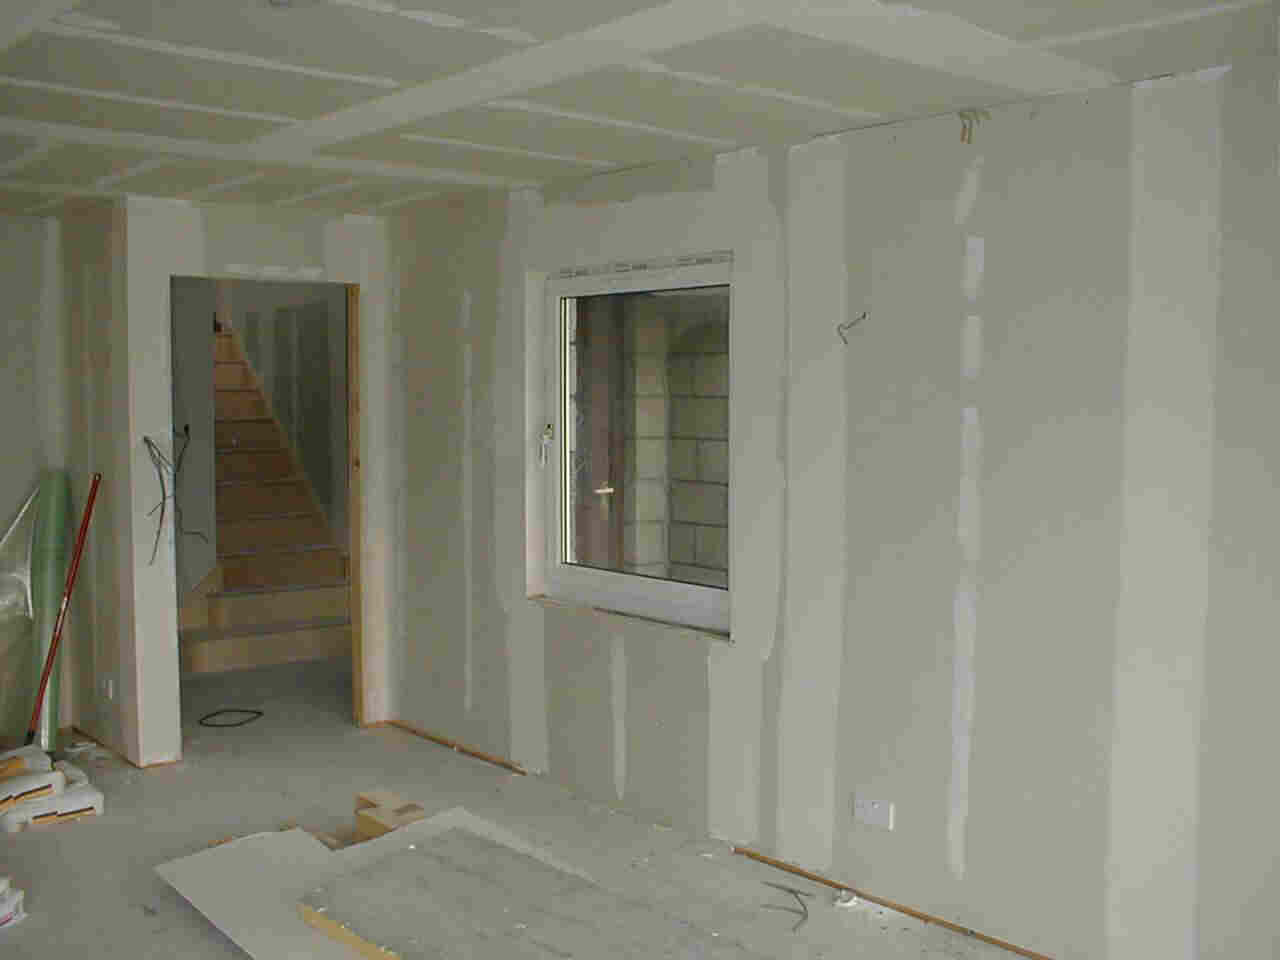
Getting Plastered Picture one is the upstairs bedroom with a wee cupboard on the right. Picture two is the staircase, you can see the banister starting to form at the top step. I can just reach the handles on the window.
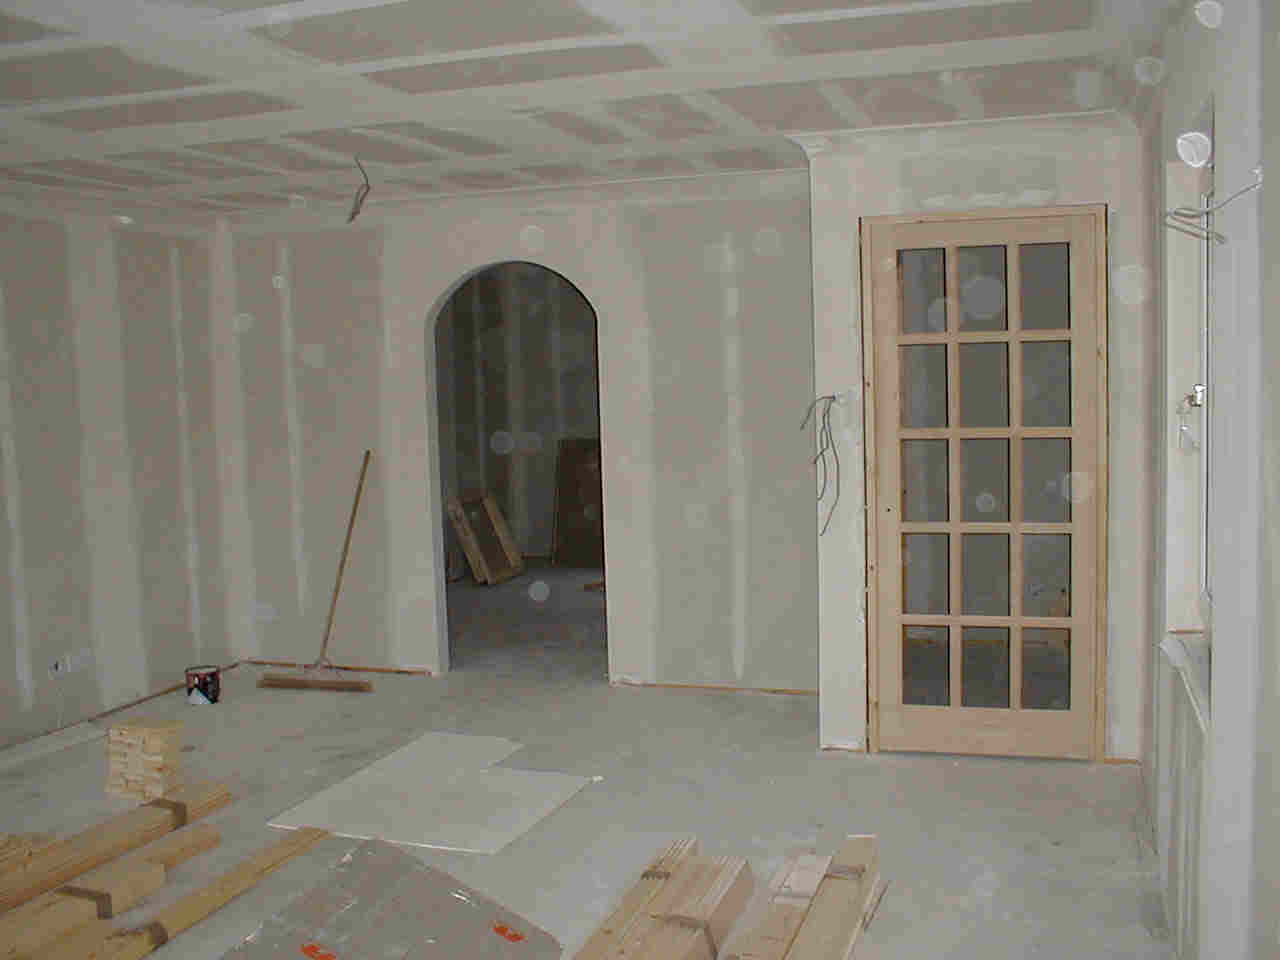
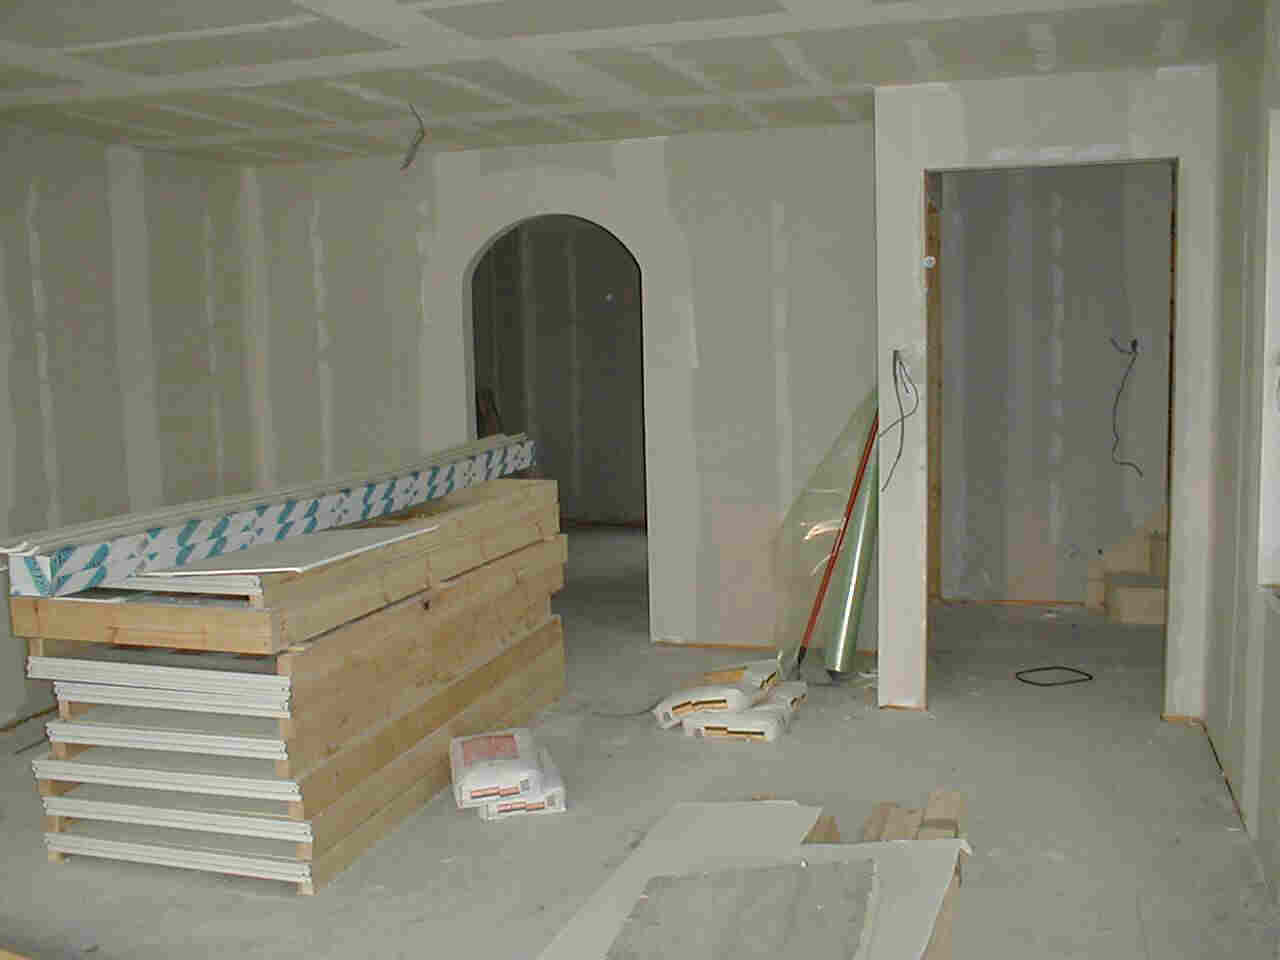
Picture three is the downstairs lounge showing the living room door into the hallway, if you squint a bit you can see the stairs too. Picture four is the lounge again, this time looking through the arch into the kitchen. Don't forget picture five!
Picture Five shows the progress of the roof. It looks really good too. Although my tiles did cost extra, I'm glad we went down that road.
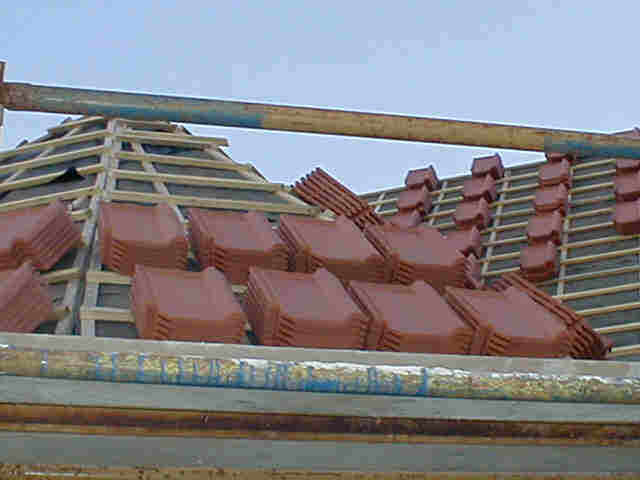
Pointy Windows are go! Picture one show the triangular window above the back door. It was going to be a bit fancy, but we've decided it'll look a bit over the top. Picture two shows the roof tiles in place and ready for action!
Picture three shows the house and the legion of tiles stuck up on the roof. Picture four shows the bedroom upstairs, you can see a cupboard has appeared which will be at the side of the bed.
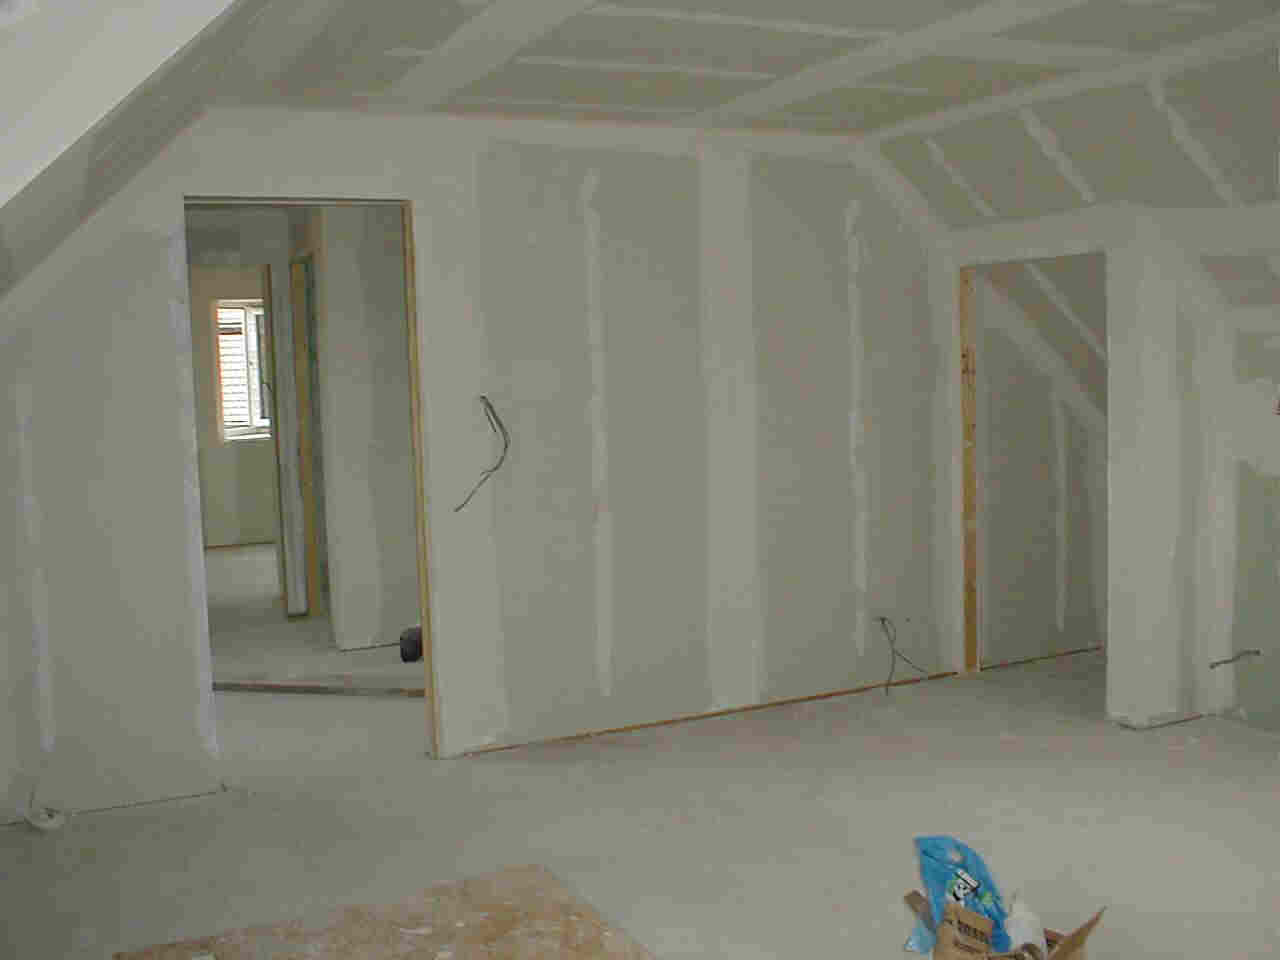
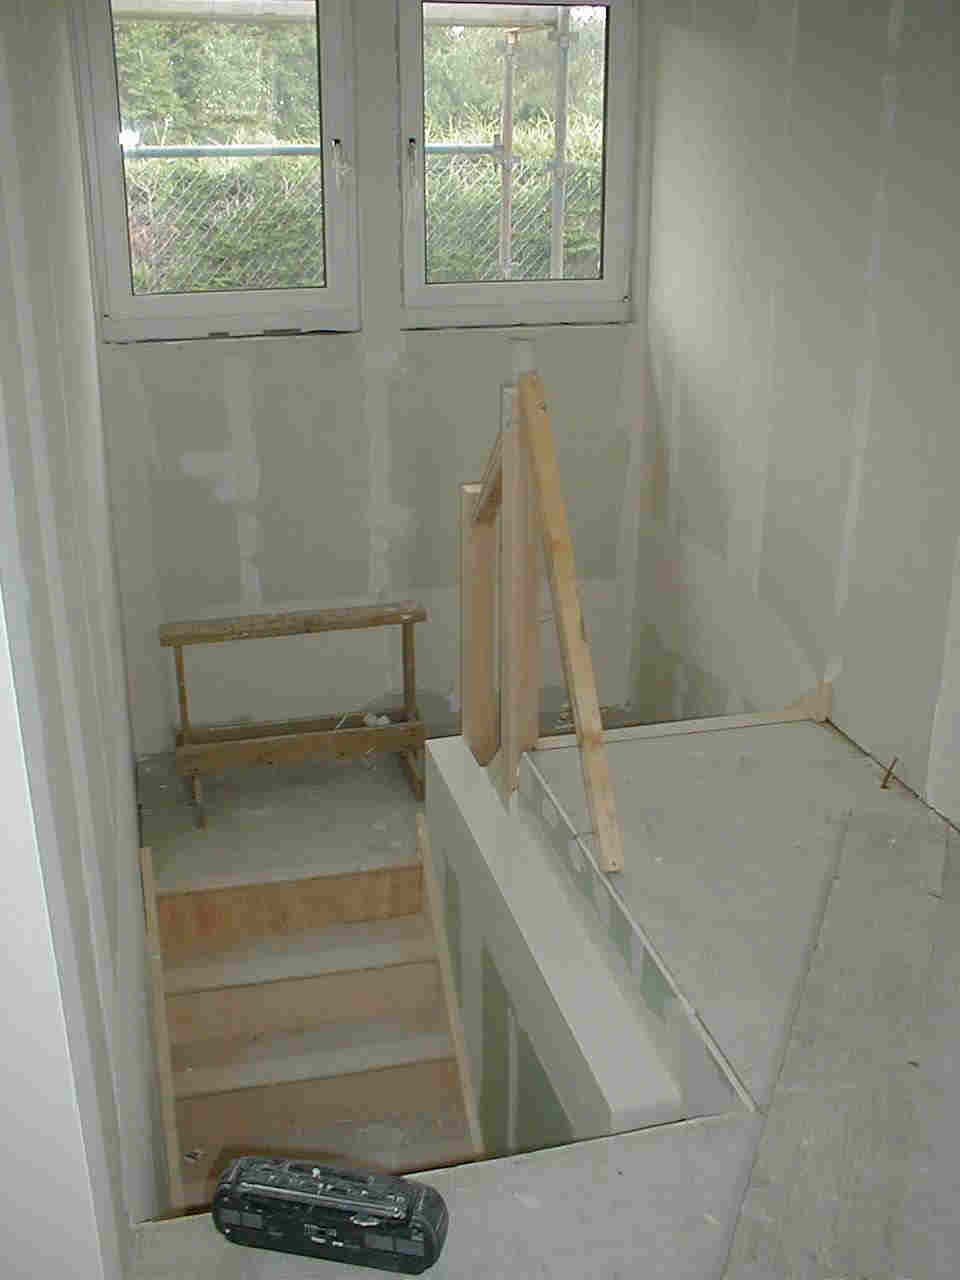
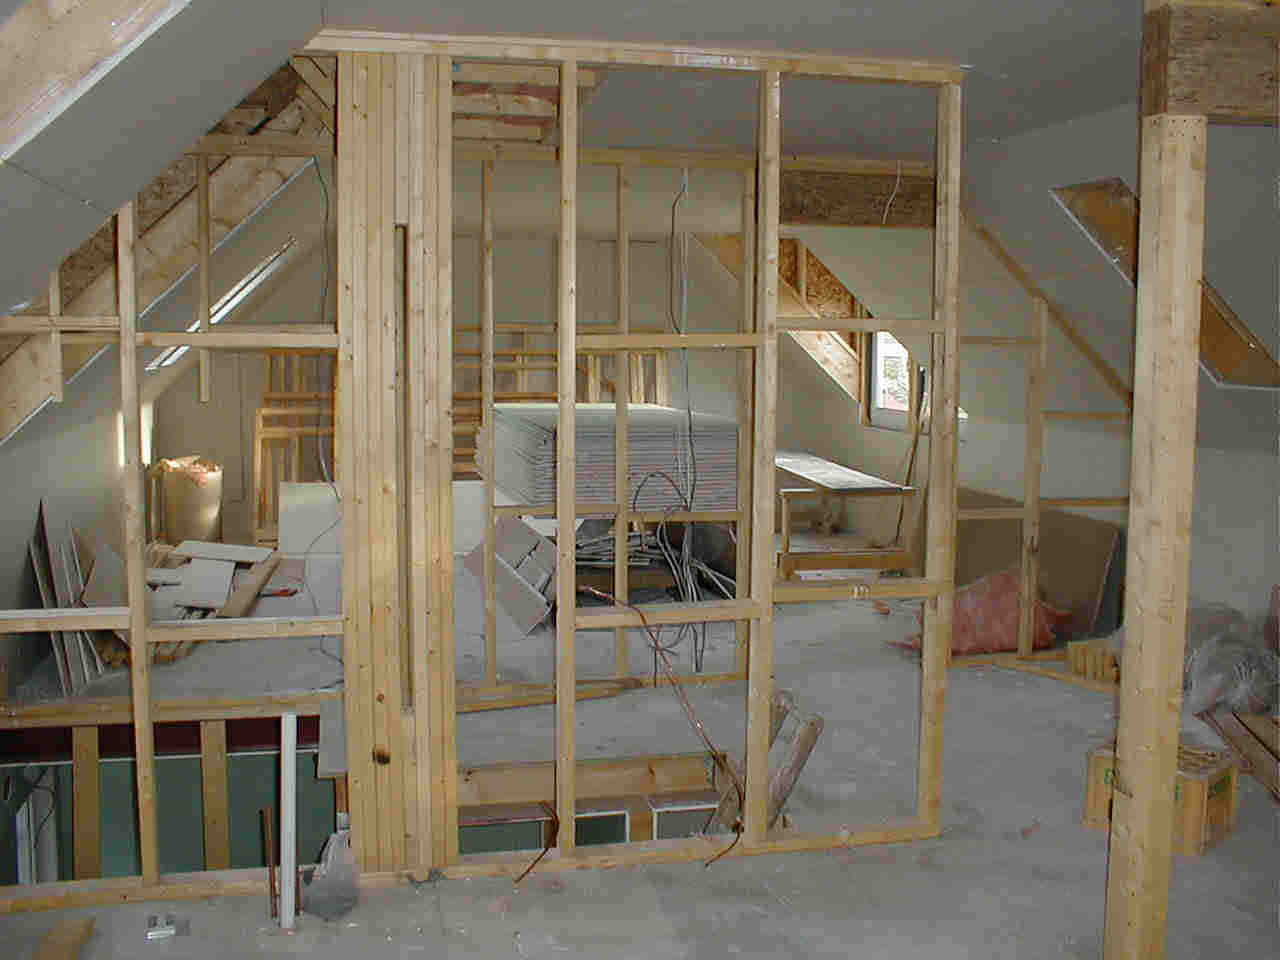
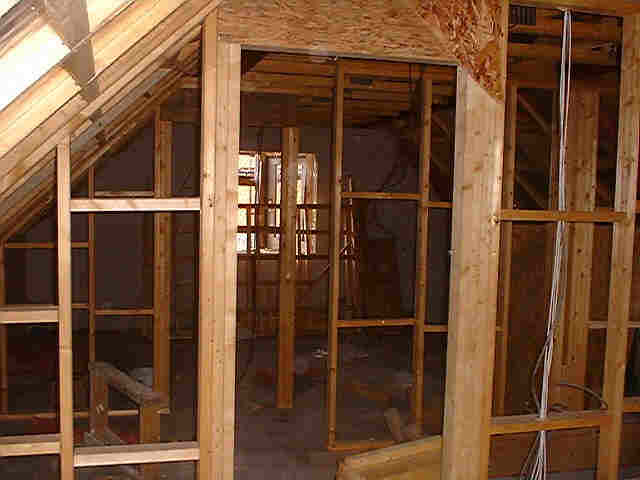
Picture One shows the upstairs bedroom. You can see all the plasterboard work on the walls in complete. The big hole in the floor is where the stairs should come up. The second picture is the bathroom with the partition walls up. It looks really small but there's enough room for an oversized bath, bog and big sink.
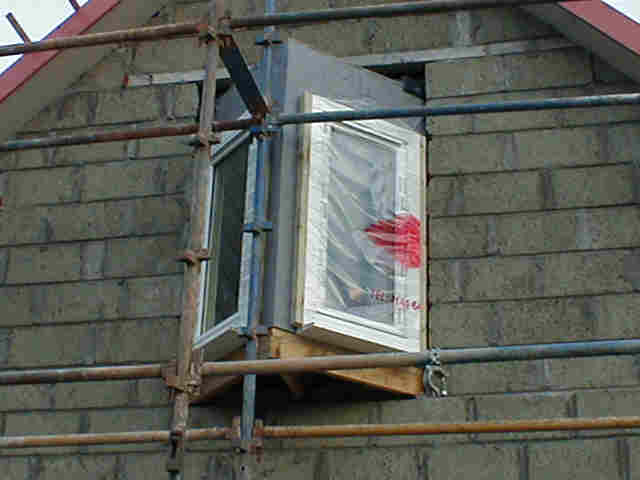
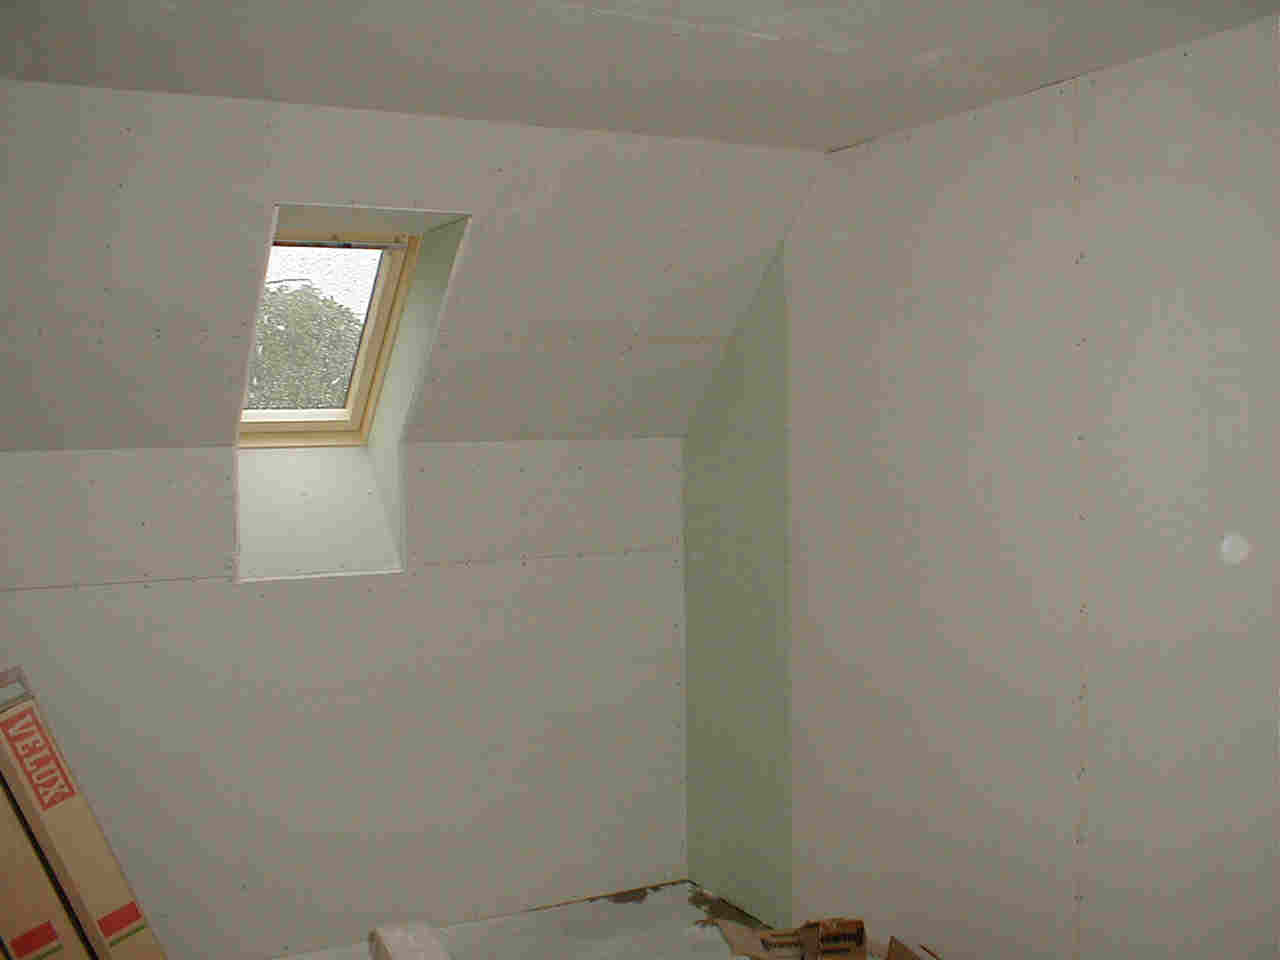
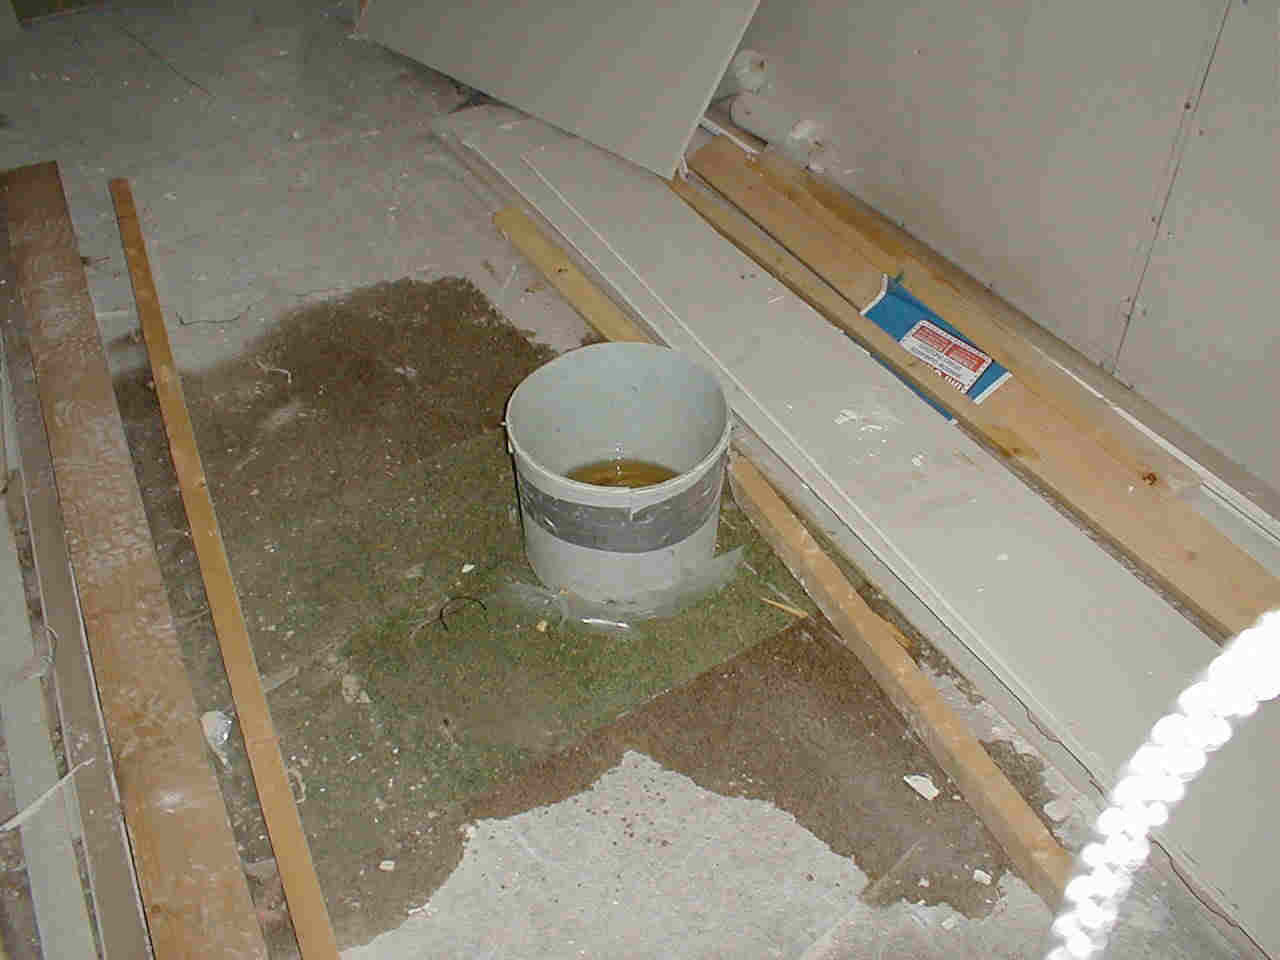
Picture three is the small bedroom upstairs. You can see that the plasterboard work is complete. Picture four is my first and hopefully last roof leak! There has been thunder and lightning in Edinburgh today, and its been tipping it down most of the day. The waters coming in through the gap round the dormer window.
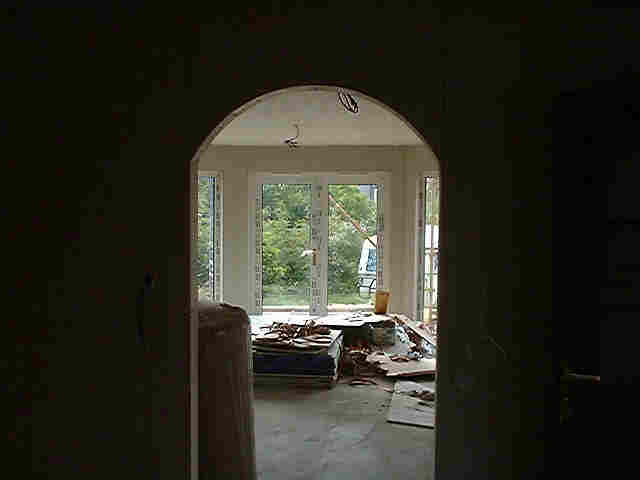
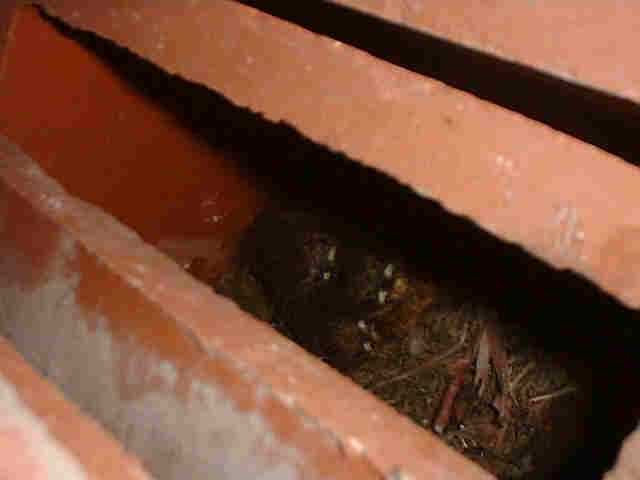
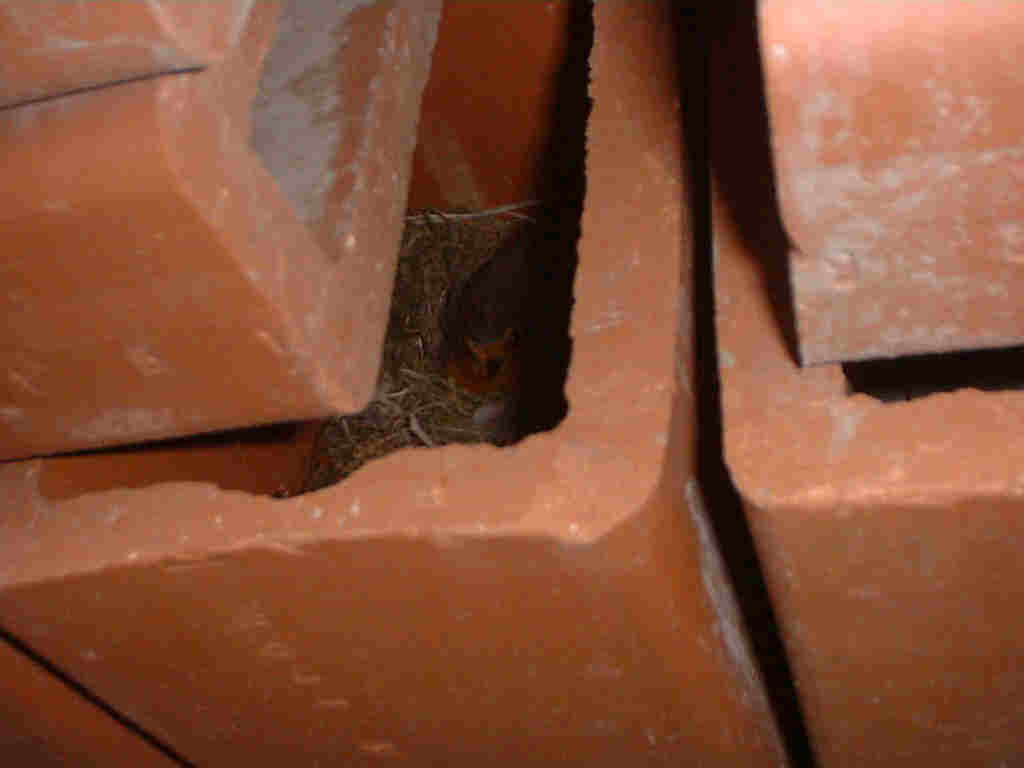
What's through the Arch Window? Picture one is looking through the Arch from the kitchen into the living room. Both the kitchen and the living room are finished, (with the exception of the fire place!) Picture two is the Robin chicks which are nesting near the house. All the noise etc. Doesnt seem to have put them off, although there has been a couple of casualties.
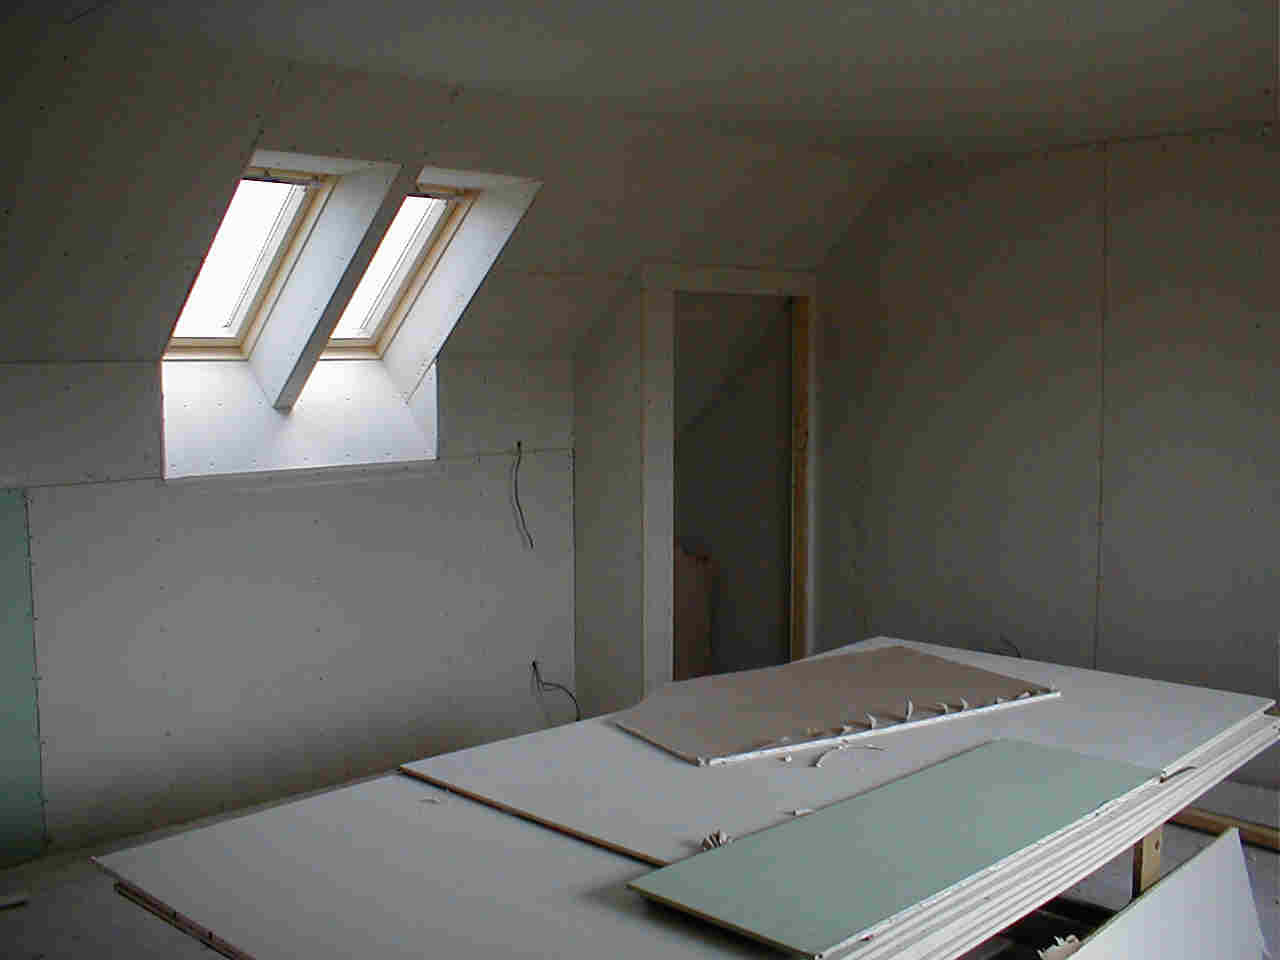
Picture three is the upstairs bedroom, looking over the landing through the bathroom and into the small bedroom. The stairs are in the kitchen ready to be assembled. Picture four is in the small bedroom upstairs and the furthest away dormer is the bedrooms, the other is for the bathroom.
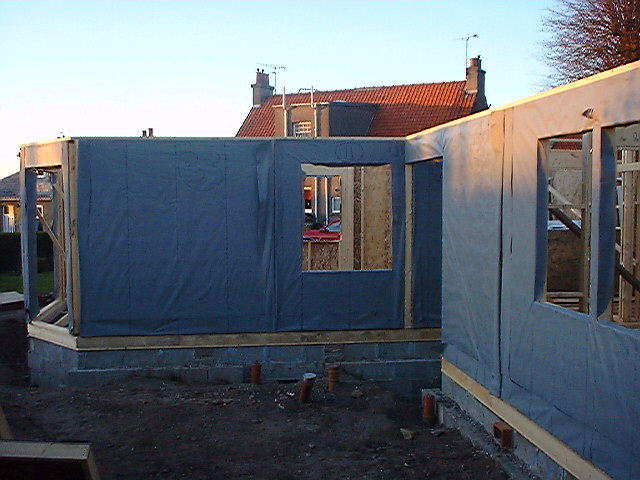
Bricks are go! The first picture is from the driveway and shows the side of the house and the back door. You can see that the brick work is complete. A few lintels have to be delivered but apart from that the job is done. Picture two shows a bit of the front of the house and the plasterboard & insulation waiting to be put up.
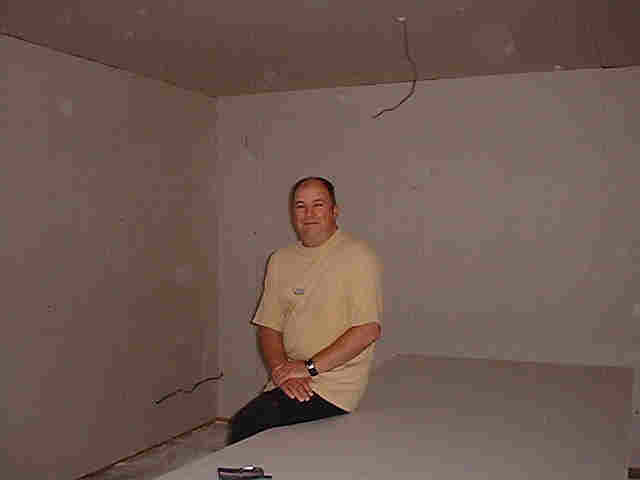
The third picture shows the hallway, you can see that the plasterboard is up and well on its way. It also shows that I cant take pictures with my digital camera! Picture four is me. In reality I look a bit more like Robert Redford on a dark night - a very dark night with no moon and your wearing sunglasses, yes, then I look like Robert Redford. That's not a bolt of lightning either, its the wiring for the lights. They say that TV puts about 5 lbs on you - I think pics put on atleast 2 stone, perhaps more. This room that I'm in is wired, the plasterboard is up and the phone and aerials are in, so its almost done.
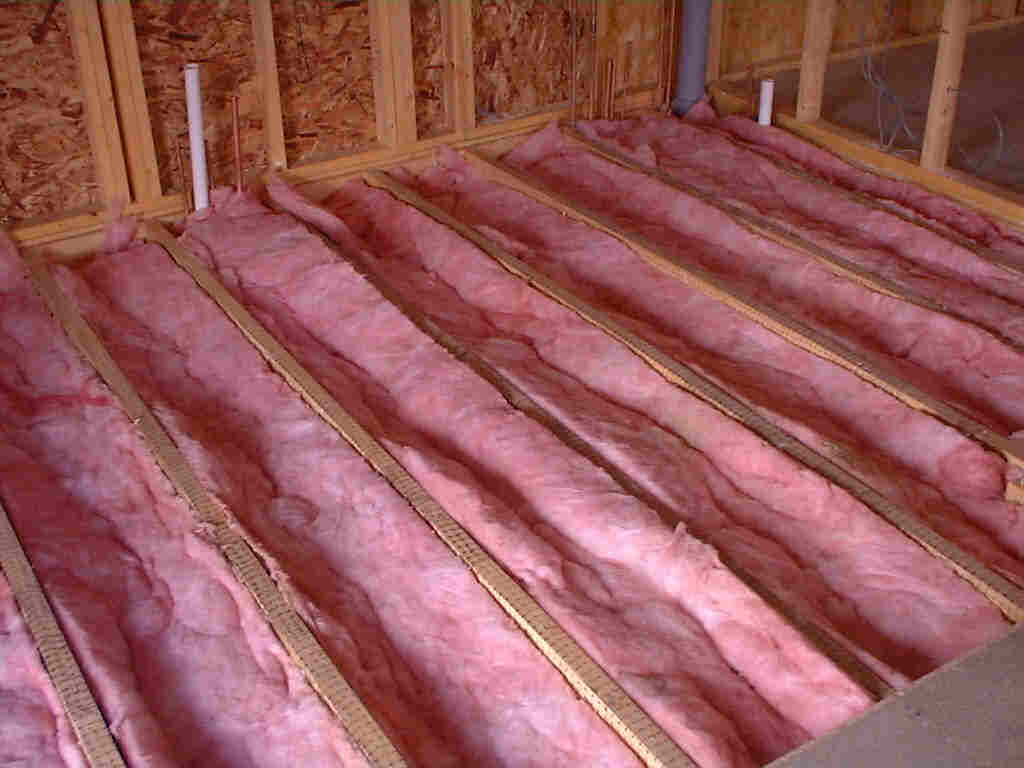
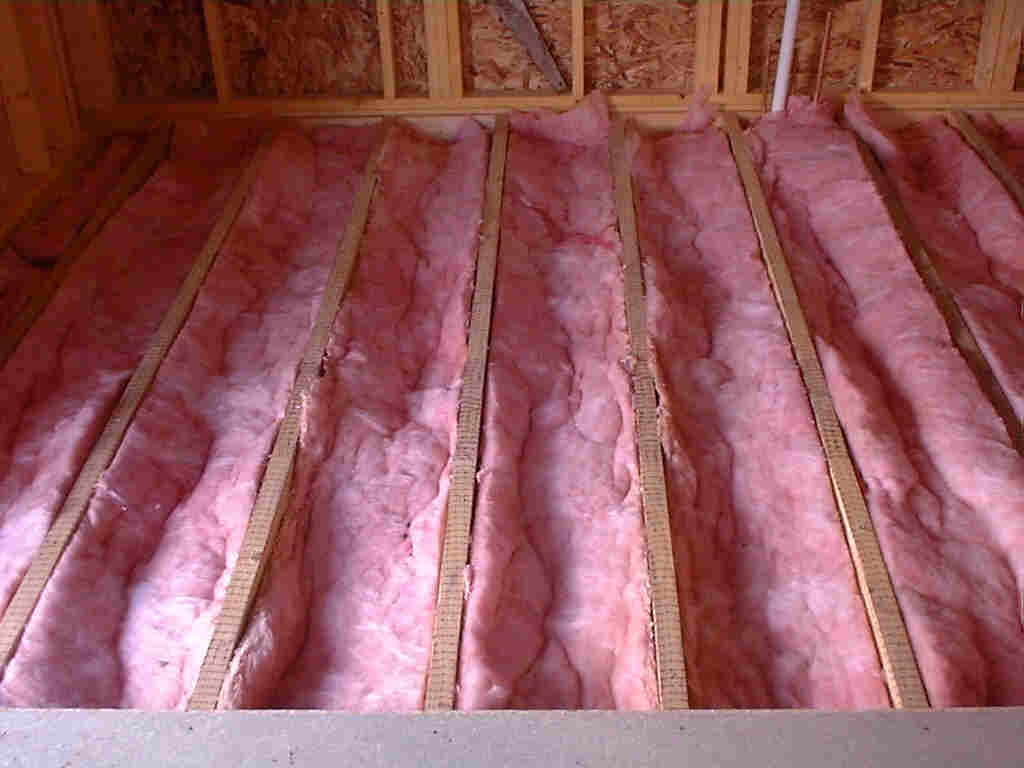
Floors are go! The first picture is the insulation going down between the floor boards. They use netting so that the insulation is hanging between the trusses, apparently you get better heat retention if its not touching the concrete underneath... Picture two the rest of the kitchen. All the plumbing work is in place for the ground floor and we are ready to move onto flooring.
The third picture is looking out through the kitchen door into the hallway. You can see that the initial wiring has been completed, and the flooring is now complete downstairs. The upstairs bit is still to be started, and my staircase is due for delivery soon.
Windows & Roof Felt are Go! The first picture is my set of door keys! (Although I'll have to change them before I move in) These are for my doors surprisingly enough. Picture 2 you can see the bay windows are in and the roof is felted and ready for the tiling to begin, which I think is Thursday.
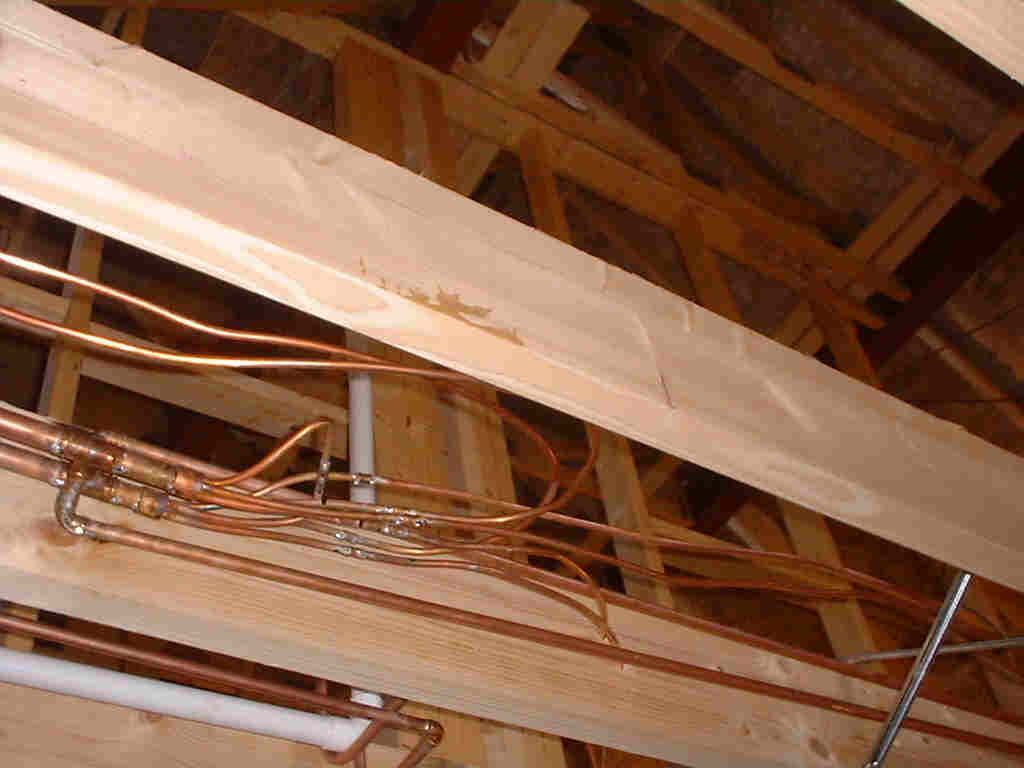
The third picture is the bay windows from the inside, and the wee picture nailed to the wall is the kitchen layout. The fourth picture is of a central heating manifold. Either that or some modern art!
SQUATTER!! Someone is living in the house before me! If you look and kinda squint with one eye, you can see a Robin has built her nest in the Air Bricks, that are due to go in sometime in the next couple of weeks. As I work for an environmental organisation I can hardly get the bazooka out now can I?! She's got five eggs just now, we'll just need to see what comes out. Chicks is my bet!
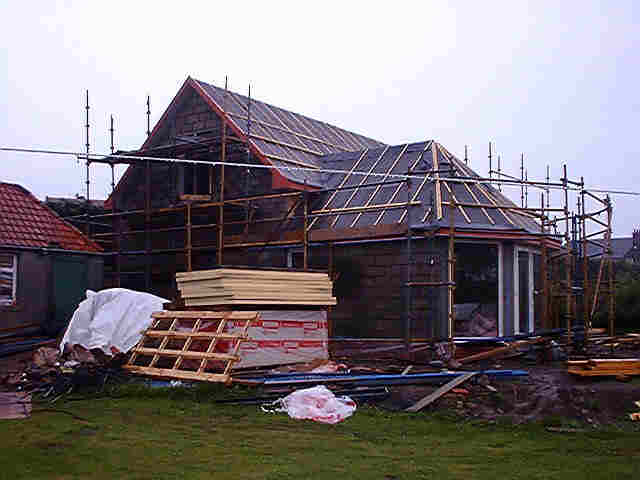
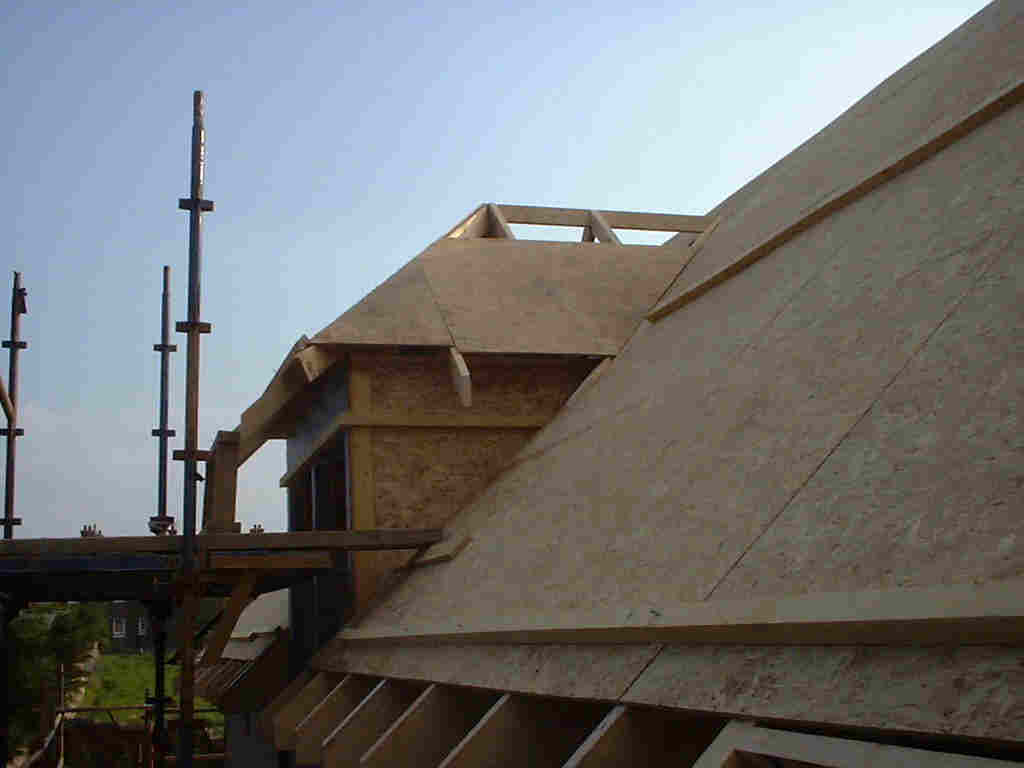
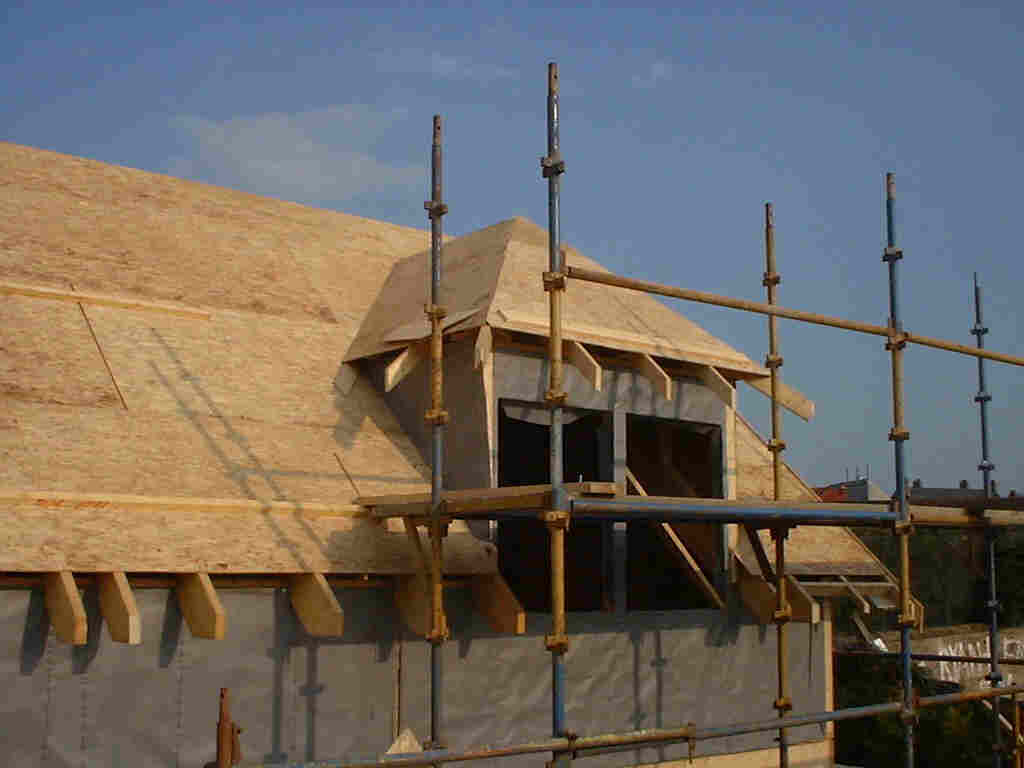
The roof is on! Well, the first bit of the roof is on anyway! The first picture shows the back of the house and the dormer over the stairs. The second picture shows the front upper right of the house with the bedroom dormer almost complete.
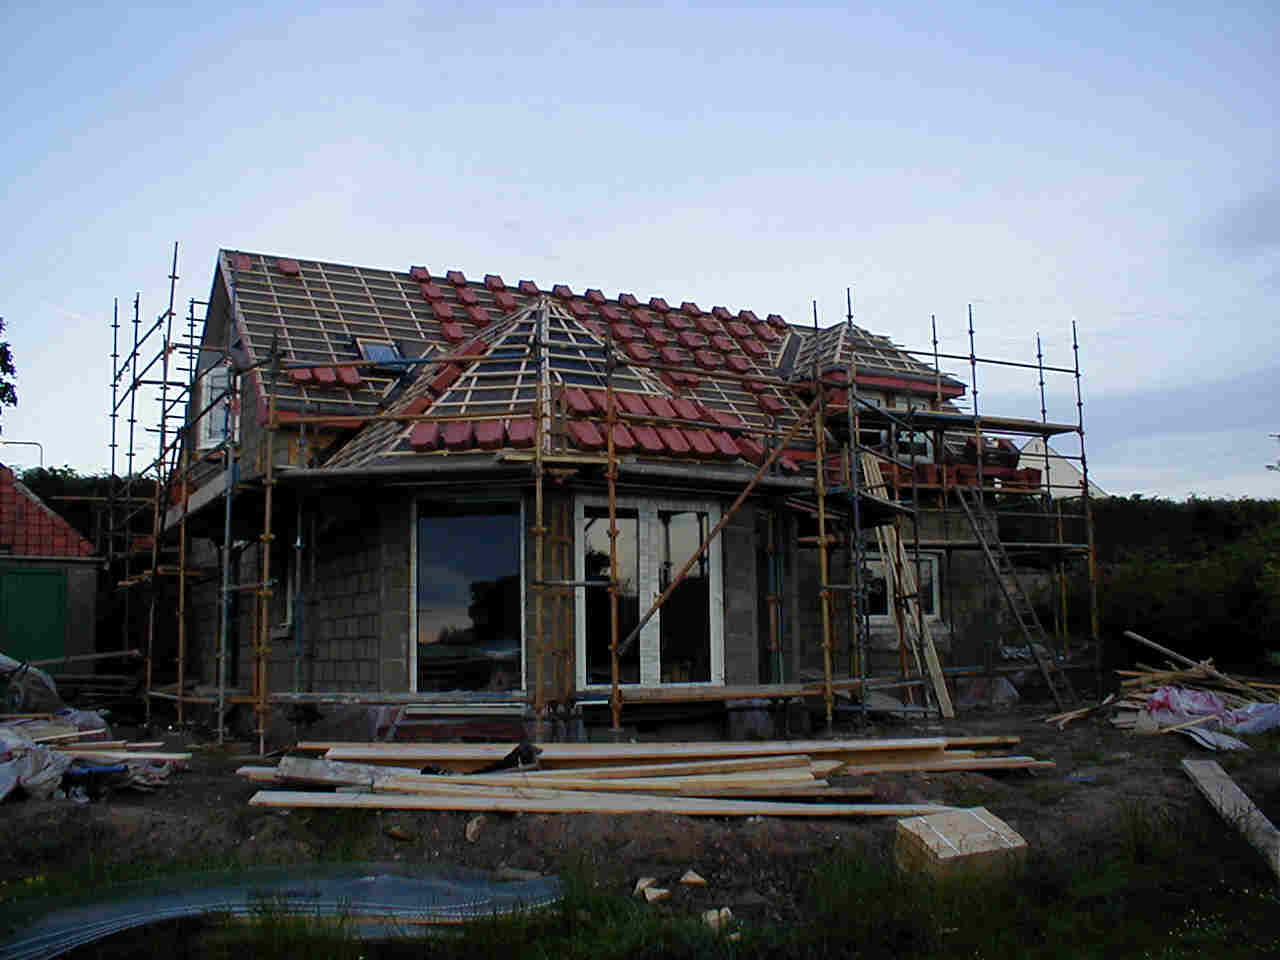
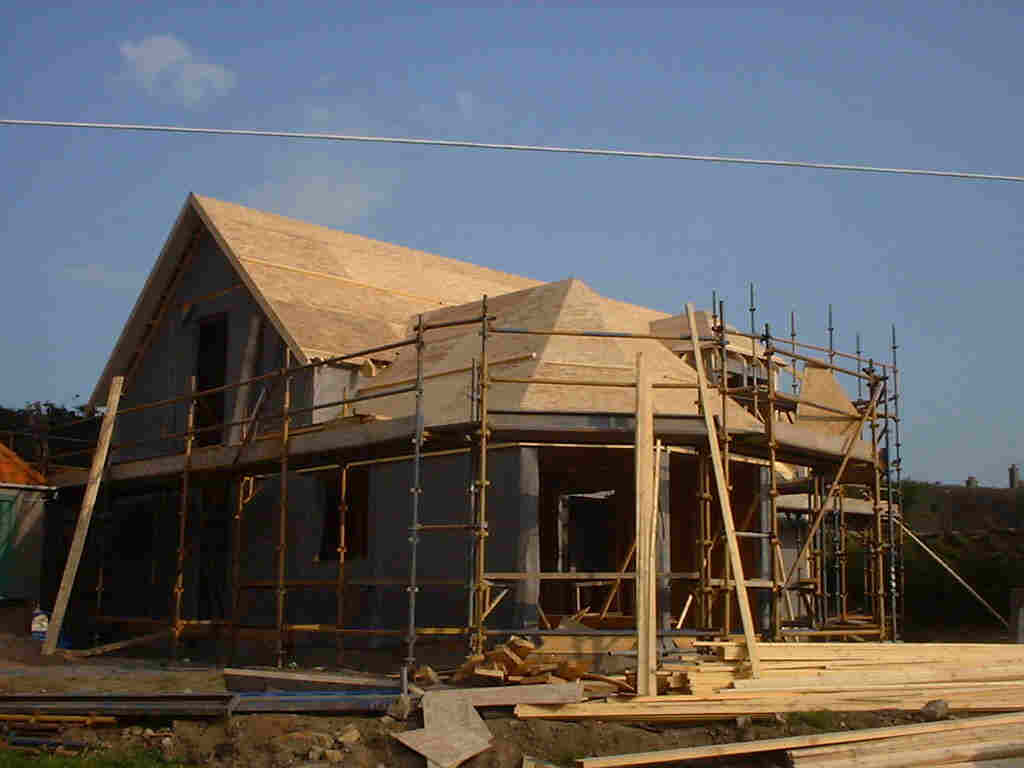
This page. The third picture shows the front of the house from the bottom of the garden. You can see that all the initial roof work is completed. The fourth picture shows you the view from the driveway.
This page was last updated on 05-11-2001 17:49:36.
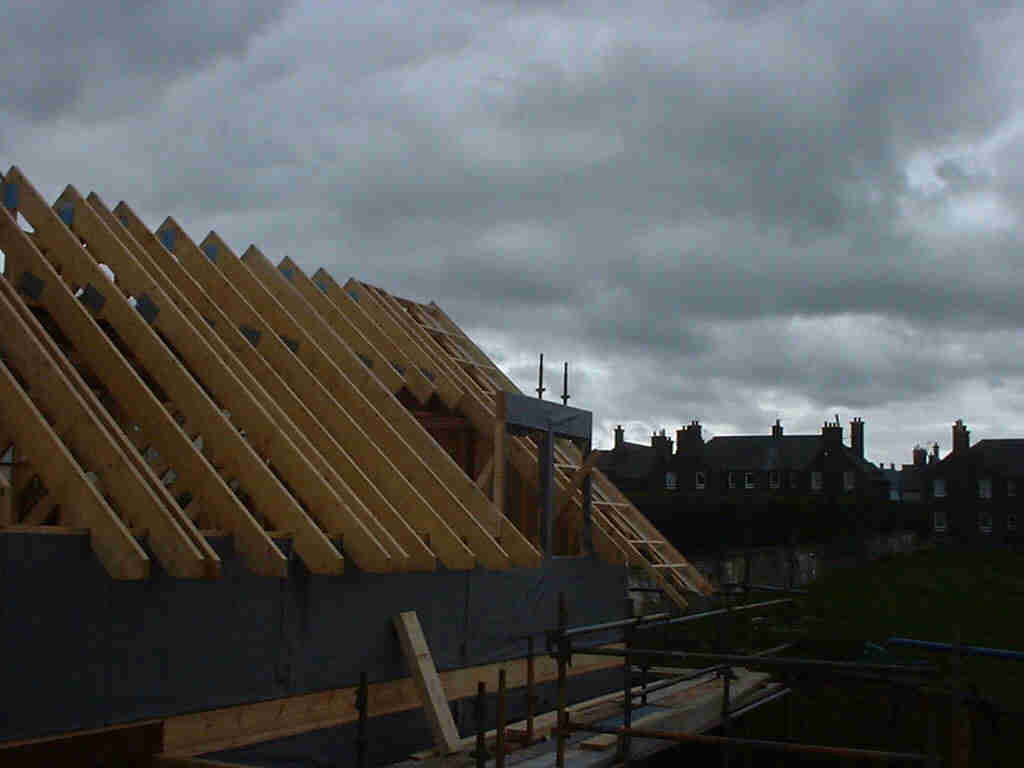
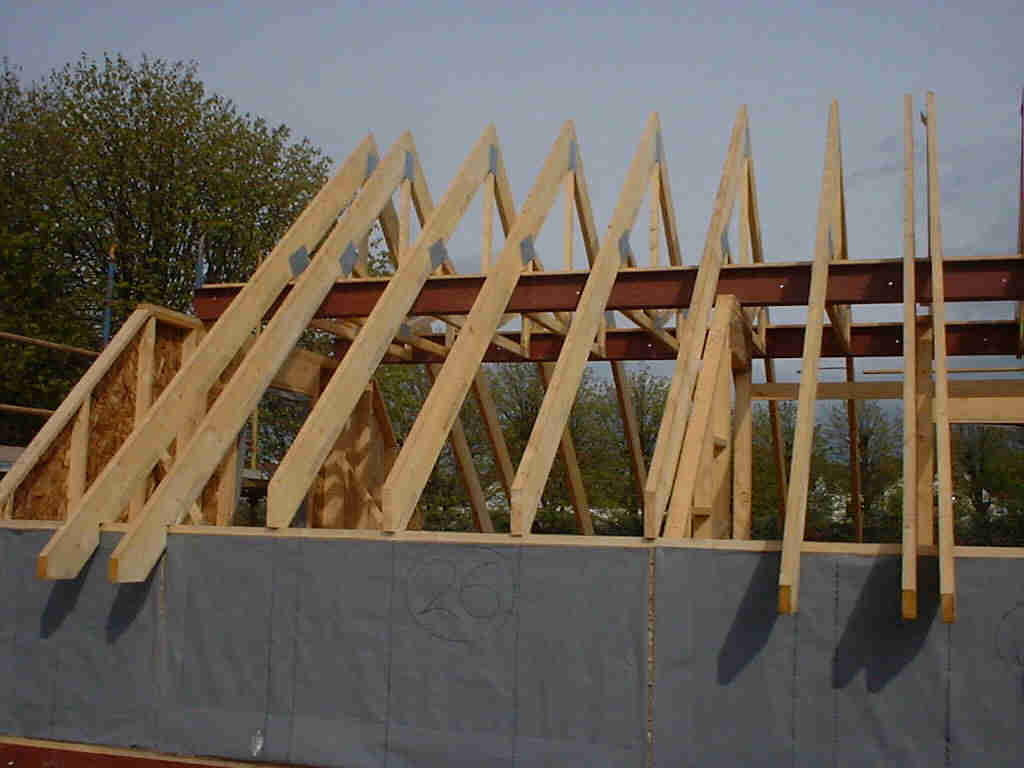
The first couple of pictures are a bit dark but you can see that all the ribs of the roof are intact. In both pictures you can see the dormer of the bedroom standing out.
standing out. The third picture is the bit of the roof just above the living room. The shorter roof members will be the gap that the roof above the lounge fits into. The fourth picture is from the window in the small bedroom upstairs, with the two steel roof beams running through the length of the roof.
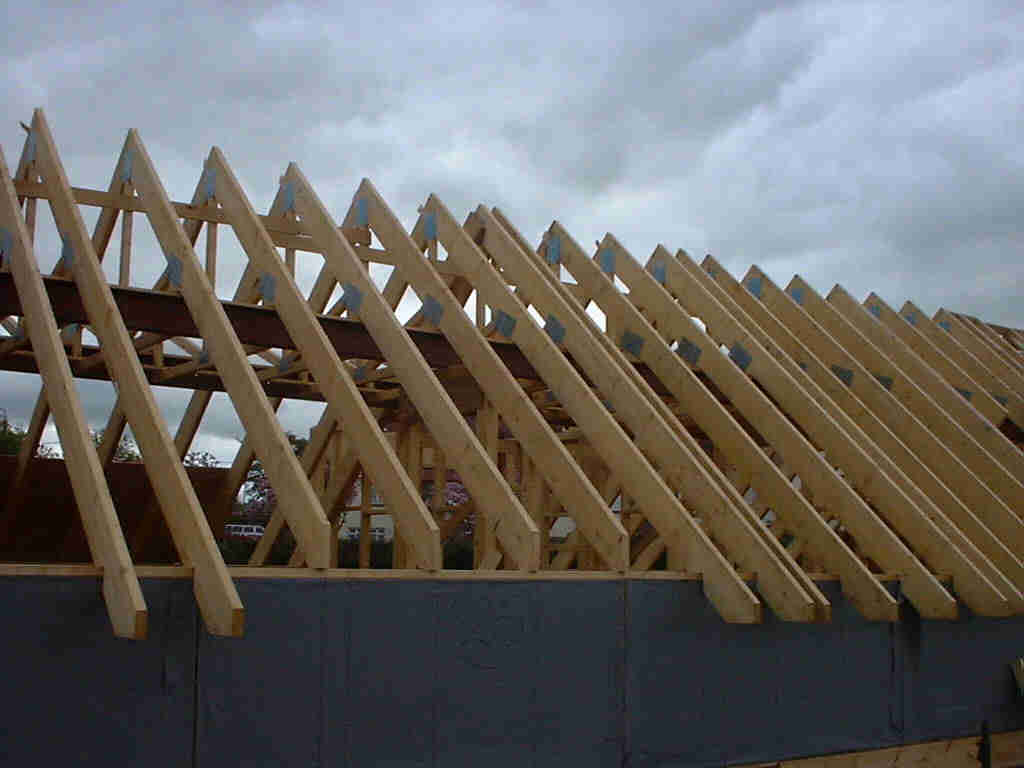
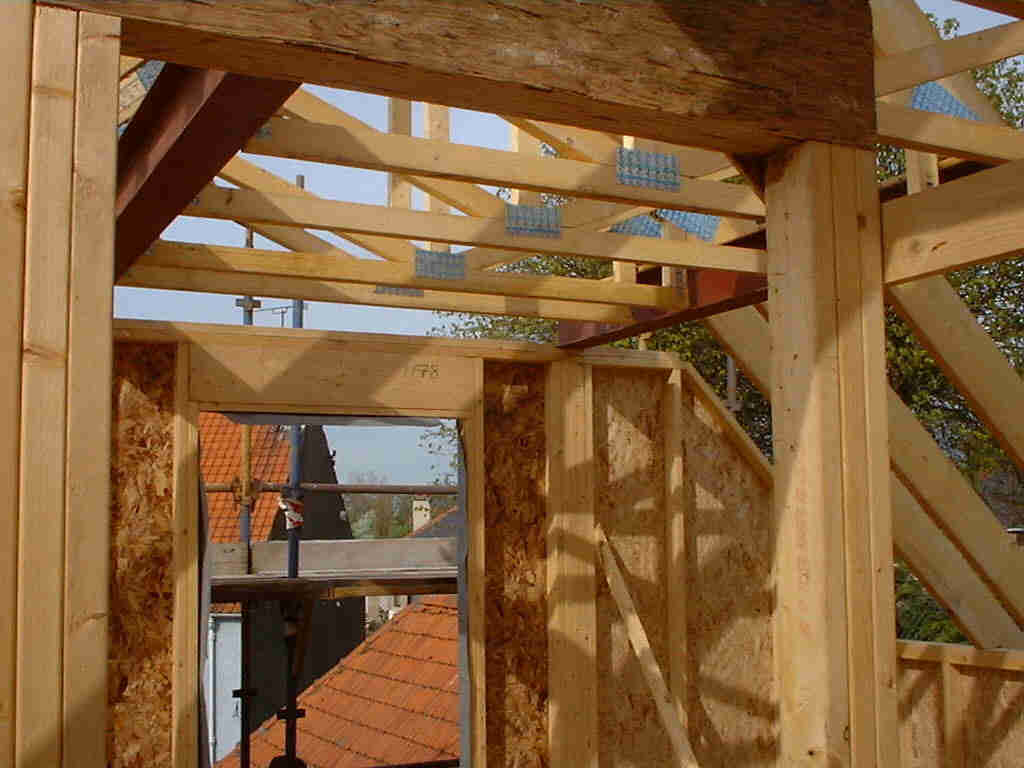
The first picture is from the front of the house and shows the trusses bolted on to the two steel beams that run the length of the house. The reason the middle ones are cut is to allow the separate roof over the lounge to be fitted. The second picture shows the inside of the upstairs bedroom that you see in the first picture. We are looking through the window in the side of the house.
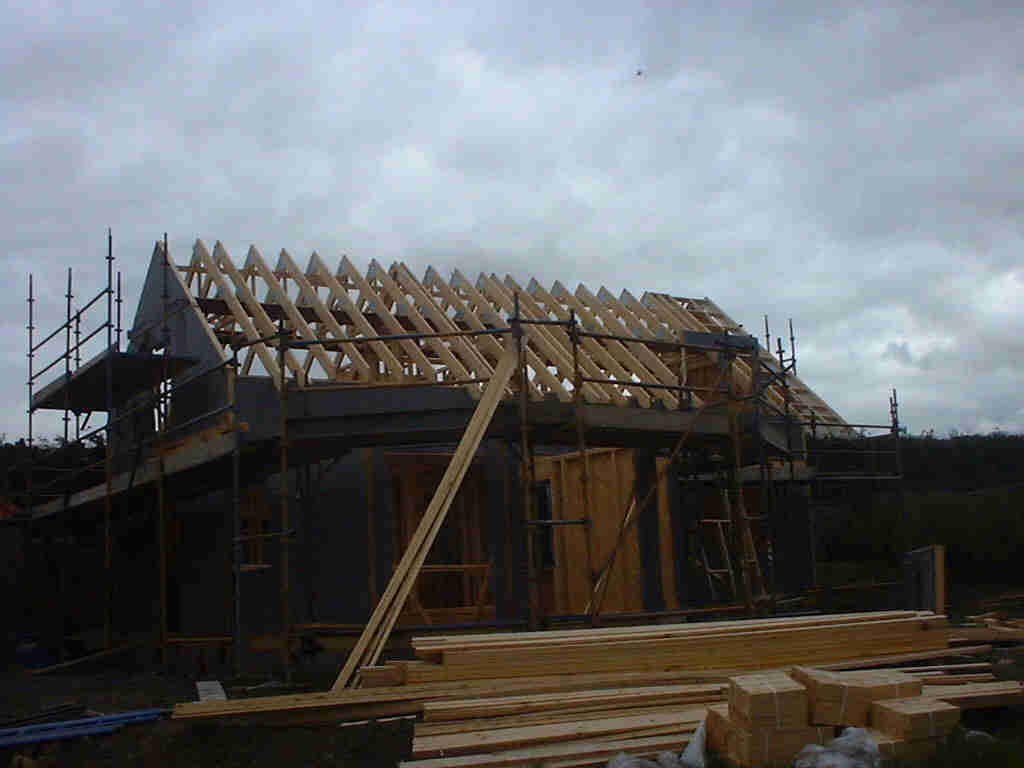
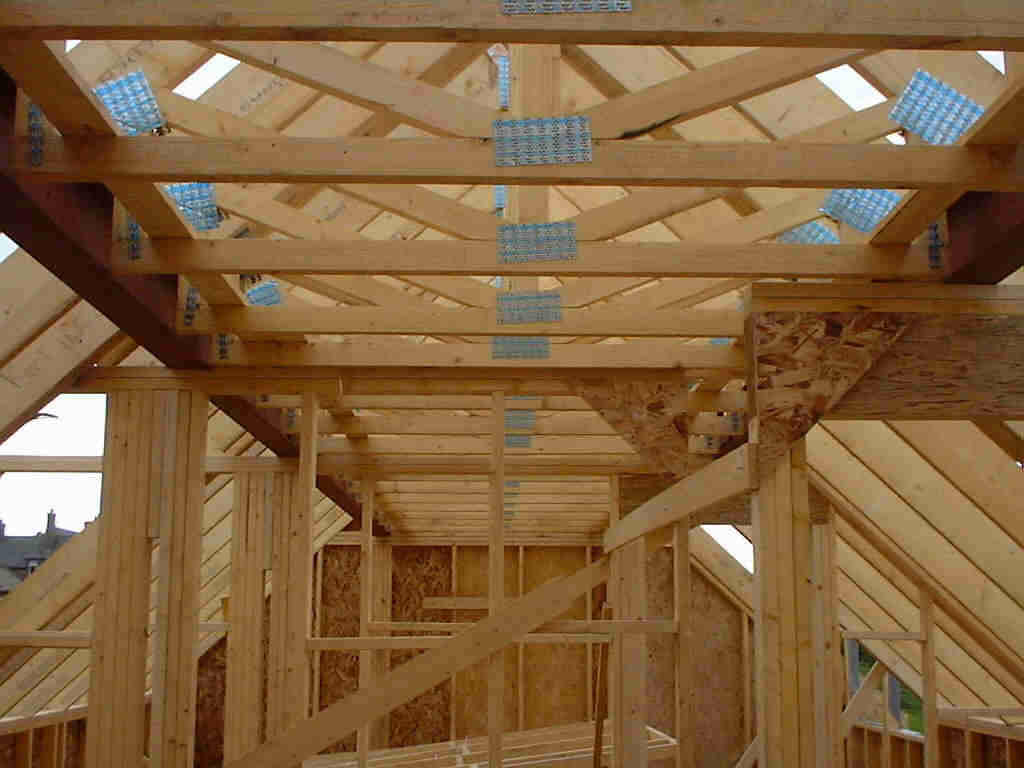
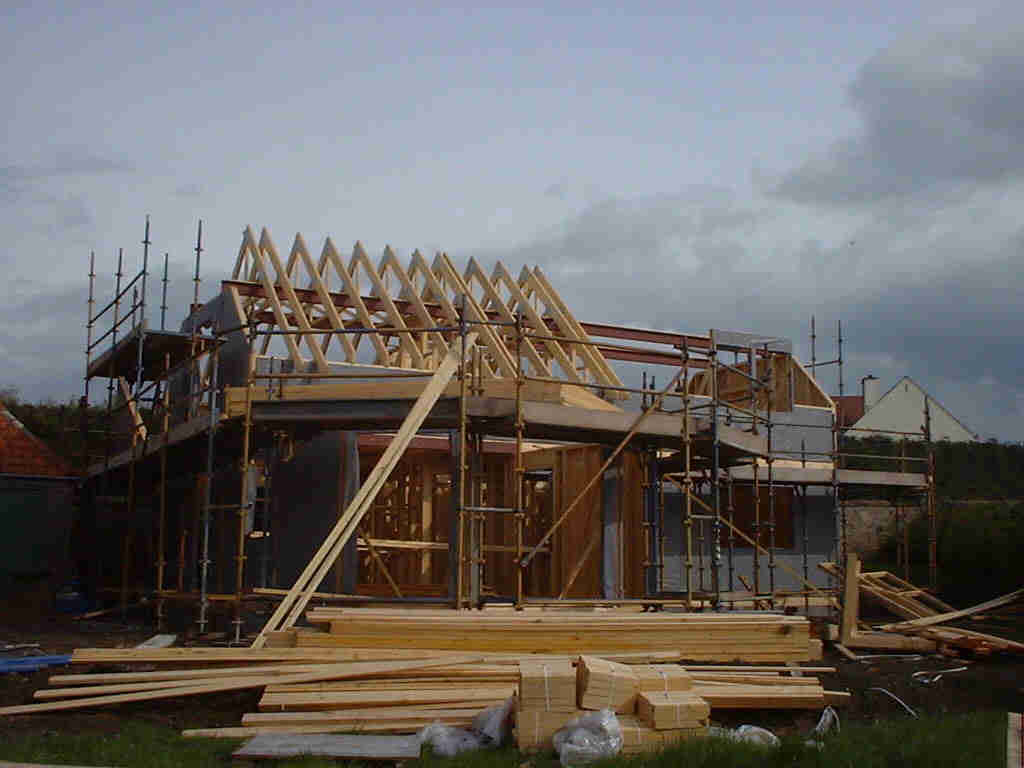
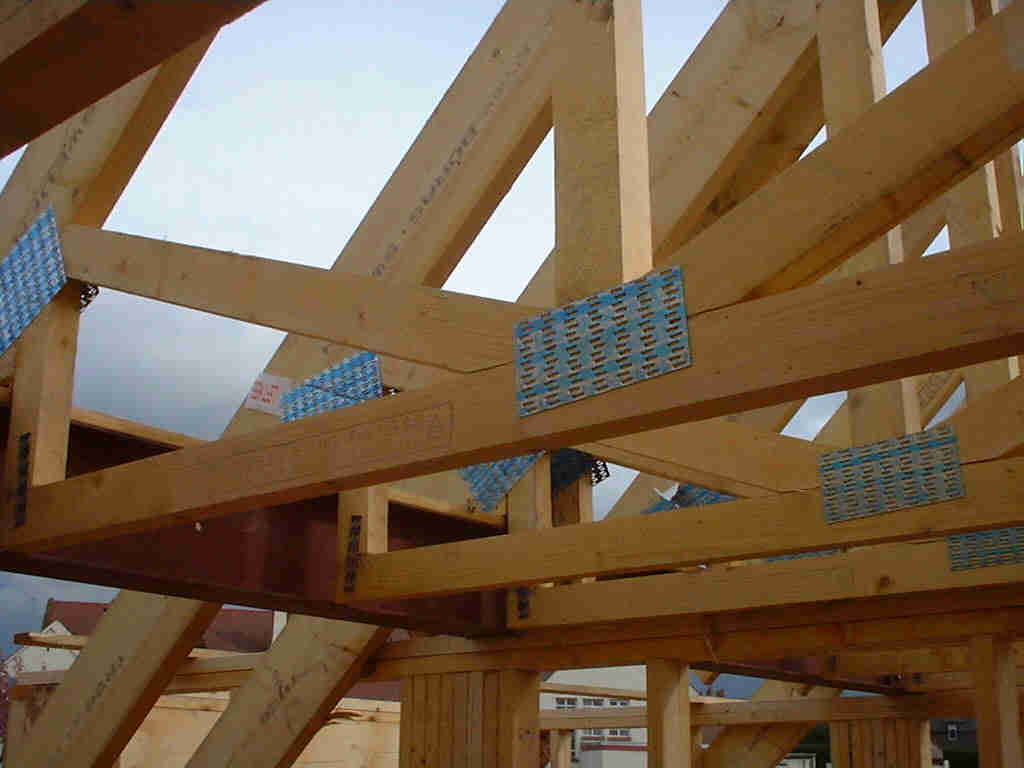
The third picture shows the half completed roof structure from near the bottom of the garden. They have stopped building at the edge of the stair well. Hope fully tomorrow the rest of the roofing will go up and on Friday the roof over the lounge will be in place. The fourth picture is inside the roof and shows the fit between the roofing and the steel work.
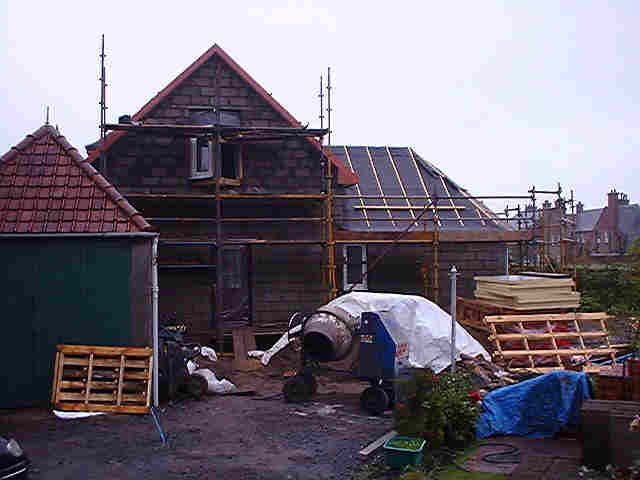
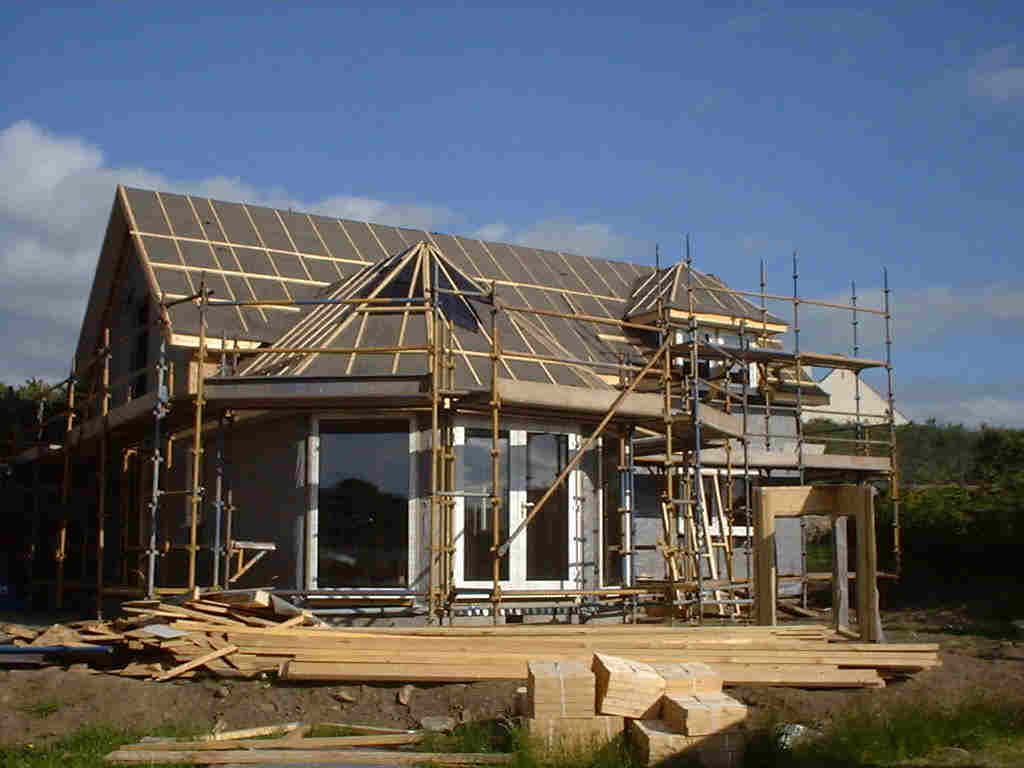
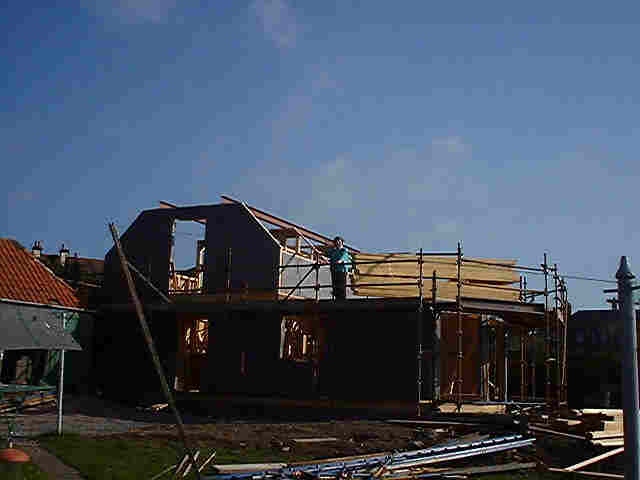
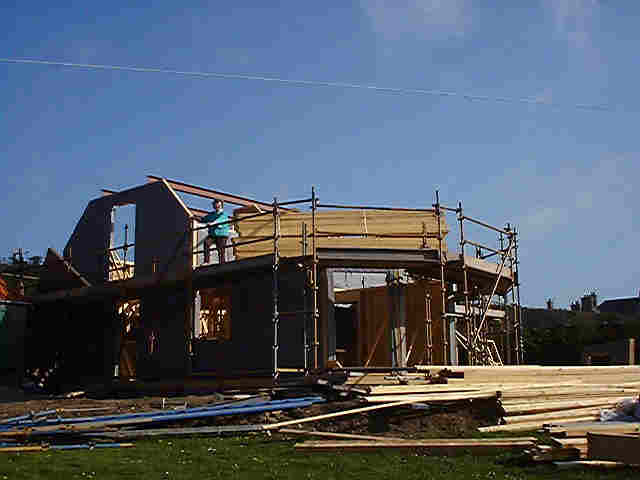
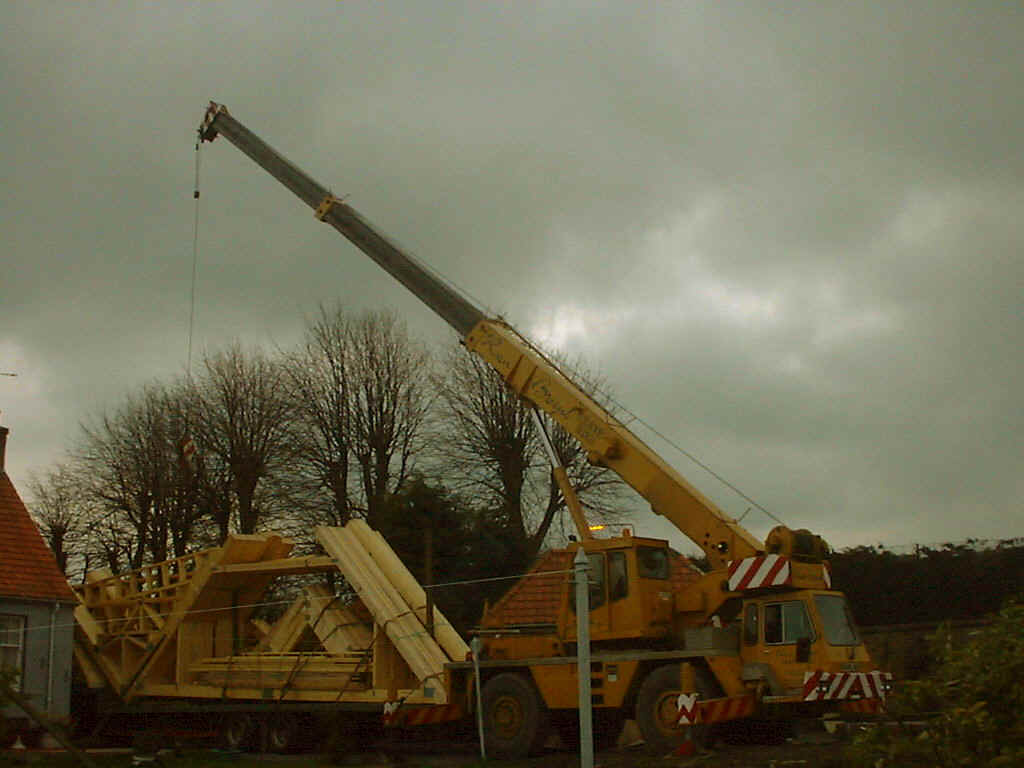
The first floor trusses were installed the other day, then the scaffolding was erected to allow work to be carried out on the first floor and roof. also for the brickies who should be paying a visit over the next few weeks. T After! Then the sun came out! The structure for the roof went up in a day, the crane came in and lifted the roof members up a level and helped to put the two roofing beams in place on the very top of the house.
The roof supports go in early next week, and then the initial layer of wood sheeting will go on to protect the inside of the house. That's my Ma standing on the roof waving.
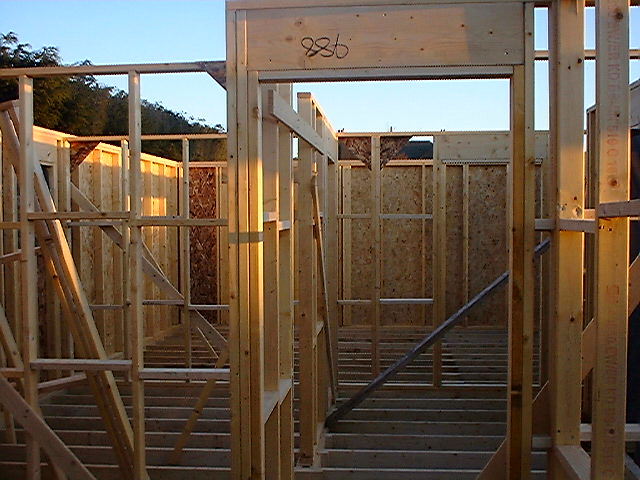
he first picture is the back door which leads into the kitchen. The picture next is looking from the kitchen into the hallway, past the stairs & bog (on the left) and through to the first bedroom. Not sure if it'll be a bedroom but that's what its called on the plan.
Turning right from the second picture will let you see through the bay windows from the kitchen. The Fourth picture is outside the bay windows looking back into the kitchen.
Lastly, this is a picture from the garden wall looking along the front of the house to the living room and shows the front door.
If you haven't been for a few days, make sure you pay a visit to the old pictures and the diary so all the rest makes some sense. Thanks to all the people that have sent me good wishes via email.
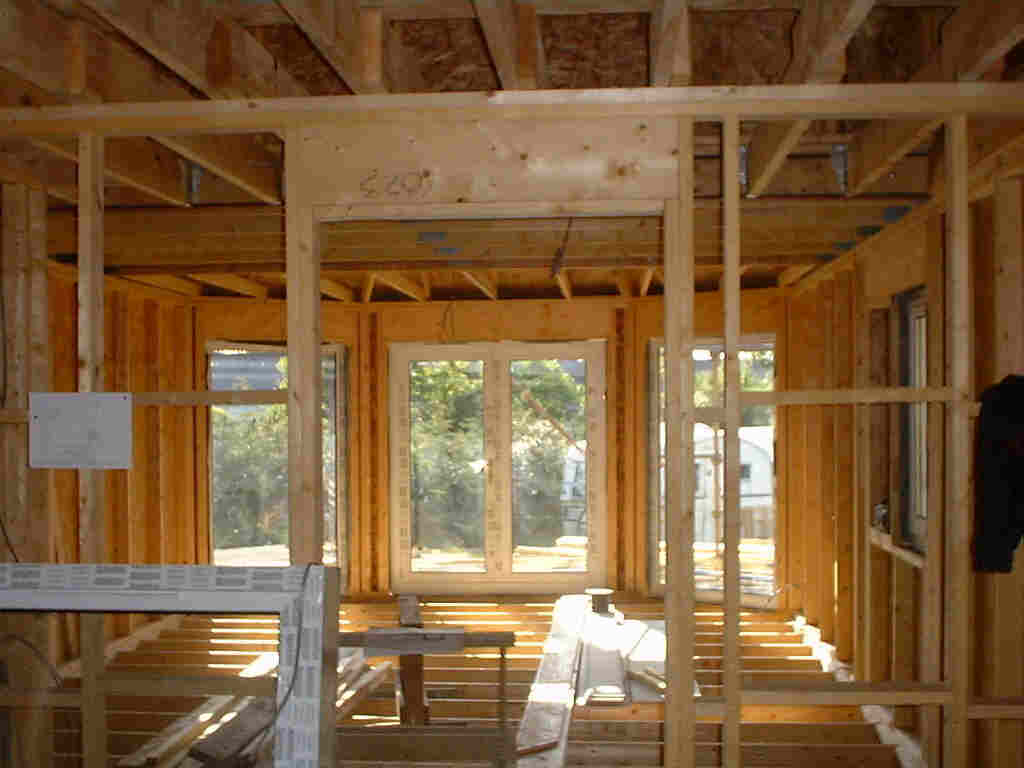
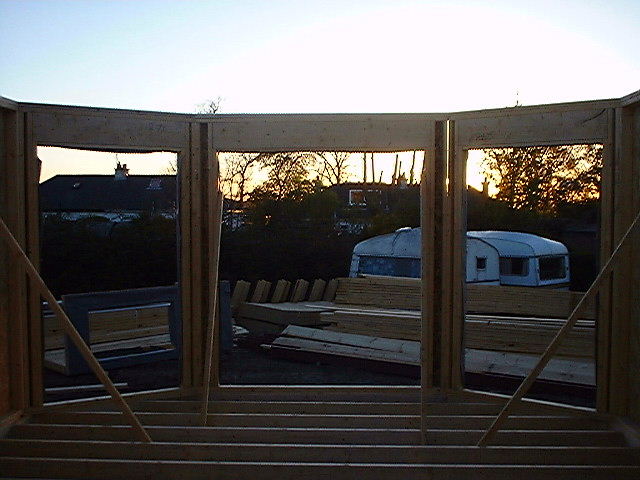
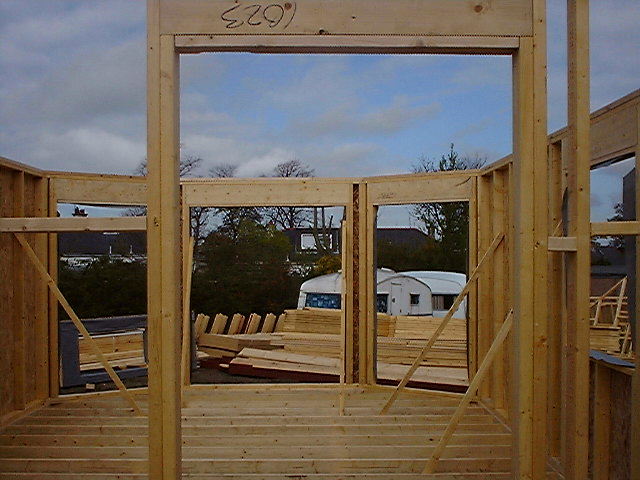
Thar She Blows! This is the view from my kitchen into the living room. The bay windows at the front will be patio doors in the middle and two full length opening on either side, sort of a cross between a living room and a conservatory.
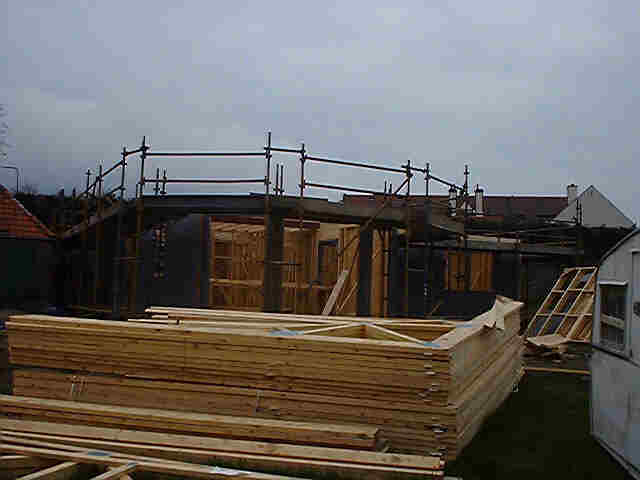
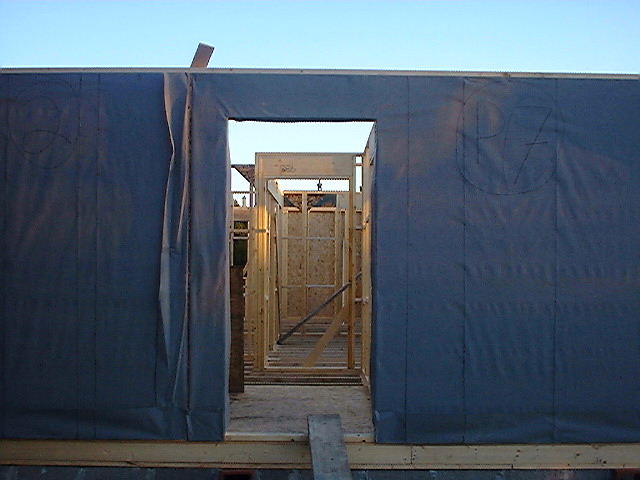
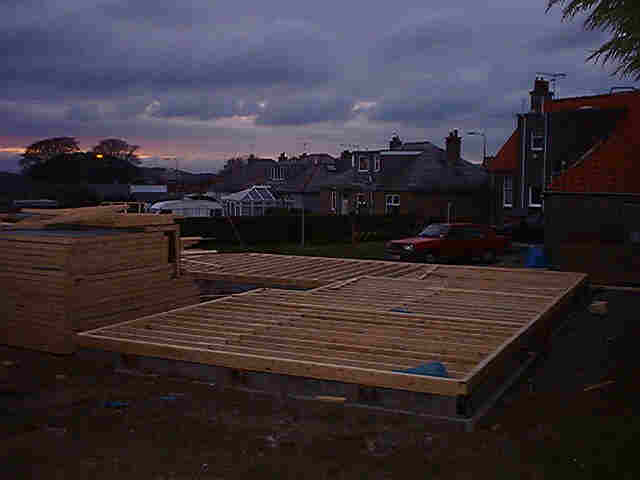
All trussed up and no where to go! Steve the builder was away Monday and Tuesday but turned up today to put down the trusses. Now that its done, the partitions will go up tomorrow (Thursday) and then the scaffolding will arrive Monday. Its difficult to know how big the house is, but currently it looks large again. I think its the colour of the wood that makes it seem bigger. I got back from work late tonight, so it was almost too dark when I took this picture. I'll take a pile of pictures once more work has been done.
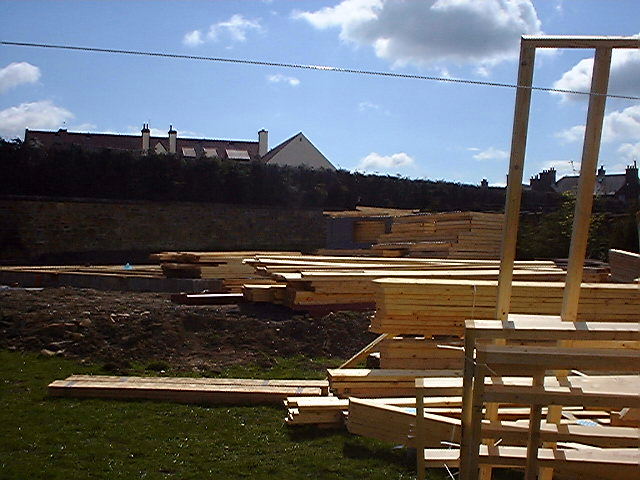
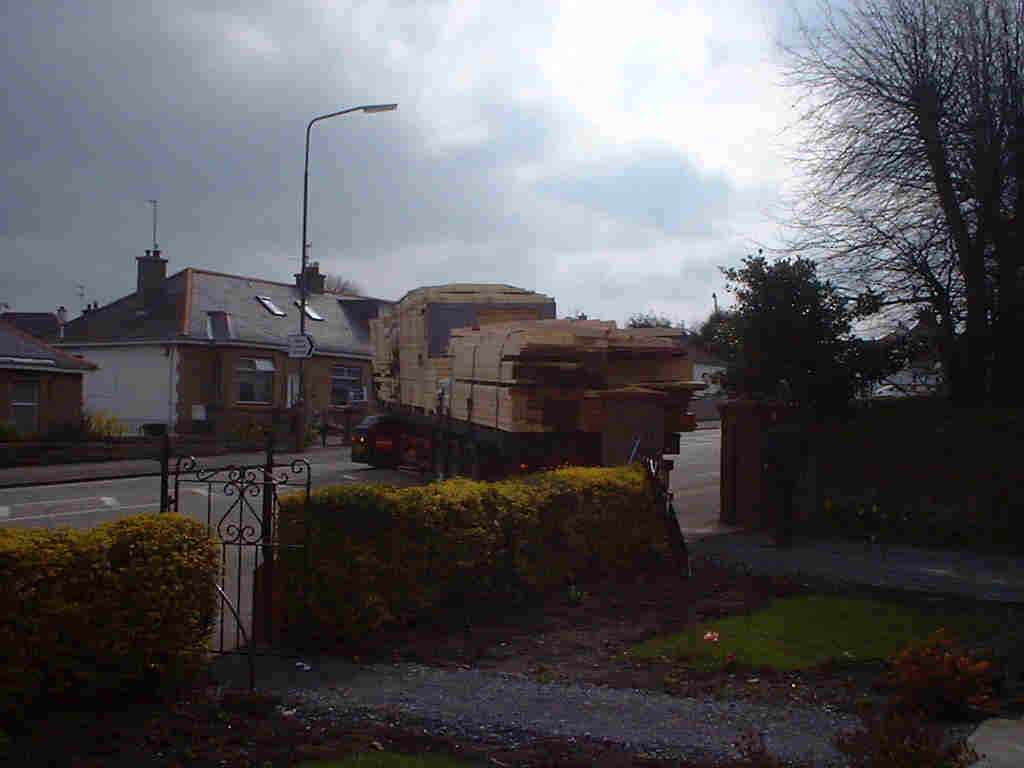
By the look of things you would think I had setup business as a lumber yard. Piles of wood are scattered round the garden from Sweden and Canada of different shapes. All the panels are here, the stuff that appears to be missing is the flooring, my stairs and the insulation for the partitions. The windows & doors should come along in a couple of weeks, which should just be about the right time. As you can see below, the kit came on Friday, but no bugger turned up today! Hopefully this means that it'll start off again tomorrow. I think that the scaffolding is due to arrive then to allow the brickwork and partitions to go in. Finally! It's happening!
The kit arrived Friday! Just after 9 this morning the kit arrived. We even got a mention on Radio Fourth for blocking the road - how brief is our moment of fame!! The kit was delivered on two lorries and it took considerable skill to get them through the gates. The Lorry you see here has my roof trusses on it. The second lorry had the internal partitions and structural wood. Second Lorry with internal partitions
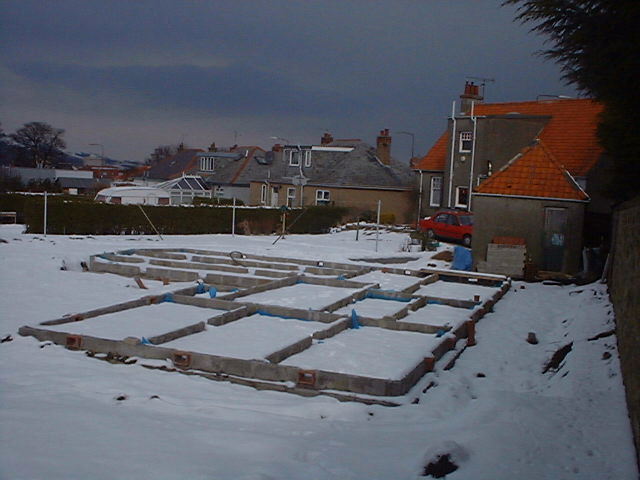
The sharp eyed amongst you may notice a slight change to the site from the previous picture, and that difference would be more snow! Still nothing happening, although the end appears in sight now. The diary will fill you in. When the snow melts I'm going to have eight individual very shallow swimming pools instead of a house!
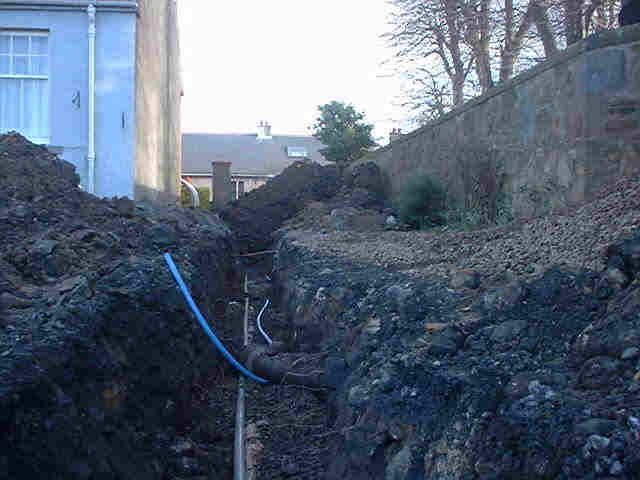
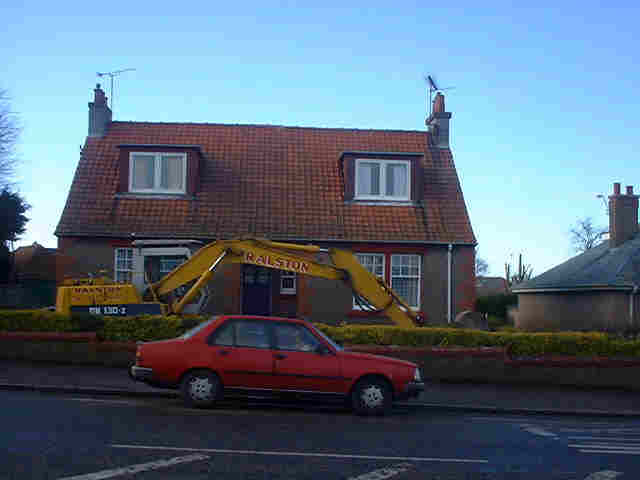
Hello! I've returned from a superb skiing trip knowing that the site would be tidied and work would start just as I got back. In theory this was a fine idea, but in practice it ran into a few problems. The drawings for the kit were still not complete, and the kit can't be manufactured until all amendments to the house design are shown and the drawings are signed off. Ahh, and there's also the small matter of money I can't get out the bank as yet! As nothing much has happened, here's a bigger picture of the snowy covered site. The drains are in (half way up the back side of the house you can see a brown pipe sticking up - that's the bog drain - if you draw a line through the house you can see another brown pipe at an angle, that's a rodding point for drain clearing) Beside the gray stacked bricks is one of two drain collection points, the other is just in front of the red car). My house cant be taller than the one with the red roof - right now I think my house is about 2ft under the roof height.
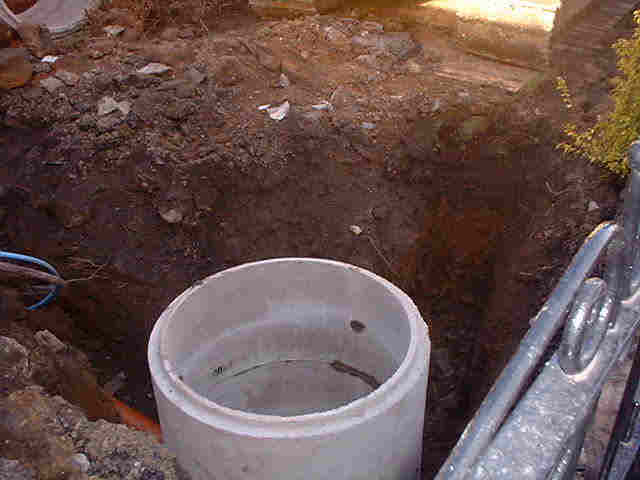
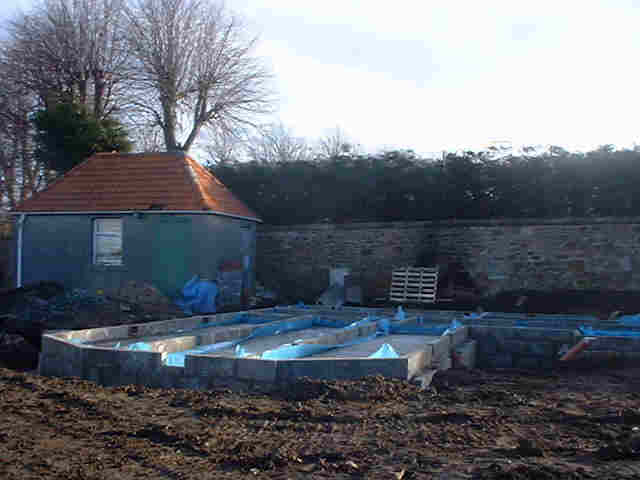
Picture 1 is the driveway up to my house, you can just see the founds past the garage. The services are being brought in at present. Picture 2 is the first drainage collection point its about 10-12ft deep, there's another at the other side of the front garden. Picture 3 is the services trench from the other end, looking on to the main road and gates. Picture 4 is the digger in the front garden, digging another drainage collection point. Picture 5 is the completed foundations, the house drainage is complete and awaiting sign off by the planning department, then all the holes can be filled back in, hopefully!
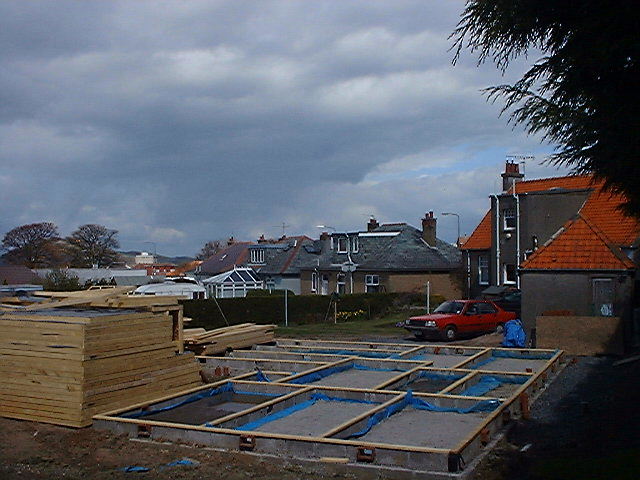
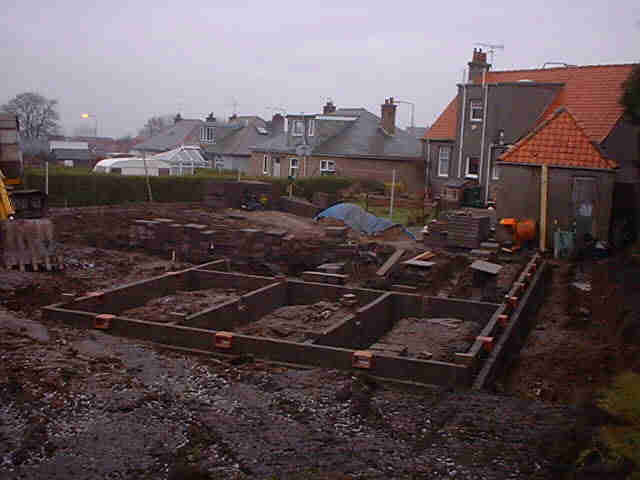
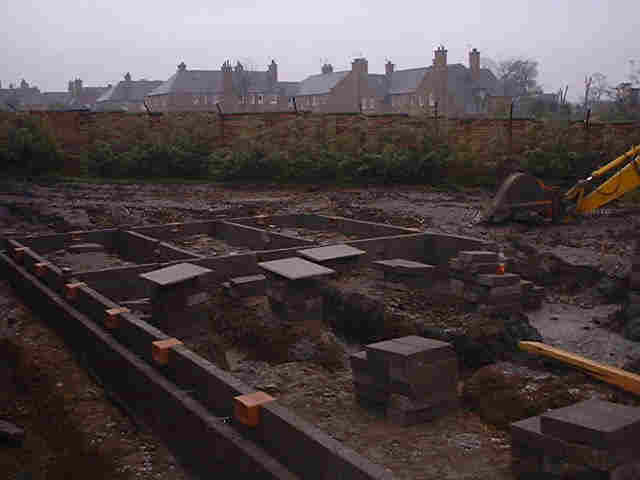
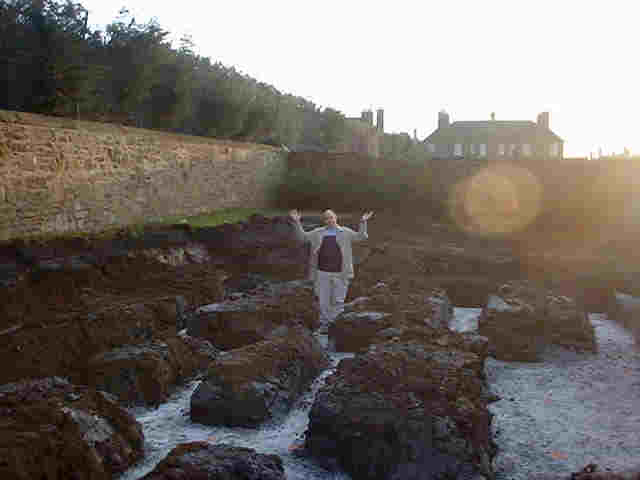
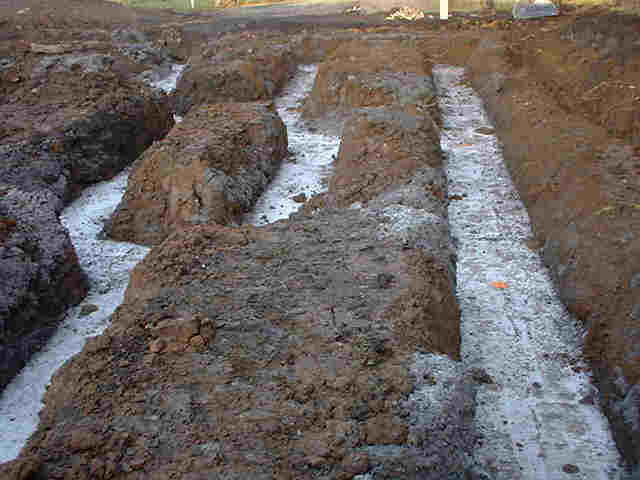
Work started again after the weather warmed up a bit. It's odd, the house seemed huge when it was marked out on the ground in yellow spray paint, but now the foundations are starting to form it looks quite a bit smaller. They earth in the middle of the squares will be scooped out after. In the first picture, that three sets of wee squares is Room One in the plan, the bricks stop short at the top right hand corner, which is the front door. In the second picture on the bricks is a bottle of Irn Bru, directly behind that bottle is where the front door should be. check out my other ramblings in the diary
Not unlike the surface of mars! The foundations have been cut, they need a few days before the digger can come back in and dig out the lumps of earth. Once the earth has been removed, a wee bit more concrete will cover up the holes. Once a level has been obtained, further bricklaying will go ahead to build up the platform for the kit frame to be stuck on to.
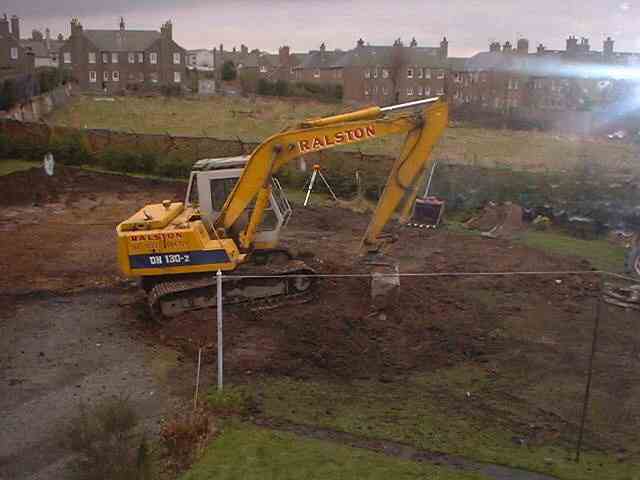
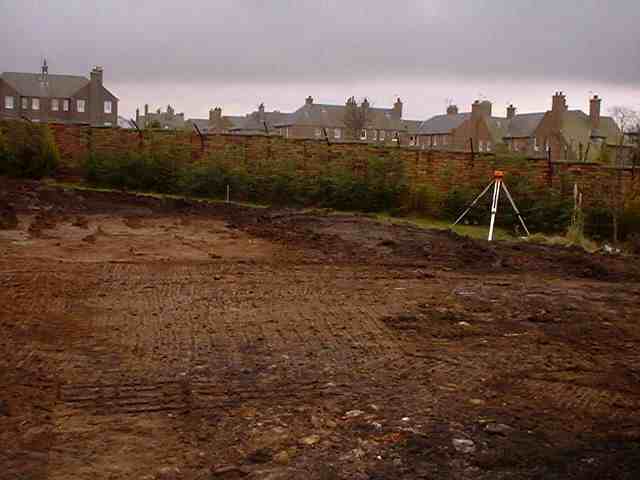
The digger & lorry have removed the topsoil, and now have flattened it off, ready for the leveling which is being carried out in the second picture. After this is done the site will be measured and marked out with the foundation layout. The digger will then cut out the design for the foundations tomorrow.
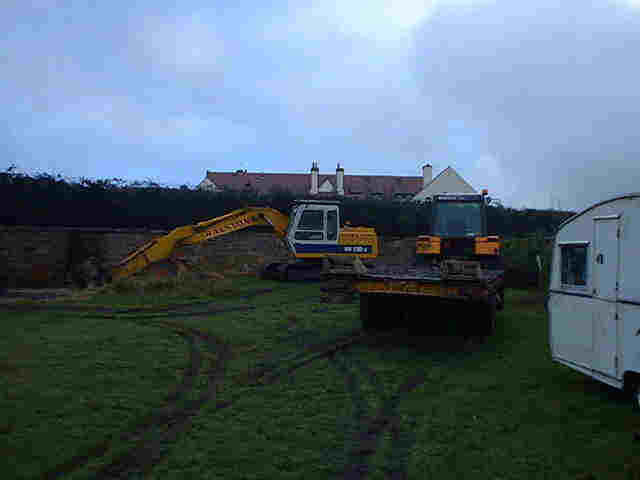
The air raid shelter gets a do-in on Monday!
Sunday Morning - look whose come for breakfast!
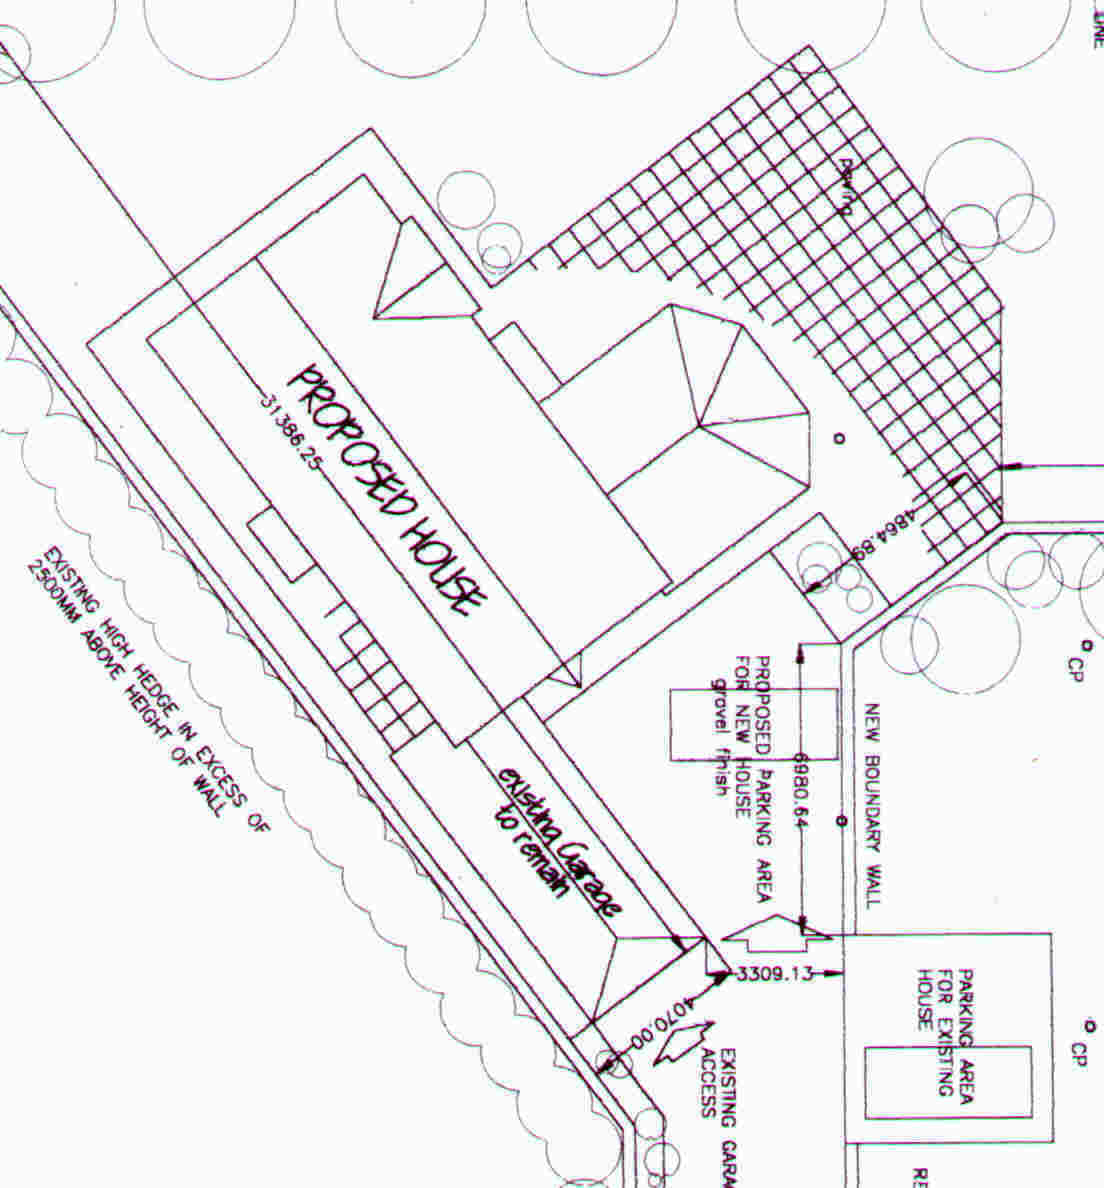
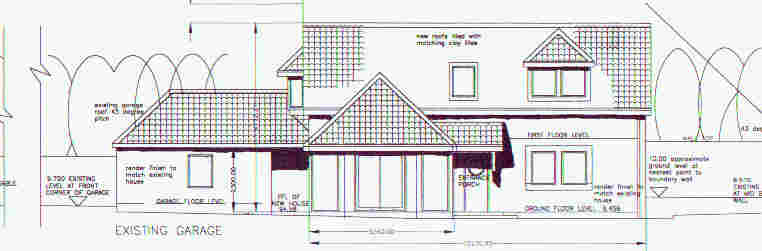
Below is the top elevation of the house, you can see that it joins on to the garage. The air raid shelter is right under the L shaped part of the house.
Below is the front elevation of the house. The strange objects in the background are actually meant to be trees, not a collection of giant insect pupae!!
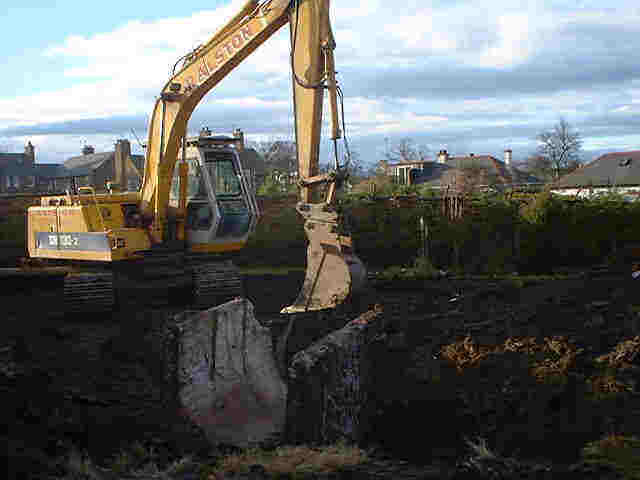
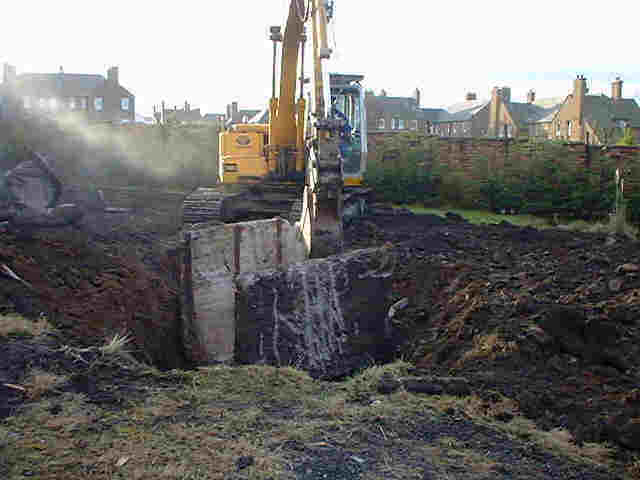
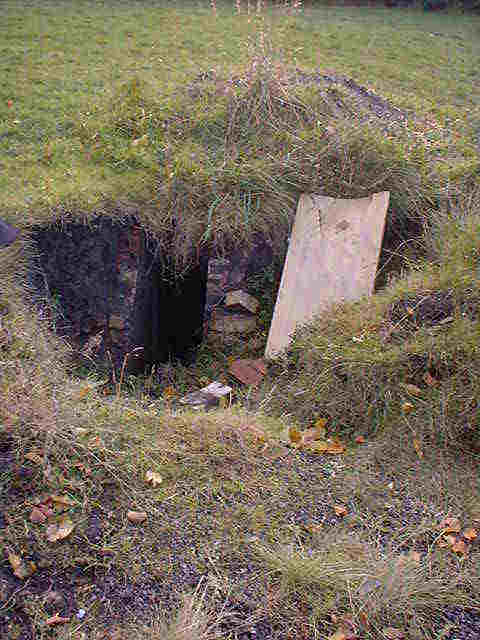
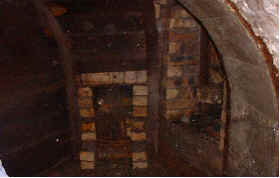
This is the entrance to the air raid shelter. It's at ground level and goes down about 6ft or so. Right now its full of water (about 2ft deep) which we'll try and get out today. The shelter would be in the middle of my lounge, so there's no way it can be used for anything. The picture on the left is a close up of the mound of earth on the right.
One of the first problems to crop up was the a Second World War Air Raid Shelter pictured below. It was about 12ft long by about 6 ft in height and about 8ft wide, buried under a mound of concrete to spread the blast should a bomb be dropped right on it. As the property belonged to the pit manager in previous times, its likely that the supplies to build it will have come from the mine depot, which would account for the good state of repair that we found it in. The rusty oblong object beside the whole in the wall is a 3/4 inch thick iron door.
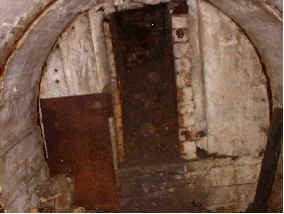
The picture below is the other end of the shelter, complete with fireplace. To the side of the picture there appears to be a window, we found several pairs of gloves and an empty preserve jar.
|